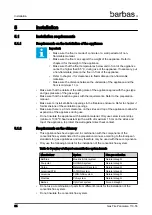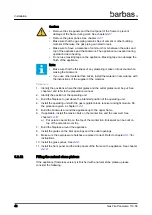
Caution:
• Remove the side panels and the front panel of the frame to prevent
damage of the frame during work. See chapter
.
• Remove the glass panes. See chapter
.
• Make sure that the gas piping remains free of cement or other building
material. Otherwise, the gas piping can start to leak.
• Make sure to have a clearance of minimum 3 mm between the sides and
top of the appliance and the brickwork. The appliance can expand during
operation due to heating.
• Do not use masking tape on the appliance. Masking tape can damage the
finish of the appliance.
Note:
• Make sure that the thickness of any plastering is taken into account when
making the brickwork.
• If you use other material than bricks, install the material in accordance with
the instructions of the supplier of the material.
Procedure
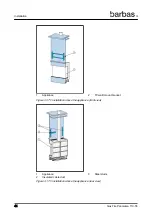
1. Identify the positions where the inlet grates and the outlet grates must be put. See
chapter
and refer to the preparation manual.
2. Identify the position of the operating unit
3. Build the fireplace to just above the intended position of the operating unit .
4. Install the operating unit with the gas regulator block, receiver and light module. Do
the procedure given in chapter
5. Build the brickwork around the appliance up to the upper frame.
6. If applicable, install the tension bars on the mantel iron and the rear wall. See
chapter
.
a) Put ceramic wool strip on the top of the mantel iron. Brickwork can be built on
top of the ceramic wool strip.
7. Build the fireplace around the appliance.
8. Install the grates on the inlet openings and the outlet openings.
9. Make sure the overpressure hatches are placed correct. Refer to chapter
for
instructions.
10. Install the glass panes. See
.
11. Install the front panel and the side panels of the frame on the appliance. See chapter
5.2.12
Fitting the natural stone plateau
If the appliance (frameless version) is finished with a natural stone plateau, please
consider the following:
Installation
42
Gas Fire Panorama 110-55
Содержание Panorama 110-55 PF2
Страница 1: ...Installation and maintenance manual Gas Fire Panorama 110 55 PF2 Serial number Production date...
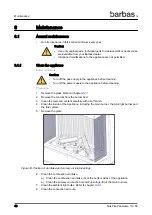
Страница 50: ...2 Remove the side panels and front panel Maintenance 50 Gas Fire Panorama 110 55...
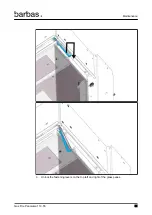
Страница 52: ...4 Lift the front glass pane a little and remove it in a slanted manner Maintenance 52 Gas Fire Panorama 110 55...
Страница 57: ...3 Tighten the screws left and right of the top side strips Maintenance Gas Fire Panorama 110 55 57...
Страница 69: ...9 Dimensions 9 1 Gas Fire Panorama 110 55 PF2 Frameless Adjustable Dimensions Gas Fire Panorama 110 55 69...
Страница 71: ...9 3 Gas Fire Panorama 110 55 PF2 with 4 cm frame Dimensions Gas Fire Panorama 110 55 71...
Страница 72: ...9 4 Gas Fire Panorama 110 55 PF2 with 4 cm frame and convection casing Dimensions 72 Gas Fire Panorama 110 55...
Страница 73: ...9 5 Gas Fire Panorama 110 55 PF2 with 6 cm frame Dimensions Gas Fire Panorama 110 55 73...
Страница 75: ...9 7 Gas Fire Panorama 110 55 PF2 with 10 cm frame Dimensions Gas Fire Panorama 110 55 75...
Страница 76: ...9 8 Gas Fire Panorama 110 55 PF2 with 10 cm frame and convection casing Dimensions 76 Gas Fire Panorama 110 55...
Страница 77: ...9 9 Gas Fire Panorama 110 55 PF2 with 10 cm frame and adjustable legs Dimensions Gas Fire Panorama 110 55 77...
Страница 78: ...9 10 Operating unit Dimensions 78 Gas Fire Panorama 110 55...
Страница 81: ...11 EU Declaration of Conformity EU Declaration of Conformity Gas Fire Panorama 110 55 81...
Страница 82: ...EU Declaration of Conformity 82 Gas Fire Panorama 110 55...
Страница 83: ...EU Declaration of Conformity Gas Fire Panorama 110 55 83...
Страница 84: ...Your Barbas dealer 002 25 06 2021 351246...


