3
Safety
3.1
Safety devices on the appliance
Name
Description
Thermo-electric pilot light shut off
Prevents unforseen discharge of gas from the main
burner.
Overpressure door (= glass front) and
overpressure hatch
If an overpressure occurs in the appliance, the glass
front door and the hatch opens for a short duration.
When the door and hatch opens, a loud noise can oc-
cur. If an overpressure occurs, the installer must do a
thorough check on the appliance.
3.2
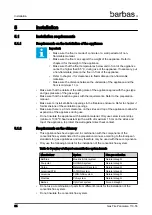
Safety instructions for installation
Warning:
• The appliance must be positioned and connected as a 'room sealed
system' appliance by a certified and registered gas installer.
• Before beginning the installation, check that the details on the rating plate
correspond to the gas type and supply pressure to which the appliance will
be connected.
• Install the appliance in accordance with the following installation
instructions, and the national and the local applicable regulations.
• Do not put flammable materials in the appliance.
• Make sure that the area around the appliance is free of flammable
materials at all times. the minimal safe distance is 100 cm from the
appliance.
• Make sure that the burner openings stay clean during installation.
Blockage of the burner openings can lead to a dangerous situation.
• Make sure that the gas regulator block and the piping remain free of
cement or other building material. Otherwise, the gas regulator block or the
piping can start to leak.
• Do not twist the flexible pipes to the gas regulator block. Make sure that
there is no stress on the flexible pipes and the gas regulator block.
• Make sure that you do not damage the pipes.
• Make sure that the compression fittings do not come loose.
• Do not put the appliance directly against a flammable or non-flammable
wall.
• Make sure to protect a flammable floor under the intended position of the
appliance with a plate of non-flammable material that extends the full width
and depth of the appliance.
• After installation, make sure that the pipes and compression fittings are
gas tight.
Safety
20
Gas Fire Panorama 110-55
Содержание Panorama 110-55 PF2
Страница 1: ...Installation and maintenance manual Gas Fire Panorama 110 55 PF2 Serial number Production date...
Страница 50: ...2 Remove the side panels and front panel Maintenance 50 Gas Fire Panorama 110 55...
Страница 52: ...4 Lift the front glass pane a little and remove it in a slanted manner Maintenance 52 Gas Fire Panorama 110 55...
Страница 57: ...3 Tighten the screws left and right of the top side strips Maintenance Gas Fire Panorama 110 55 57...
Страница 69: ...9 Dimensions 9 1 Gas Fire Panorama 110 55 PF2 Frameless Adjustable Dimensions Gas Fire Panorama 110 55 69...
Страница 71: ...9 3 Gas Fire Panorama 110 55 PF2 with 4 cm frame Dimensions Gas Fire Panorama 110 55 71...
Страница 72: ...9 4 Gas Fire Panorama 110 55 PF2 with 4 cm frame and convection casing Dimensions 72 Gas Fire Panorama 110 55...
Страница 73: ...9 5 Gas Fire Panorama 110 55 PF2 with 6 cm frame Dimensions Gas Fire Panorama 110 55 73...
Страница 75: ...9 7 Gas Fire Panorama 110 55 PF2 with 10 cm frame Dimensions Gas Fire Panorama 110 55 75...
Страница 76: ...9 8 Gas Fire Panorama 110 55 PF2 with 10 cm frame and convection casing Dimensions 76 Gas Fire Panorama 110 55...
Страница 77: ...9 9 Gas Fire Panorama 110 55 PF2 with 10 cm frame and adjustable legs Dimensions Gas Fire Panorama 110 55 77...
Страница 78: ...9 10 Operating unit Dimensions 78 Gas Fire Panorama 110 55...
Страница 81: ...11 EU Declaration of Conformity EU Declaration of Conformity Gas Fire Panorama 110 55 81...
Страница 82: ...EU Declaration of Conformity 82 Gas Fire Panorama 110 55...
Страница 83: ...EU Declaration of Conformity Gas Fire Panorama 110 55 83...
Страница 84: ...Your Barbas dealer 002 25 06 2021 351246...


