Note: The retainer ring (C) and filter (D) are optional. Filter kits are available separately.
Setting Up a Barcode Application
This section describes how to set up the iVu BCR sensor.
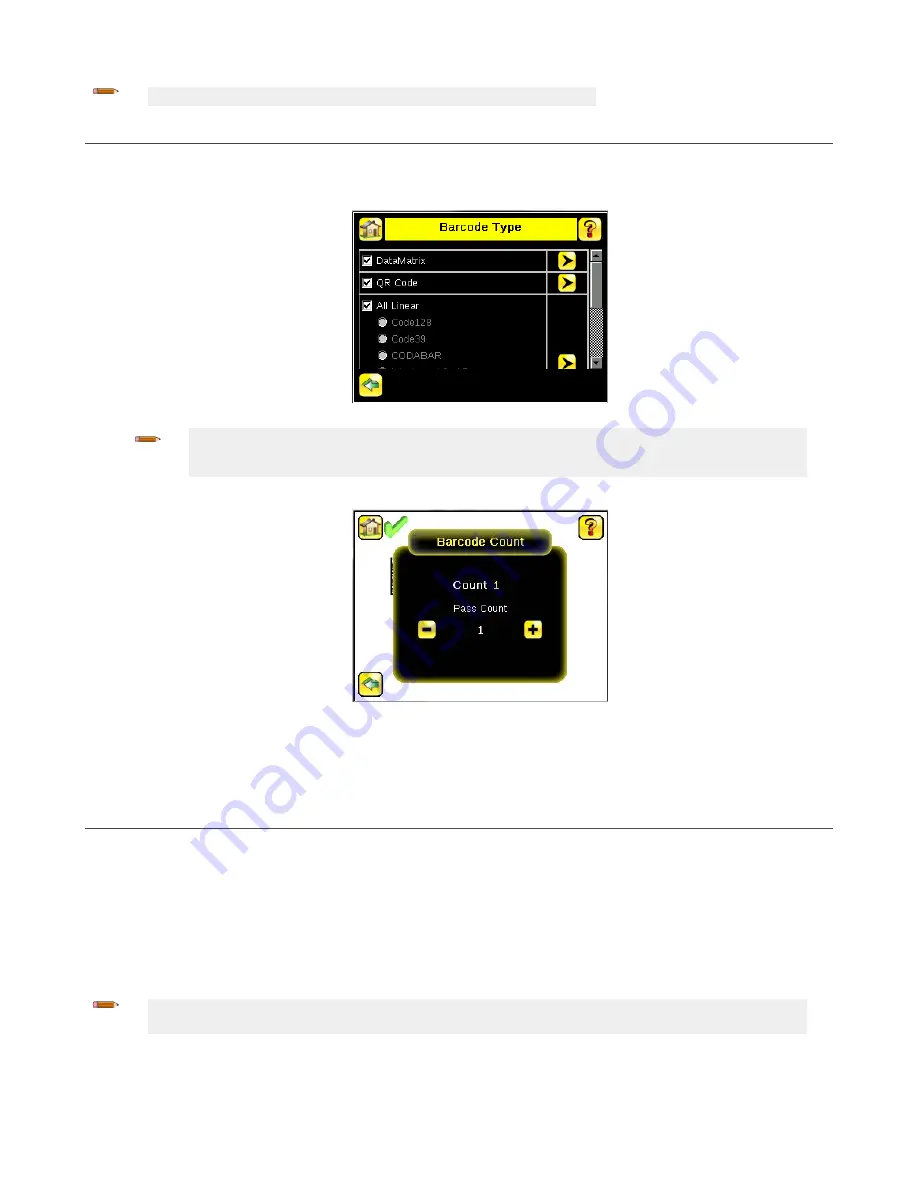
1. Go to Main Menu > Inspection > Barcode > Barcode Type .
2. Select one or more Barcode Types from the list.
Note: To ensure optimal performance, select only the barcode types for your application. For example, if you use only
one of the of the barcode types listed for All Linear, uncheck the box next to All Linear, and select the desired linear
barcode type. If you use only DataMatrix, uncheck all the boxes except the one next to DataMatrix.
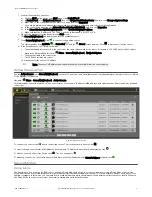
3. Go to Main Menu > Inspection > Barcode > Barcode Count to select the number of barcodes (1 to 10) to be read at one time.
After the sensor has been set up as described:
• Each successfully read barcode is marked by a green bounding box. If annotations are on, the barcode data is also displayed.
• Any case where data does not compare is marked with a solid red bounding box. If the barcode is marked with a dotted red bounding box,
this indicates a checksum error or quiet zone violation.
• Any barcodes in the field of view that the sensor does not detect (for example, because they are not one of the barcode types selected), are
unmarked.
Compare Data
The iVu BCR has a data compare feature for comparing read barcode data against reference data. To manually enter data, go to Main Menu >
Inspection > Barcode > Data Compare > Set Data . Enter data of up to 3200 characters. Additionally, the data compare feature provides for masking
characters within the data.
There are two additional ways to enter compare data:
• Import the last read data while viewing the Set Data screen. The new data is effective on the first trigger that occurs after this action.
• Use Remote Teach.
When a Remote Teach occurs, the data of the first read barcode is saved as Data Compare input. Inspections executed on the next trigger
use the new data for comparison with subsequently read barcodes. If the previous input data contained any masked characters, Remote
Teach retains the masked characters only if the new data is of the same length as the previous input data. If the length does not match,
masking is removed.
The sensor tries to compare the full length of this string with the data read from the barcode. If it is not equal, the inspection is marked as Fail.
Note: If the sensor reads more than one barcode in the field of view, only the first barcode data that the sensor reads can be
compared.
Setting up for Data Compare
This section describes how to set up the data compare feature. For this example, the reference data is from a previously decoded barcode.
1. Go to Main Menu > Inspection > Barcode > Data Compare > Compare and enable data compare.
iVu Plus BCR Gen2 Series Sensor
8
www.bannerengineering.com - Tel: +1-763-544-3164
P/N 178443 Rev. C


