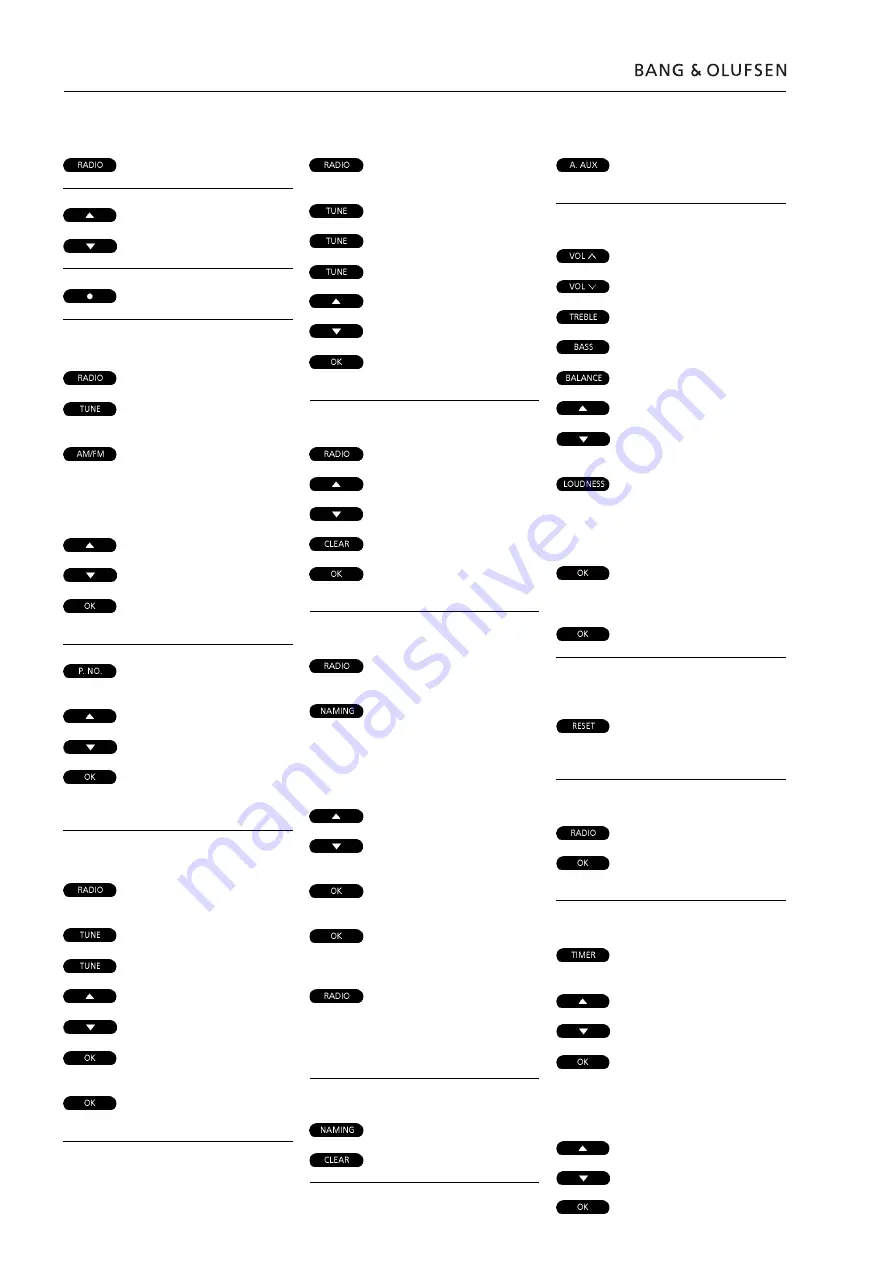
1.6 Brief operation guide
Playing your radio programs
Press to turn on the radio
Press to step through your
or
radio programs
Press to switch to stand-by
Presetting radio stations
Press to turn on the radio
Press to start the tuning
function
Press to select [AM] or [FM],
switches from one to the
other, check display for an
indication of which one you
have chosen
then
Press to search for a radio
or
station up or down the
frequency band
then
Press to accept the station
you have found
Press to change the displayed
program number
then
Press to select for a program
or
number – up or down
then
Press to store your new radio
program – [STORED] appears
on the display
Fine tuning a radio station
Press to turn on the radio pro-
gram you want to fine tune
Press to start the fine tuning
then
function
Press to fine tune your
or
program towards a higher or
lower frequency
then
Press to accept your fine
tuned program
then
Press again to store program
and program number
Mono/stereo reception
Press to turn on the relevant
radio program
Press to choose [MONO] or
then
[STEREO]
then
then
Press to switch from stereo
or
to mono
Press to store your new tu-
ning on the program number
Clearing presets...
Press to turn on the radio
Press to search for program
or
number
Press to clear the program
then
Press to confirm the clearing
of the radio program
Naming radio programs
Press to turn on the radio
program you want to name
Press to start the naming
function.
The first of the twelve cha-
racter positions blinks, indi-
cating that you can start
“writing” a name
Press to reveal the characters
or
one by one
Press to reveal previously
shown characters
then
Press to move to the next
character position
then
Press to store the name of
the radio station [NAMING
OK] will appear on the display
or
Press to store the name and
exit the naming function
You can press RADIO at any
time to store and exit the
naming function
To clear a name…
Press to access the naming
then
function
Press to clear the name
Playing auxiliary sources
Press to select extra
equipment
Adjusting sound
Press to raise the volume
Press to lower the volume
Press to access treble
Press to access bass
Press to access balance
Press to raise or lower the
or
treble and bass levels; or
adjust the balance between
the left and the right speaker
Press to see the status of the
loudness adjustment function
– [LOUDNESS ON] or [LOUD-
NESS OFF]. Press LOUDNESS
again to change the setting
Press to accept all sound
levels - [SOUND OK?]
appears on the display
then
Press to store all sound levels
If you have not stored your
sound adjustments...
Press to reset the sound
levels to their previously
stored settings
Switching displays, example
Press to turn on the radio
Press repeatedly to change
the radio display indication
Programming Timers
Press to start programming
timers
then
Press to choose a source for
or
your Timer or choose a Timer
stand-by
then
Press to accept the Timer
Then program when you
want the Timer to start and
stop…
Press repeatedly until you
or
have found the exact time
for starting a Timer play
then
Press to accept start
Содержание BeoSound 9000 MKIII
Страница 12: ...2 3 Wiring diagram Wiring diagram 2 3 2 3 Wiring diagram...
Страница 14: ...2 5 Block diagram Block diagram 2 5 2 5 Block diagram for AM Block diagram for Frontend Tuner...
Страница 15: ...2 6 Block diagram Block diagram 2 6 2 6 Block diagram for CD...
Страница 16: ...2 7 Block diagram Block diagram 2 7 2 7 Block diagram for Input Output Select...
Страница 17: ...2 8 Block diagram Block diagram 2 8 2 8 Block diagram for Data...
Страница 19: ...2 10 Block diagram Block diagram 2 10 2 10 Block diagram for Power Supply...
Страница 20: ...2 11 Diagram A Diagram A 2 11 2 11 DIAGRAM A Frontend tuner PCB drawing for PCB1 see page 2 15...
Страница 21: ...2 12 Diagram AA Diagram AA 2 12 2 12 DIAGRAM AA FM AM detector PCB drawing for PCB1 see page 2 15...
Страница 23: ...2 14 Diagram BB Diagram BB 2 14 2 14 DIAGRAM BB RDS and P PCB drawing for PCB1 see page 2 15...
Страница 24: ...2 15 PCB drawing PCB drawing 2 15 2 15 PCB1 FM AM RDS primary side PCB1 FM AM RDS secondary side...
Страница 25: ...2 16 Diagram C Diagram C 2 16 2 16 DIAGRAM C CD servo decoder PCB drawing for PCB41 see page 2 17...
Страница 28: ...2 19 Diagram F Diagram F 2 19 2 19 DIAGRAM F Digital analog decoder PCB drawing for PCB32 see page 2 21...
Страница 34: ...2 25 PCB drawing PCB drawing 2 25 2 25 PCB34 Power Supply...
Страница 35: ...2 26 Diagram L Diagram L 2 26 2 26 DIAGRAM L Motor Control...
Страница 36: ...2 27 PCB drawing PCB drawing 2 27 2 27 PCB35 Motor Control...
Страница 40: ...2 31 PCB drawings PCB drawings 2 31 2 31 PCB4 Mains Filter PCB7 Display...


