background image

12

13

Adjusting Your Shade’s Limits and Home Position

Adjusting Your Shade’s Limits and Home Position

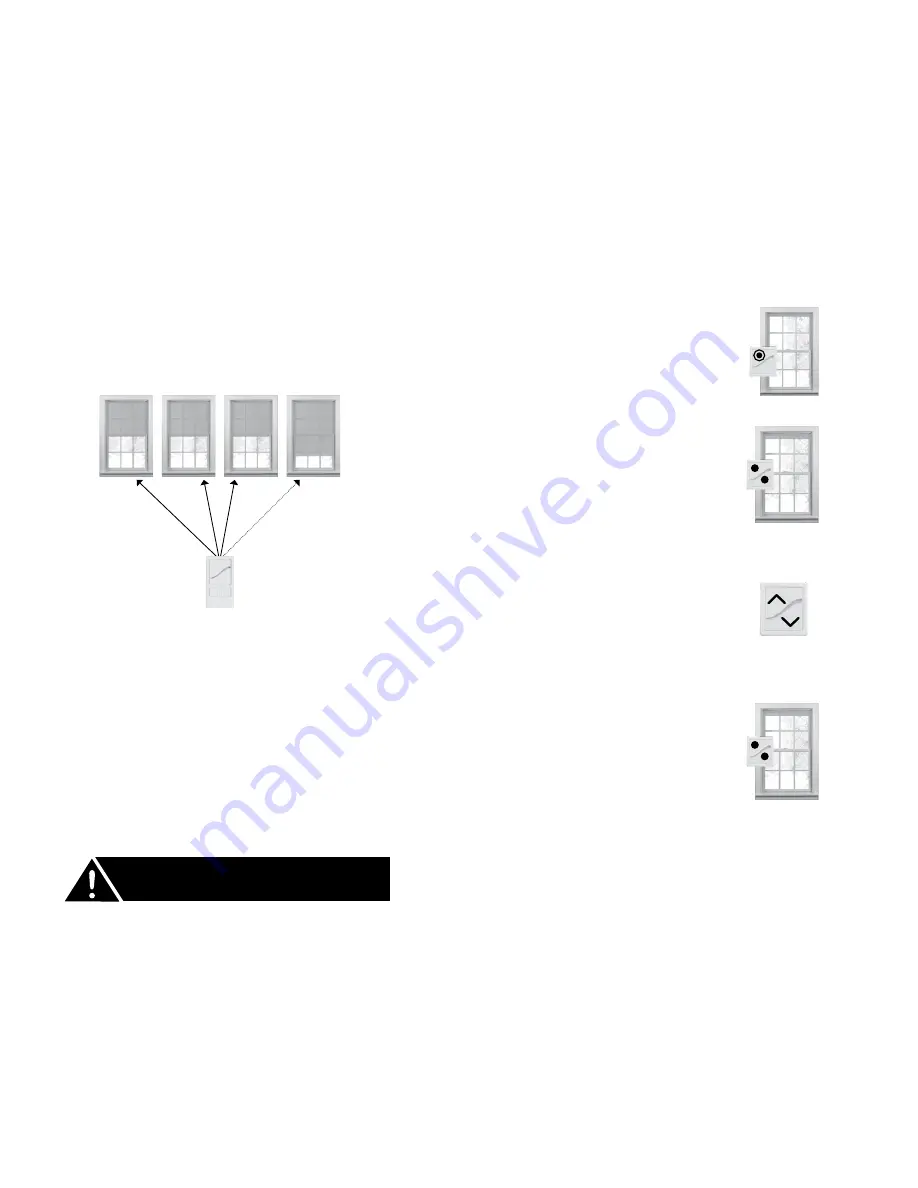
Adjusting the Upper Limit

1.  On  the remote, press and  

release the UP button.


Wait until the shade reaches its  

preset upper limit.

2.   Press and hold the UP and 

DOWN buttons at the same 

time for 3 seconds. When 

the remote LED turns amber, 

release both buttons.  

The shade will jog. 

4.   Press and hold the UP and 

DOWN buttons at the same 
time for 3 seconds. When the 
remote LED turns amber,  
release both buttons. 


The shade will jog. This means you’ve 

set your new upper limit.

5. 


If you need to adjust another 
shade’s upper limit, go back  
to the 

Before You Start


section and repeat the steps  
for each shade.

3.   Use the UP or DOWN buttons 

to move your shade to the new 

upper limit. 

For the Two-Button or Single-Channel Remote 

Before You Start

If your remote currently controls a group of shades, you’ll first need 
to target the specific shade that you want to adjust the upper limit 
for. To do that, perform the following steps first:

1.    On the remote, press and release the program button  

on the back. 

The remote LED will flash green.

2.    On the shade you want to adjust, press and hold the program 

button for 3 seconds. 


The shade LED will flash green and the shade will jog.

Even after you target a shade, all of the shades in the group  
will still move with the remote. However, nontargeted shades won’t 
accept the new upper limit until you target them specifically.

TARGET 

SHADE

Don’t attempt to move the upper limit to a position higher 

than the preset limit—that could damage your shade or 

prematurely drain the batteries.

Содержание MOTORIZED SHADES

Страница 1: ...MOTORIZED SHADES FEATURING Z WAVE TECHNOLOGY...

Страница 2: ...airing Your Multi Channel Remote 26 Integrating Your Shades with a Z Wave Home Automation System Step 1 Exclude Remove the Current Pairing Between Your Shades and Remotes 31 Step 2 Include Add Your Sh...

Страница 3: ...or multiple shades maximum of 8 shades on one channel The remote can control a maximum of 24 shades LEARN HOW to assign shades to channels on page 10 HOME STOP button UP button DOWN button FRONT LED l...

Страница 4: ...scussed later in this manual QUICK START GUIDE For the Two Button or Single Channel Remote Pull out the paper strip on the back of the remote For the Multi Channel Remote 1 Remove the battery door 2 I...

Страница 5: ...ou ordered Home Position We set this to the midpoint of your shade but you can adjust it to any point between the upper and lower limits Not available with the two button remote Legend Press and hold...

Страница 6: ...you bought your shades and multi channel remote at the same time your shades arrive already paired with your multi channel remote However you ll need to assign each shade to a channel or multiple chan...

Страница 7: ...the UP or DOWN buttons to move your shade to the new upper limit For the Two Button or Single Channel Remote Before You Start If your remote currently controls a group of shades you ll first need to t...

Страница 8: ...the MENU RIGHT button to set the upper limit The shade will jog This means you ve set your new upper limit Adjusting the Lower Limit Don t attempt to move the lower limit to a position lower than the...

Страница 9: ...both buttons The shade will jog 3 Use the UP or DOWN buttons to move your shade to the new lower limit For the Multi Channel Remote 1 On the remote press and hold the MENU RIGHT button for 2 seconds...

Страница 10: ...green 2 On the shade you want to adjust press and hold the program button for 3 seconds The shade LED will flash green and the shade will jog Even after you target a shade all of the shades in the gr...

Страница 11: ...ir own section PAIRING YOUR REMOTES AND SHADES NOTE If you don t press any buttons for 10 seconds while you re making these adjustments the remote will time out If that happens just start the process...

Страница 12: ...mote or shade These steps apply only to the new remote or shade 1 Reset the new remote to make sure you start with a clean slate a Press and hold the program button on the back of the remote for 15 se...

Страница 13: ...with the remote c Repeat steps a b for each shade in the group If you want to control each shade individually as well as in a group follow the steps in the next section x2 Pair a Second Remote with a...

Страница 14: ...following the steps on page 10 Pair a Remote with a Group of Shades Already Controlled by a Group Remote If you bought a new multi channel remote and want to pair it with a group of shades that are a...

Страница 15: ...t take a little while and then display how many shades have been found Your shades are now visible in the remote again To create new channel assignments follow the steps on page10 Pair a Second Remote...

Страница 16: ...onds while you re performing these steps the remote will time out If that happens just start the process over Step 1 Exclude Remove the Current Pairing Between Your Shades and Remotes 1 Reset each two...

Страница 17: ...e 3 Repeat steps 1 2 for each shade Add Your Two Button or Single Channel Remotes 1 From your home automation system s user interface select the option to enroll a new Z Wave device See your home auto...

Страница 18: ...hium coin battery You ll need a screwdriver to open the battery compartment Replacing Batteries in the Multi Channel Remote Insert two AAA batteries The programming steps aren t working If you don t p...

Страница 19: ...hen the remote LED turns amber release both buttons The shade direction has now been reversed I want to start over with pairing my shades and remotes How do I start fresh To remove the current pairing...

Страница 20: ...drail or motor end that lets you move your shade without a remote or perform various programming functions as described in this manual Z Wave A radio frequency protocol for communicating between smart...

Страница 21: ...ed operation Note This equipment has been tested and found to comply with the limits for a Class B digital device pursuant to Part 15 of the FCC Rules These limits are designed to provide reasonable p...

Страница 22: ...her users the antenna type and its gain should be so chosen that the equivalent isotropically radiated power e i r p is not more than that necessary for successful communication For advanced technical...

Страница 23: ...For video tutorials and additional help visit www motorization support Customer Service 1 800 221 6352 motorization support springswindowfashions com 79083 01 03 18 17 7492...

Отзывы: