background image

General Information 1-3

MN605

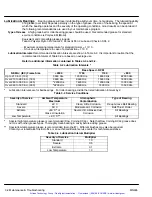
Caution:

Do not lift the motor and its driven load by the motor lifting hardware.  The motor lifting hardware

is adequate for lifting only the motor.  Disconnect the load from the motor shaft before moving the

motor.

Handling

The motor should be lifted using the lifting lugs or eye bolts provided.

1. Use the lugs or eye bolts provided to lift the motor.  Never attempt to lift the motor and additional

equipment connected to the motor by this method.  The lugs or eye bolts provided are designed to lift

only the motor.  Never lift the motor by the motor shaft or the hood of a WPII motor.  If eye bolts are

used for lifting a motor, be sure they are securely tightened.  The lifting direction should not exceed a

20

°

 angle from the shank of the eye bolt.  Excessive lifting angles can cause motor damage.

2. To avoid condensation inside the motor, do not unpack until the motor has reached room temperature.

(Room temperature is the temperature of the room in which it will be installed). 

The packing provides insulation from temperature changes during transportation.

3. When lifting a WPII (Weather Proof Type 2) motor, do not lift the motor by inserting lifting lugs into

holes on top of the cooling hood.  These lugs are to be used for hood removal only.  

A spreader bar should be used to lift the motor by the cast lifting lugs located on the motor frame.

4. If the motor must be mounted to a plate with the driven equipment such as pump, compressor etc., 

it may not be possible to lift the motor alone.  For this case, the assembly should be lifted by a sling

around the mounting base.  The entire assembly can be lifted as an assembly for installation.  

Do not lift the assembly using the motor lugs or eye bolts provided. Lugs or eye bolts are designed to

lift motor only. If the load is unbalanced (as with couplings or additional attachments) additional slings

or other means must be used to prevent tipping.  In any event, the load must be secure before lifting.

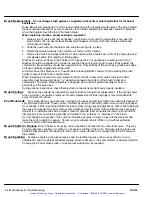
Storage

Storage requirements for motors and generators that will not be placed in service for at least six months

from date of shipment.  To avoid condensation inside the motor, do not unpack until the motor has

reached room temperature. (Room temperature is the temperature of the room in which it will be

installed).  The packing provides insulation from temperature changes during transportation.
Improper motor storage will result in seriously reduced reliability and failure. An electric motor that does

not experience regular usage while being exposed to normally humid atmospheric conditions is likely to

develop rust or rust particles on surrounding surfaces to contaminate the bearings. The electrical

insulation may absorb an excessive amount of moisture leading to the motor winding failure.
A wooden crate “shell” should be constructed to secure the motor during storage. This is similar to an

export box but the sides & top must be secured to the wooden base with lag bolts (not nailed as export

boxes are) to allow opening and reclosing many times without damage to the “shell”.

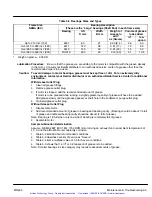
Preparation for Storage

1. Some motors have a shipping brace attached to the shaft to prevent damage during transportation.

The shipping brace, if provided, must be removed and stored for future use. The brace must be

reinstalled to hold the shaft firmly in place against the bearing before the motor is moved.

2. Store in the original containers in a clean, dry, protected warehouse where these controlled:

a. Shock or vibration must not exceed 2 mils maximum at 60 hertz, to prevent the bearings from

brinelling.  If shock or vibration exceeds this limit vibration isolation pads must be used.

b. Storage temperatures of 10

°

C (50

°

F) to 49

°

C (120

°

F) must be maintained.

c. Relative humidity must not exceed 60%.

d. Motor space heaters (optional) are to be connected and energized whenever there is a possibility

that the storage ambient conditions will reach the dew point. Space heaters are optional.

Note:  Remove motor from containers when heaters are energized, reprotect if necessary.

3. Measure and record the resistance of the winding insulation every 30 days of storage.

a. If motor insulation resistance decreases to less than 5 Meg ohms, contact your Baldor District

office.

b. Place new desiccant inside the vapor bag and re

seal by taping it closed.

c. If a zipper

closing type bag is used instead of the heat

sealed type bag, zip the bag closed

instead of taping it. Be sure to place new desiccant inside bag after each monthly inspection.

d. Place the shell over the motor and secure with lag bolts.

4. Where motors are mounted to machinery, the mounting must be such that the drains and breathers

are fully operable and are at the lowest point of the motor. Vertical motors must be stored in the

vertical position.   Storage environment must be maintained as stated in step 2.

Artisan Technology Group - Quality Instrumentation ... Guaranteed | (888) 88-SOURCE | www.artisantg.com

Содержание Reliance CDX7150

Страница 1: ...ss underutilized and idle equipment along with credit for buybacks and trade ins Custom engineering so your equipment works exactly as you specify Critical and expedited services Leasing Rentals Demos...

Страница 2: ...Integral Horsepower DC Motor Installation Operating Manual 2 09 MN605 Artisan Technology Group Quality Instrumentation Guaranteed 888 88 SOURCE www artisantg com...

Страница 3: ...Any trademarks used in this manual are the property of their respective owners Artisan Technology Group Quality Instrumentation Guaranteed 888 88 SOURCE www artisantg com...

Страница 4: ...2 Conduit Box 2 2 Power 2 2 Motor Connections 2 2 Thermostats 2 3 Initial Start Up 2 5 Coupled Start Up 2 5 Section 3 Maintenance Troubleshooting 3 1 General Inspection 3 1 Lubrication Bearings 3 2 T...

Страница 5: ...ers Filters 3 8 Troubleshooting 3 8 Armature Overheating 3 8 Field Coil Overheating 3 9 Excessive Load 3 9 Jogging and Repeated Starts 3 9 Heating 3 9 Thermostat 3 9 Troubleshooting Chart 3 10 Accesso...

Страница 6: ...nel should attempt the installation operation and maintenance of this equipment WARNING Disconnect all electrical power from the motor windings and accessory devices before disassembly of the motor El...

Страница 7: ...are used for lifting a motor be sure they are securely tightened The lifting direction should not exceed a 20 angle from the shank of the eye bolt or lifting lug Excessive lifting angles can cause dam...

Страница 8: ...ransportation Improper motor storage will result in seriously reduced reliability and failure An electric motor that does not experience regular usage while being exposed to normally humid atmospheric...

Страница 9: ...on brushes should be lifted and held in place in the holders above the commutator by the brush holder fingers The commutator should be wrapped with a suitable material such as cardboard paper as a mec...

Страница 10: ...o minimize vibration and maintain alignment between the motor and shaft load Failure to provide a proper mounting surface may cause vibration misalignment and bearing damage Foundation caps and sole p...

Страница 11: ...ctural or decorative parts of the driven equipment 2 Providing covers for the rotating parts Covers should be sufficiently rigid to maintain adequate guarding during normal service Power Connection Mo...

Страница 12: ...B C C 5V COMMON Electrically Isolated Encoder Color Codes for Optional Baldor Encoder Cable Standard Receptacle MS3112W12 10P Standard Plug MS3116J12 10S Thermostats The thermostat is a pilot circuit...

Страница 13: ...drawing or rotation arrow shown on the blower housing Refer to Figure 2 1 Figure 2 1 View from Air Inlet Motor is on Opposite Side Air Inlet Housing Impeller Blades Airflow Table 2 4 Electrical Data F...

Страница 14: ...otor may reach destructive high speeds If the direction of rotation needs to be corrected disconnect the input power supply and interchange the appropriate leads Refer to the motor connection diagrams...

Страница 15: ...2 6 Installation Operation MN605 Artisan Technology Group Quality Instrumentation Guaranteed 888 88 SOURCE www artisantg com...

Страница 16: ...sive vibration will damage the motor bearings brushes and commutator 5 Listen for unusual noises especially in the area of the bearings Also rubbing or rumbling noises could be signs of internal damag...

Страница 17: ...to 210 incl 132 5500 Hrs 12000 Hrs 18000 Hrs 22000 Hrs Over 210 to 280 incl 180 3600 Hrs 9500 Hrs 15000 Hrs 18000 Hrs Over 280 to 360 incl 225 2200 Hrs 7400 Hrs 12000 Hrs 15000 Hrs Over 360 to 500 in...

Страница 18: ...Remove grease outlet plug 3 If motor is stopped add the recommended amount of grease If motor is to be greased while running a slightly greater quantity of grease will have to be added Add grease slow...

Страница 19: ...ositioning of the brush box During periodic inspections check that electrical connections are tight and properly insulated Brush Springs Brush springs should be inspected for proper tension during bru...

Страница 20: ...ofit motors Contact your local Baldor District Office or an Authorized Baldor Service Center for technical assistance Do not change brush grades or the number of brushes per pole Doing so may void the...

Страница 21: ...he commutator surface With increased loads and increased spring pressure this condition can be avoided Grooving May result from an overly abrasive brush grade The more common cause is poor electrical...

Страница 22: ...ature must be removed from the motor and the commutator machined by a qualified repair shop Rapid Commutator Wear Light electrical loads and contamination are the usual causes of rapid commutator wear...

Страница 23: ...e an averaging type ammeter if the motor s power is coming from a rectifier or SCR control Jogging and Repeated Starts Repeated starts or jogs of motors may reduce the life of the brushes and winding...

Страница 24: ...nded winding Perform dielectric test and repair as required Improper connections Inspect all electrical connections for proper termination clearance mechanical strength and electrical continuity Refer...

Страница 25: ...hat the motor is designed for vertical mounting Fan Cover Lint Screen To prevent build up of debris on the cooling fan Nameplate Additional stainless steel nameplates are available Roller Bearings Rec...

Страница 26: ...d AC 3 Drive generator at rated RPM 4 Measure the voltage across A1 and A2 Voltage should be 150 to 200 of F1 to F4 voltage When A1 to A2 voltage level reaches this level approximately 30 seconds care...

Страница 27: ...3 12 Maintenance Troubleshooting MN605 Artisan Technology Group Quality Instrumentation Guaranteed 888 88 SOURCE www artisantg com...

Страница 28: ...ries Motor CW Rotation Facing Commutator End Armature A1 A2 S2 S1 Compound or Stabilized Shunt Motor CCW Rotation Facing Commutator End High Voltage Field Connection Shunt Field F1 F2 F3 F4 A1 A2 S2 S...

Страница 29: ...d Interpole Series Field Comm Field Shunt Field Shunt Motor CW Rotation Facing Commutator End High Voltage Field Connection Armature Shunt Field Interpole Field Reversing Shunt Motor CCW Rotation Faci...

Страница 30: ...Baldor District Offices Artisan Technology Group Quality Instrumentation Guaranteed 888 88 SOURCE www artisantg com...

Страница 31: ...reserved Printed in USA 2 09 BALDOR ELECTRIC COMPANY World Headquarters P O Box 2400 Fort Smith AR 72901 2400 479 646 4711 Fax 479 648 5792 www baldor com Artisan Technology Group Quality Instrumentat...

Страница 32: ...uipment Have surplus equipment taking up shelf space We ll give it a new home Learn more Visit us at artisantg com for more info on price quotes drivers technical specifications manuals and documentat...

Отзывы: