


15
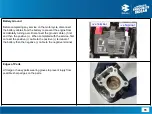
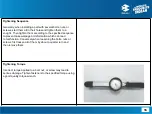
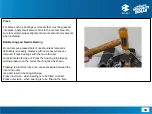
Tightening Sequence
Generally, when installing a part with several bolts, nuts, or
screws, start them all in their holes and tighten them to a
snug fit. Then tighten them according to the specified sequence
to prevent case warpage or deformation which can lead
to malfunction. Conversely when loosening the bolts, nuts or
screws, first loosen all of them by about a quarter turn and
then remove them.
Tightening Torque
Incorrect torque applied to a bolt, nut, or screw may lead to
serious damage. Tighten fasteners to the specified torque using
a good quality torque wrench.
Содержание Pulsar F250 BS VI
Страница 1: ...1 Service Station Manual Pulsar F250 N250 BS VI Product codes Pulsar F250 JR05 Pulsar N250 JR03...
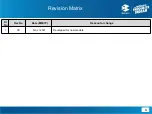
Страница 3: ...3 Sr No Rev No Date MM YY Reason for change 1 00 Nov 2021 Developed for new models Revision Matrix...
Страница 5: ...5 Workshop Safety...
Страница 10: ...10 General information...
Страница 22: ...22 Information for Customer...
Страница 34: ...34 Technical Specifications...
Страница 39: ...39 I Read I Learn...
Страница 40: ...40 Vehicle Identification...
Страница 42: ...42 Speedometer Information ABS System...
Страница 43: ...43 Speedometer Details...
Страница 44: ...44 Speedometer Details...
Страница 45: ...45 Speedometer Details...
Страница 46: ...46 Speedometer Details Details IFE ODO...
Страница 47: ...47 Speedometer Details Details AFE 1 TRIP 1 AFE 2 TRIP 2...
Страница 48: ...48 Speedometer Details DTE TRIP...
Страница 49: ...49 Speedometer Details Speedometer Setting...
Страница 50: ...50 Speedometer Details Speedometer Setting USB Charger...
Страница 55: ...55 Control switches Ignition switch Headlight Side stand information...
Страница 56: ...56 Control switch LH...
Страница 57: ...57 Control switch RH...
Страница 59: ...59 Headlight...
Страница 61: ...61 Steering cum Ignition switch...
Страница 62: ...62 Cranking ON OFF Control...
Страница 63: ...63 Fuel Tank Cap...
Страница 64: ...64 Preventive Maintenance Chart...
Страница 76: ...76 PDI Check sheet...


