background image

19

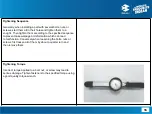
Oil Seal, Grease Seal

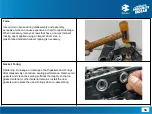
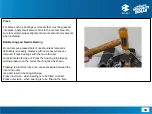
Do not remove pressed oil or grease seals unless removal is 
necessary. Replace with new ones whenever removed. Press 
new oil seals with manufacture and size marks facing out. Make 
sure the seal is aligned properly when installing.

Apply specified grease to the lip of seal before installing the 
seal.

Lubrication

It is most important to lubricate rotating or sliding parts during 
assembly to minimize wear during initial operation. Apply the 
specific oil or grease as specified.

Содержание Pulsar F250 BS VI

Страница 1: ...1 Service Station Manual Pulsar F250 N250 BS VI Product codes Pulsar F250 JR05 Pulsar N250 JR03...

Страница 2: ...accepts no liability for any inaccuracies or omissions in this publication although every possible care has been taken to make it as complete and accurate as possible All procedures and specifications...

Страница 3: ...3 Sr No Rev No Date MM YY Reason for change 1 00 Nov 2021 Developed for new models Revision Matrix...

Страница 4: ...Preventive Maintenance Chart PDI Checklist Index Sr No Parameter 6 Engine Section Torque Value Service Limit Special Tools Important SOP Engine Oil Flow path Part Identification 7 Frame Section Torqu...

Страница 5: ...5 Workshop Safety...

Страница 6: ...oggle Ear Plug Wear Nitrile Rubber Hand Gloves while handling petrochemicals like petrol Oil Kerosene etc Precautions to be taken while handling Fire Extinguisher Install ISI approved Fire extinguishe...

Страница 7: ...outlet pressure to 6 5 Kg cm This avoids the risk of personal injury Never use the blow gun to blow dust off your clothes and never point it at anyone The air pressure can drive dust particles at high...

Страница 8: ...T Equipment once in a year Avoid direct body contact with Petrol Kerosene Caution Prolonged contact of used oil may cause cancer Waste Oil Disposal Sell used oil to Government approved re cycle agenc...

Страница 9: ...not keep your leg between the top and bottom frame while lowering the lifter bay Do not work with loose clothing while working on the lifter bay Do not keep hydraulic joints loose Do not stand on the...

Страница 10: ...10 General information...

Страница 11: ...ning over Disconnect the ground cable first and then the positive When completed with the service first connect the positive cable to the positive terminal of the battery then the negative cable to th...

Страница 12: ...fore disassembly Dirt or other foreign materials entering into sealed areas during vehicle disassembly can cause excessive wear and decrease performance of the vehicle Arrangement and Cleaning of Remo...

Страница 13: ...ign materials that may collect before reassembly Inspection Reuse of worn or damaged parts may lead to serious accident Visually inspect removed parts for corrosion discoloration or other damage Refer...

Страница 14: ...AJ Gaskets O rings Oil seals Grease seals Circlips or Cotter pins must be replaced with new ones whenever disassembled Assembly Order In most cases assembly order is the reverse of disassembly however...

Страница 15: ...the specified sequence to prevent case warpage or deformation which can lead to malfunction Conversely when loosening the bolts nuts or screws first loosen all of them by about a quarter turn and then...

Страница 16: ...lied using an impact driver Use a plastic faced mallet whenever tapping is necessary Gasket O ring Hardening shrinkage or damage of both gaskets and O rings after disassembly can reduce sealing perfor...

Страница 17: ...oil residue remains before applying liquid gasket or non permanent locking agent Do not apply them excessively Excessive application can clog oil passages and cause serious damage Circlips Cotter Pin...

Страница 18: ...ll or needle unless removal is absolutely necessary Replace with new ones whenever removed Press bearings with the manufacturer and size marks facing out Press the bearing into place by putting pressu...

Страница 19: ...eals with manufacture and size marks facing out Make sure the seal is aligned properly when installing Apply specified grease to the lip of seal before installing the seal Lubrication It is most impor...

Страница 20: ...n will affect the adjustment Rotate the crankshaft to positive direction clockwise viewed from clutch cover side Instrument Use a meter that has enough accuracy for an accurate measurement Read the ma...

Страница 21: ...s with tool during installing to prevent deformation Always use appropriate special tool for opening assembling parts to avoid damages To avoid dust muck entry inside the engine wash vehicle thoroughl...

Страница 22: ...22 Information for Customer...

Страница 23: ...nly one brake may cause the vehicle to lose control During monsoon drive the vehicle more cautiously Remember vehicles skid more easily during light showers Always carry vehicle registration papers in...

Страница 24: ...these checks every day before you ride may result in serious damage or severe accident What to Check Check for Fuel Enough fuel for the planned distance of operation no leaks in the fuel lines Oil Le...

Страница 25: ...ll lights Horn Correct functions Steering 1 Smoothness 2 No restriction of movement 3 Loose or Tight Clutch 1 Correct lever play 2 to 3 mm 2 Smooth operation of lever Side Stand Return to their fully...

Страница 26: ...Run the engine for a minute at idle speed to give the oil a chance to work up into the engine Fuel Saving Tips A well maintained vehicle and good driving can contribute a lot to the saving of petrol F...

Страница 27: ...With side stand down condition vehicle in gear engine cranking is disable through ECU side stand down indication will be displayed in speedometer Information on Bike handling Cranking ON and OFF dura...

Страница 28: ...both the wheels are raised off the ground Ensure vehicle cleanliness apply antirust oil Parco Lubricant PL 101 of M s Hankle on fasteners completely cover the vehicle It is mandatory to cover the veh...

Страница 29: ...vehicle clean regularly Ensure engine oil level between MAX MIN mark Use both brakes simultaneously while braking Do not ignore brake engine oil leakage Do not ignore worn out cut tyre condition if fo...

Страница 30: ...ch lever half pressed Avoid harsh braking do not drive the vehicle by keeping brake pedal pressed Always ensure tyres are inflated to specified air pressure Do not add extra electrical accessories e g...

Страница 31: ...ty service genuine parts Always insist on Bajaj Genuine Spare Parts in case of replacement Always insist on Bajaj Genuine Oil for optimum engine performance warranty benefits Do not repair front fork...

Страница 32: ...icators simultaneously Do not replace fuse with higher capacity fuse Never bypass fuse Do not cut wiring conduit wires midway Never remove conduit from wiring harness Do not repair wiring harness inst...

Страница 33: ...33 5 BAL warranty policy Fuel adulteration local accessories fitment vehicle maintenance as per PM schedule For detailed warranty policy refer the Owner s Manual...

Страница 34: ...34 Technical Specifications...

Страница 35: ...rpm Max Net Torque 21 5 N m 6500 rpm Ignition system DC Fuel Injection Spark plugs Qty 2 Nos Spark plug gap 0 8 0 9 mm Lubrication Wet Sump Forced Lubrication Transmission 5 Speed Constant mesh Gear s...

Страница 36: ...er Brakes Front Single channel ABS Disc 300 mm Rear Disc 230 mm Tyres Front 100 80 17 52P Tubeless Rear 130 70 17 62P Tubeless Tyre Pressure Front 1 75 Kgf cm 25 PSI Rear Solo 2 Kgf cm 28 PSI Rear Pil...

Страница 37: ...h 743 mm Height 1143 mm F250 1050 mm N250 Wheelbase 1351 mm Ground Clearance 165 mm Vehicle Kerb Weight 164 Kg F250 162 Kg N250 Vehicle Gross Weight 314 Kg F250 312 Kg N250 Note Always maintain Minimu...

Страница 38: ...ndicator Lamp LED Neutral Indicator LED Hi Beam Indicator LED Turn Signal Indicator LED Speedometer back light LCD Fuel Level Indicator LCD Low Oil Pressure Indicator LED Malfunction Indicator LED Hig...

Страница 39: ...39 I Read I Learn...

Страница 40: ...40 Vehicle Identification...

Страница 41: ...re the unique alpha numeric codes to identify your particular vehicle from others of the same model and type Frame Number Location On RH side of steering column Alpha Numeric 17 Digits Engine Number L...

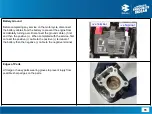
Страница 42: ...42 Speedometer Information ABS System...

Страница 43: ...43 Speedometer Details...

Страница 44: ...44 Speedometer Details...

Страница 45: ...45 Speedometer Details...

Страница 46: ...46 Speedometer Details Details IFE ODO...

Страница 47: ...47 Speedometer Details Details AFE 1 TRIP 1 AFE 2 TRIP 2...

Страница 48: ...48 Speedometer Details DTE TRIP...

Страница 49: ...49 Speedometer Details Speedometer Setting...

Страница 50: ...50 Speedometer Details Speedometer Setting USB Charger...

Страница 51: ...sec text will reappear with respective Km reading Example If you are resetting more than 9450 kms less than14000 kms next service schedule shall display as 14450 km If you are resetting more than 1400...

Страница 52: ...ously as per the fuel input All micro controller based tell tales should be ON during power on cycle Time Complete power on cycle Post power on cycle all tell tales and LCD segments should follow resp...

Страница 53: ...n speedometer blinks fast Gear Indicator Icon Number of gears 5 and Neutral Gear Display segments should show 0 when in neutral If neither Neutral nor Gear input is present then Speedometer shall not...

Страница 54: ...itches illumination Speedometer illumination Low Battery icon engine oil pressure icon engine temperature icon MIL ABS displayed in speedometer Side stand icon Neutral N icon appears for some time the...

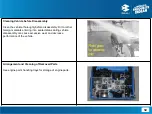
Страница 55: ...55 Control switches Ignition switch Headlight Side stand information...

Страница 56: ...56 Control switch LH...

Страница 57: ...57 Control switch RH...

Страница 58: ...ON High beam High beam OFF ON High beam No change Condition 1 Ignition ON Kill switch ON OFF Engine OFF Headlight Switch Position Headlight DRL Effect on pressing Pass switch Low beam Low beam ON High...

Страница 59: ...59 Headlight...

Страница 60: ...in speedometer Gear position Remark Down Yes Neutral Vehicle gets started after pressing self start button Yes Gear is applied in vehicle start condition by pressing clutch lever Vehicle gets OFF Down...

Страница 61: ...61 Steering cum Ignition switch...

Страница 62: ...62 Cranking ON OFF Control...

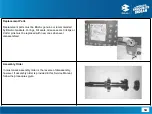
Страница 63: ...63 Fuel Tank Cap...

Страница 64: ...64 Preventive Maintenance Chart...

Страница 65: ...ng at every 10000 kms by petrol spray nylon brush 3 Oil strainer CL CL CL CL CL CL CL CL Oil strainer cleaning at the time of oil change 4 Engine oil filter R R R R R R R R Replace oil filter during e...

Страница 66: ...nspection C A T C A T C A T C A T C A T C A T C A T C A T C A T C A T C A T C A T C A T C A T C A T C A T Damaged conduit PVC sleeves protection by applying electrical tape film ensure tie bands to sp...

Страница 67: ...CL L A CL L A CL L A CL L A CL L A CL L A CL L A During 1st free service use OKS spray for chain cleaning without removing chain from vehicle During other services clean chain with Diesel SAE 90 oil r...

Страница 68: ...C T C T C T C T C T C T C T Torque 3 5 3 8 Kgf m 29 Rear wheel rubber shock dampers for excess play C R C R C R C R C R C R C R Replace rear wheel rubber shock damper if required 30 Clutch Throttle c...

Страница 69: ...xle 13 to 15 Kgf m 3 Engine foundation Engine foundation Top 2 2 to 2 4 Kgf m Front top 2 8 to 3 Kgf m Front bottom 4 to 4 2 Kgf m Rear 4 to 4 2 Kgf m 4 Rider Pillion foot rest holder Stay Rider Pilli...

Страница 70: ...9 5 50 K 54 5 55 K 59 5 60 K 64 5 65 K 69 5 70 K 74 5 75 K Remarks 38 Drain hole no blockage verification below starter motor C C L C C L C C L C C L C C L C C L C C L C C L C C L C C L C C L C C L C...

Страница 71: ...70 K 74 5 75 K Remarks 37 Mobile USB port C R C R C R C R C R C R C R C R C R C R C R C R C R C R C R C R Charging OK to be checked at Engine start condition using LED USB light PM SOP for added point...

Страница 72: ...Note about engine oil level AT MAX OIL LEVEL OIL LEVEL SHOULD BE JUST BELOW THE TOP WINDOW QADRENET POINT AS MARKED Only lower position of the marking shall be present in the cover Clutch 72...

Страница 73: ...f product with intended reliability b Reduce cost of repairs replacement c Protect assets prolong the useful life of component product 3 How to perform a Clean Inspect Lubricate Adjust Replace as per...

Страница 74: ...spection 3 Monitor consumption of Periodic parts vis a vis vehicle serviced month wise b Customer side 1 Display periodic parts replacement chart in customer interaction explaining adverse effects if...

Страница 75: ...on battery terminals Battery terminals connection tightening Battery charge condition checking by battery tester Charging of battery on BAL recommended battery charger Easy smooth functioning of DC sy...

Страница 76: ...76 PDI Check sheet...

Страница 77: ...e 1 Engine cold condition Oil level should be above lower mark just below the top window quadrant point of oil level window 2 Check this point after test ride on road 1 Engine oil filling funnel 2 BGO...

Страница 78: ...partially discharged Red LED Battery deep discharged 1 Midtronics battery tester 2 Battery chargers VRLA 3 Petroleum jelly Battery terminals tightness Petroleum jelly application Carry out cable conne...

Страница 79: ...ree play 2 3 mm Free play gauge Drive Chain Slackness Use chain slackness checking gauge Slackness 20 30 mm Brake pedal play chain slackness checking gauge Fasteners Torque values 1 Front rear axle Us...

Страница 80: ...FE DTE Fuel gauge By filling fuel Clock Set clock if required as per SOP Speedometer Odo meter trip meter working to be checked during after test ride Funnel for filling petrol measuring jar Working o...

Страница 81: ...r Driveability Throttle response Brakes effectiveness Front Rear Engine noise No abnormal noise 4 Visual inspection for dent scratches rust etc 5 Clean the vehicle thoroughly before delivery to custom...

Страница 82: ...se Refer spare parts catalogue for part number as shown in photograph before mirror fitment on vehicle Note Leg guard fitment during PDI Washer to be fitted on LH Leg guard bottom mounting only Sequen...

Страница 83: ...83 Route the clutch cable as shown in photograph Clutch is to be routed above leg guard Clutch cable routing while leg guard fitment...

Отзывы: