background image

4

Longer detachable power-supply cords or extension cords are available and may be 

used if care is exercised in their use.  If a longer detachable power-supply cord or 

extension cord is used:

1) The marked electrical rating of the cord set or extension cord should be at least as 

great as the electrical rating of the appliance, and 

2) The cord should be arranged so that it will not drape over the counter top or tabletop 

where it can be pulled on by children or tripped over unintentionally.

DO NOT OPERATE APPLIANCE IF THE LINE CORD SHOWS ANY DAMAGE, OR IF

APPLIANCE WORKS INTERMITTENTLY OR STOPS WORKING ENTIRELY.

IMPORTANT

During the first few minutes of initial use, you may notice smoke and/or a slight odor.  This is 

normal and should quickly disappear.  It will not recur after appliance has been used a few 

more times.

BEFORE USING

Solid surface countertops can be easily scratched, cracked, scorched, or damaged, 

especially when exposed to heat.  To prevent damage, the following precautions should be 

observed when using this product:

• 

Always use a trivet under heat generating sources such as Slow Cookers, Toaster 

Ovens, Skillets, or any kitchen appliance.

Carefully unpack the cupcake maker and all parts.  Remove all packaging materials, 

including any stickers or labels.


Clean the interior and exterior surfaces of the cupcake 

maker with a damp cloth or sponge.  Wipe dry with a soft cloth.  

NEVER IMMERSE THE 

CUPCAKE MAKER OR CORD IN WATER OR ANY OTHER LIQUID.

  Position the cupcake 

maker on a dry, level, heat-resistant surface.  It is recommended to operate this appliance 

on a separate outlet and circuit from other appliances to avoid overloading the circuit.

HOW TO USE

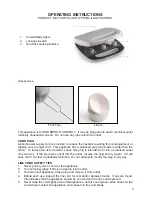
1.  Position the cupcake maker on a dry, level, heat-resistant surface.

2.  Release the lid latch and lift the lid to the open position.

3.  If not using paper cupcake liners, to maintain the quality of the nonstick it is recommended 

to periodically coat the nonstick surface with a small amount of vegetable oil.  This can be 

done with a paper towel or with a nonstick oil spray.  Wipe off any excess oil.

4.  Plug the power cord into a 120V outlet, preferably on a separate outlet from other 

appliances to prevent the circuit from being overloaded.

5.  Lower the lid to the closed position and allow the cupcake maker to preheat for a minimum 

of 3 minutes.  The red POWER light will be illuminated.

TIP:  Prepare ingredients while the cupcake maker is preheating.

6.  When the cupcake maker has preheated to the proper cooking temperature, the green 

READY light will illuminate.

7.  Open the top lid using an oven mitt or pot holder to avoid making contact with hot surfaces.

CAUTION:  Surfaces of the cupcake maker are hot.  To avoid accidental burns 

or contact with the hot surfaces or steam being released while cooking, always 

open and close the lid of the cupcake maker using an oven mitt or pot holder.

8.  If baking cupcakes, brownie bites or mini cheesecakes, place a paper baking cup in each 

Содержание CC-22

Страница 1: ......

Страница 2: ...n use and before cleaning Allow to cool before cleaning and putting on or taking off parts 7 Do not operate any appliance with a damaged cord or plug or after the appliance malfunctions or has been damaged in any manner Return appliance to the nearest authorized service facility for examination repair or adjustment 8 The use of accessory attachments not recommended by the appliance manufacturer ma...

Страница 3: ...ntended to fit into a polarized outlet only one way If the plug does not fit into the outlet reverse the plug and try again If it still does not fit contact a qualified electrician Do not attempt to modify the plug in any way LINE CORD SAFETY TIPS 1 Never pull or yank on cord or the appliance 2 To insert plug grasp it firmly and guide it into outlet 3 To disconnect appliance grasp plug and remove ...

Страница 4: ...y with a soft cloth NEVER IMMERSE THE CUPCAKE MAKER OR CORD IN WATER OR ANY OTHER LIQUID Position the cupcake maker on a dry level heat resistant surface It is recommended to operate this appliance on a separate outlet and circuit from other appliances to avoid overloading the circuit HOW TO USE 1 Position the cupcake maker on a dry level heat resistant surface 2 Release the lid latch and lift the...

Страница 5: ...or damage the nonstick surface Use a wooden or other heat resistant non metallic utensil 14 When finished cooking remove plug from wall outlet and allow the appliance to cool before moving cleaning or storing CLEANING AND MAINTENANCE This appliance requires little maintenance It contains no user serviceable parts Do not try to repair it yourself 1 Before cleaning unplug from outlet and allow to co...

Страница 6: ...akes are so hot and delicate and must cool some before they are firm enough to hold their shape Paper baking cups may be purchased online at www thebabycakesshop com Use a disposable pastry bag or zip top food storage bag to decorate or easily fill the cooking reservoirs of the cupcake maker Fill the bag with the prepared batter and clip one of the corners off the bag Squeeze gently to push batter...

Страница 7: ...or holiday greetings Cut tiny triangles from dark colored fondant and arrange as a Jack o lantern face TIERS ARRANGEMENTS AND DISPLAYS Arrange cupcakes on a cake pedestal Better yet stack two cake pedestals and fill each with cupcakes If you don t have a cake pedestal place a serving plate on a small bowl a tin or a box to make height Frosted cupcakes are fun to arrange into a special shape or dis...

Страница 8: ...xes pouches approximately 8 5 ounces will make about 8 mini muffins in the cupcake maker Drop cheese flavored biscuit mixes Prepare 7 75 ounce package mix according to package directions for drop biscuits Spoon about 1 tablespoon batter into each cup about full and bake 4 to 5 minutes One 7 75 ounce package makes 20 bite size biscuits ...

Страница 9: ...eamy Add eggs one at a time beating well after each addition Stir in the cooled chocolate 3 In separate bowl stir together flour baking soda baking powder salt and cocoa In another bowl stir together buttermilk and vanilla 4 Add a quarter of the flour mixture to the egg and sugar mixture and blend Add one third of the buttermilk and blend Continue adding flour and buttermilk ending with flour Do n...

Страница 10: ...fun confetti party cupcakes stir in 3 tablespoons confetti sprinkles with vanilla Bake as directed Strawberry Cupcakes Ingredients 1 package 9 ounces white cake mix 1 egg white cup frozen halved strawberries in syrup thawed Directions 1 Prepare cake mix according to package directions omitting water and substituting strawberries Mix with mixer for 2 minutes 2 Fill each cooking reservoir with about...

Страница 11: ...pcakes Ingredients 1 cup all purpose flour 1 teaspoon baking powder 1 teaspoon ground ginger teaspoon baking soda teaspoon cinnamon teaspoon ground cloves teaspoon salt Directions 1 Combine flour baking powder ginger baking soda cinnamon cloves and salt in a mixing bowl Set aside 2 Combine butter brown sugar corn syrup and molasses in small saucepan Heat over low heat stirring occasionally until m...

Страница 12: ...mooth Add sugar egg and vanilla and beat until smooth 2 Place a paper baking cup in each cooking reservoir Place a vanilla wafer in the bottom of each paper baking cup 3 Spoon about 2 tablespoons of cream cheese mixture into each paper baking cup over the vanilla wafer Bake about 6 to 7 minutes or until softly set 4 Carefully remove each cheesecake and place on a rack to cool Repeat with remaining...

Страница 13: ...ng Makes 16 to 18 brownie bites Tip Always use paper baking cups when baking brownie bites FROSTING RECIPES Rich Vanilla Frosting Ingredients cup butter softened 3 cups confectioners sugar 3 tablespoons milk teaspoon vanilla Directions 1 Beat butter until creamy Add confectioners sugar and milk and beat until creamy Beat in vanilla 2 Beat in an additional 1 to 2 teaspoons milk if a thinner frostin...

Страница 14: ...ing Ingredients 1 package 3 oz cream cheese softened cup butter softened 2 cups confectioners sugar teaspoon vanilla Directions Beat all ingredients together until smooth Frost each cupcake Makes about 2 cups frosting enough to frost 16 cupcakes Tip This frosting recipe may be doubled if desired Lemon Frosting Ingredients cup butter softened 2 cups confectioners sugar 2 teaspoons grated lemon zest...

Страница 15: ...re in the saucepan Cook stirring constantly until mixture boils Cook 1 additional minute after boil stirring continually 3 Remove from heat and stir in pecans coconut and vanilla Cool to spreading consistency and spoon about 2 tablespoons of frosting over each cupcake Makes about cups frosting enough to frost 16 to 18 cupcakes Tip To toast pecans preheat oven to 375 F Spread pecans in a single lay...

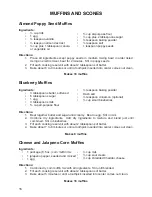
Страница 16: ...n milk 2 Combine dry ingredients Add dry ingredients to mixture and blend just until combined Stir in blueberries 3 Fill each cooking reservoir with about 2 tablespoons of batter 4 Bake about 7 to 8 minutes or until a toothpick inserted into center comes out clean Makes 8 muffins Cheese and Jalapeno Corn Muffins Ingredients 1 package 8 5 oz corn muffin mix 1 jalapeno pepper seeded and minced 1 egg...

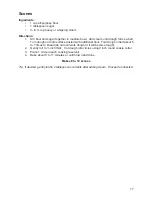
Страница 17: ...e dusted with additional flour Fold dough in half about 5 to 7 times to knead do not overwork dough or it will become tough 2 Gently roll to inch thick Cut dough into circles using 2 inch round cookie cutter 3 Place 1 circle in each cooking reservoir 4 Bake about 9 to 11 minutes or until brown and done Makes 8 to 10 scones Tip If desired gently fold in 2 tablespoons currants after adding cream Pro...

Страница 18: ...fit as necessary Top with remaining muffin half Makes 16 appetizers Mushroom Bites Ingredients 2 cups herb seasoned stuffing mix 2 tablespoons butter or margarine 1 cups coarsely chopped button mushrooms 2 green onions white and green part chopped Directions 1 Place stuffing in mixing bowl Set aside 2 Melt butter in medium skillet over medium high heat Add mushrooms and green onion and cook for 4 ...

Страница 19: ...period the authorized service dealer at its option will repair or replace any part that upon examination is found to be defective under normal use and service NORMAL WEAR This warranty does not cover normal wear of parts or damage resulting from any of the following Negligent use or misuse of the product Improper voltage or current Use contrary to the operation instructions Deviation from instruct...

Страница 20: ......

Отзывы: