Copyright © 2016, Baby Trend Inc., All Rights Reserved. Todos los derechos reservados. Tous droits réservés.
8
SAFETY
7
Copyright © 2016, Baby Trend Inc., All Rights Reserved. Todos los derechos reservados. Tous droits réservés.
ASSEMBLY
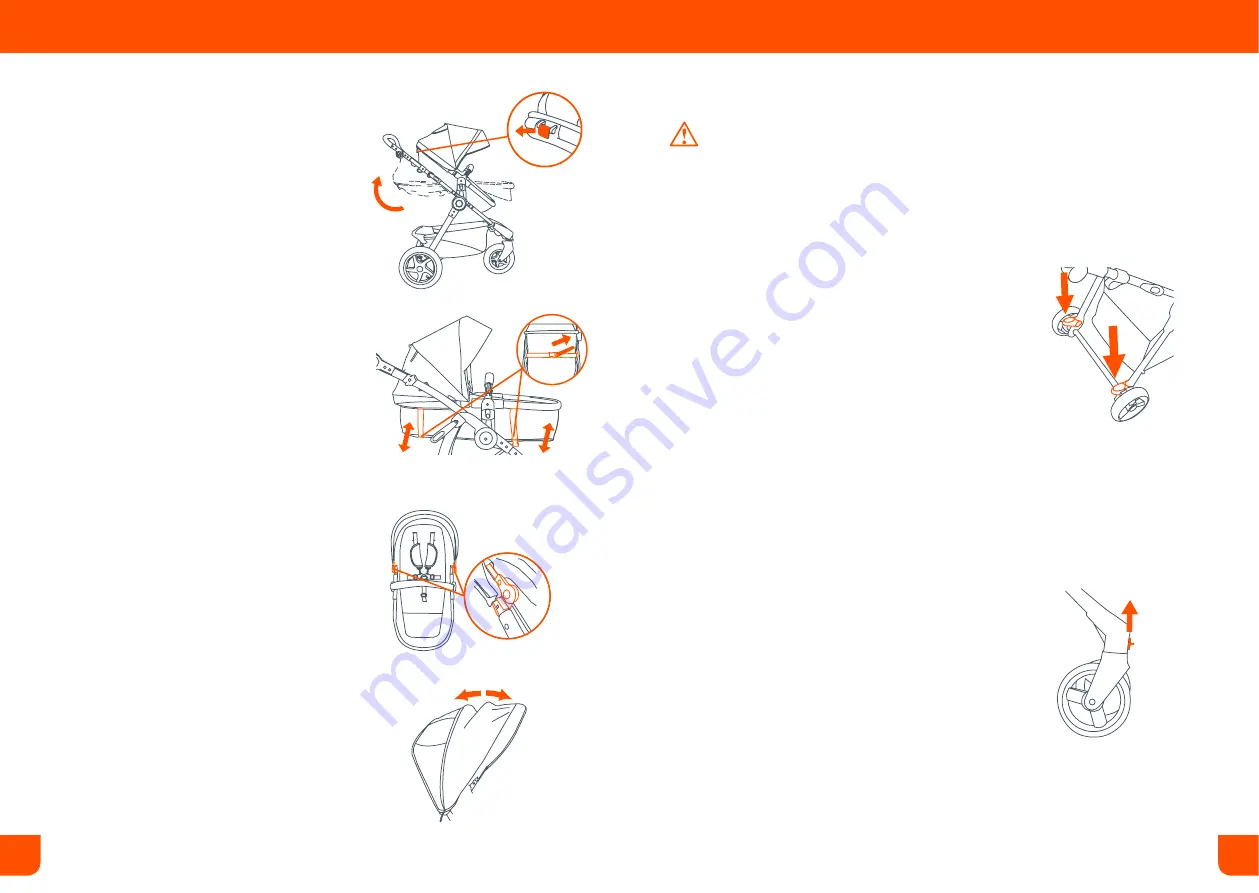
TO ADJUST SEAT
6)
• The seat can be adjusted into upright,
reclined, and carriage positions. Pull the
recline button on the rear of the seat and
rotate the seat into the desired position
(Fig. 6a).
•
Upright and Reclined Position:
Buckle
the footrest and headrest straps on the
rear of the seat. Pull the excess straps to
tighten the seat (Fig. 6b).
• Carriage Position:
Make sure both
footrest and headrest straps are
loosened and extend the seat surround
fully (Fig. 6b).
REMOVABLE CANOPY
7)
•
To attach the removable canopy:
Snap
the canopy clips on the inside of the
toddler seat tubes (Fig. 7a).
•
To open the canopy:
push forward
on the front edge of the canopy while
holding the rear of canopy in place
(Fig. 7b).
•
To fold the canopy:
pull backwards on
the front edge (Fig. 7b).
BRAKES
WARNING:
Always
set brakes when the stroller
is not being pushed so
that the stroller will not roll
away. NEVER leave stroller
unattended on a hill or
incline as the stroller may
slide down the hill
.
8)
• To engage brakes, apply downward
pressure to the brake levers located on the
rear axle. The stroller may require forward
or rearward movement in order to engage
the brake (Fig. 8). Check that the stroller
will not move once the brakes are properly
applied. To release, gently lift up on the
brake levers.
FRONT WHEEL LOCK
9)
• The front wheel is equipped with a swivel
locking device. Push the button on each
wheel upwards to engage the locks and
push downward to disengage the locking
device (Fig. 9).
Fig. 8
Fig. 9
Fig. 6a
Fig. 6b
Fig. 7b
Fig. 7a


