CREATING FILL IMAGE
343
IQ
D
es
ign
er
7
d
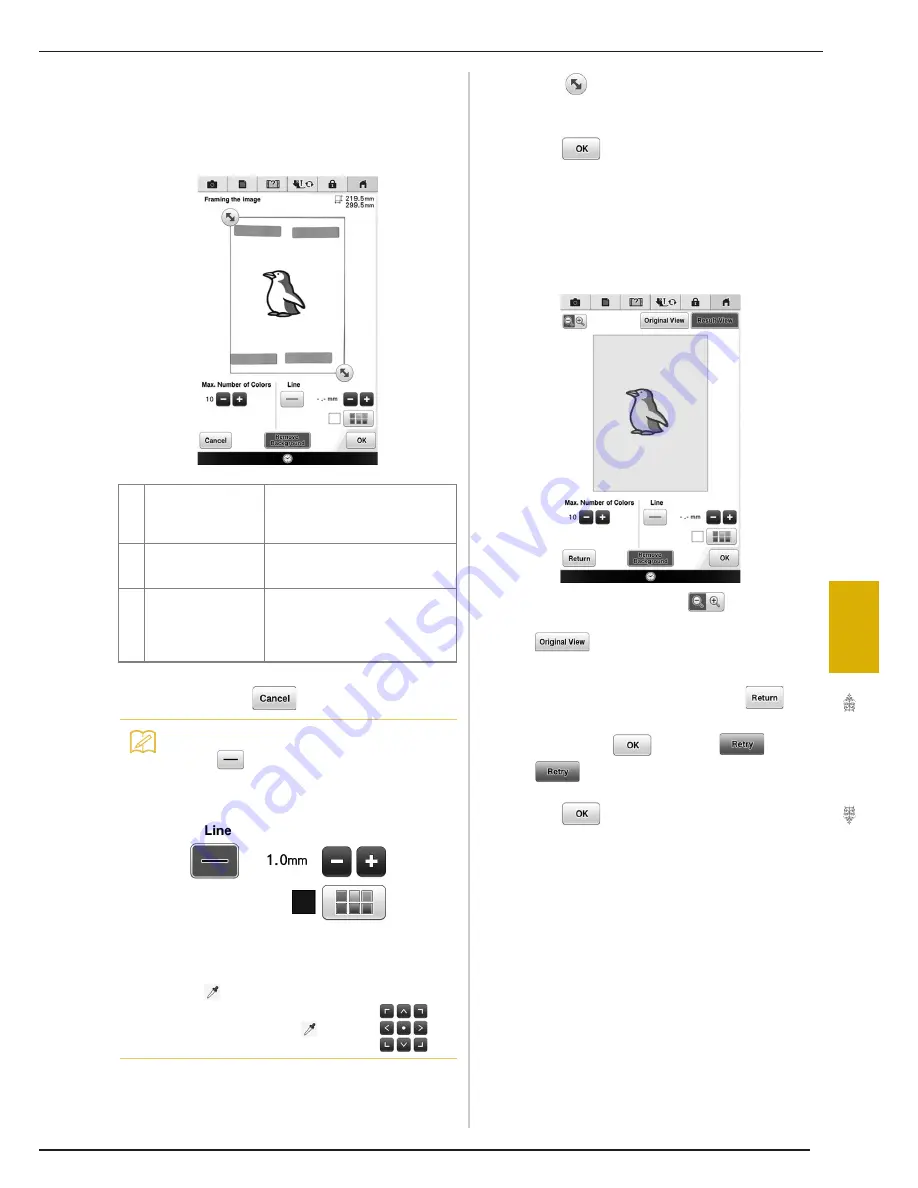
When scanning is finished, specify the
necessary settings in the scan image
confirmation screen.
Change the settings to adjust the image so it can easily
be converted to the desired pattern.
*
To stop scanning and return to the screen in
step
c
, press
.
e
Move
to frame the image for the
pattern.
f
Press .
→
The screen for confirming the converted image
appears.
g
In the screen for confirming the converted
image, adjust the image as necessary as in
step
d
.
*
To enlarge the image, press
.
*
To display the image before being converted, press
. Compare the images before and after
being converted, and then change the settings if
necessary.
*
To return to the previous screen, press
.
→
After changes to the settings described above have
been applied,
changes to
. Press
to check that the image is as desired.
h
Press .
a
Max. Number of
Colors
The number of colors in an image will
reduced less than the number
specified here, and then the outline
will be extracted.
b
Remove Background
Select whether or not the
background color will be included as
one of the colors.
c
Line
Select whether or not the outline will
be detected as a line. A thick outline
can also be detected as a region.
When detected as a line, the line
thickness and color can be specified.
Memo
• Press
to detect the outline.
Line thickness can be specified from 1.0
mm (1/16 inch) to 5.0 mm (3/16 inch).
• By touching the scanned image, select the
color that wanted to be detected as the
outline.
• The
moves to the point you touched.
You can also move
by using
.
Содержание Destiny BLDY
Страница 1: ......
Страница 55: ...ATTACHING THE EMBROIDERY FRAME 248 b Pull the embroidery frame toward you...
Страница 77: ...ADJUSTMENTS DURING THE EMBROIDERY PROCESS 270...
Страница 129: ...RESUME FEATURE 322...
Страница 163: ...STIPPLING 356...
Страница 181: ...TROUBLESHOOTING 374...
Страница 222: ......
Страница 223: ......
Страница 224: ......
Страница 225: ...XF9969 001 English 882 W21 Printed in Taiwan...


