background image


2


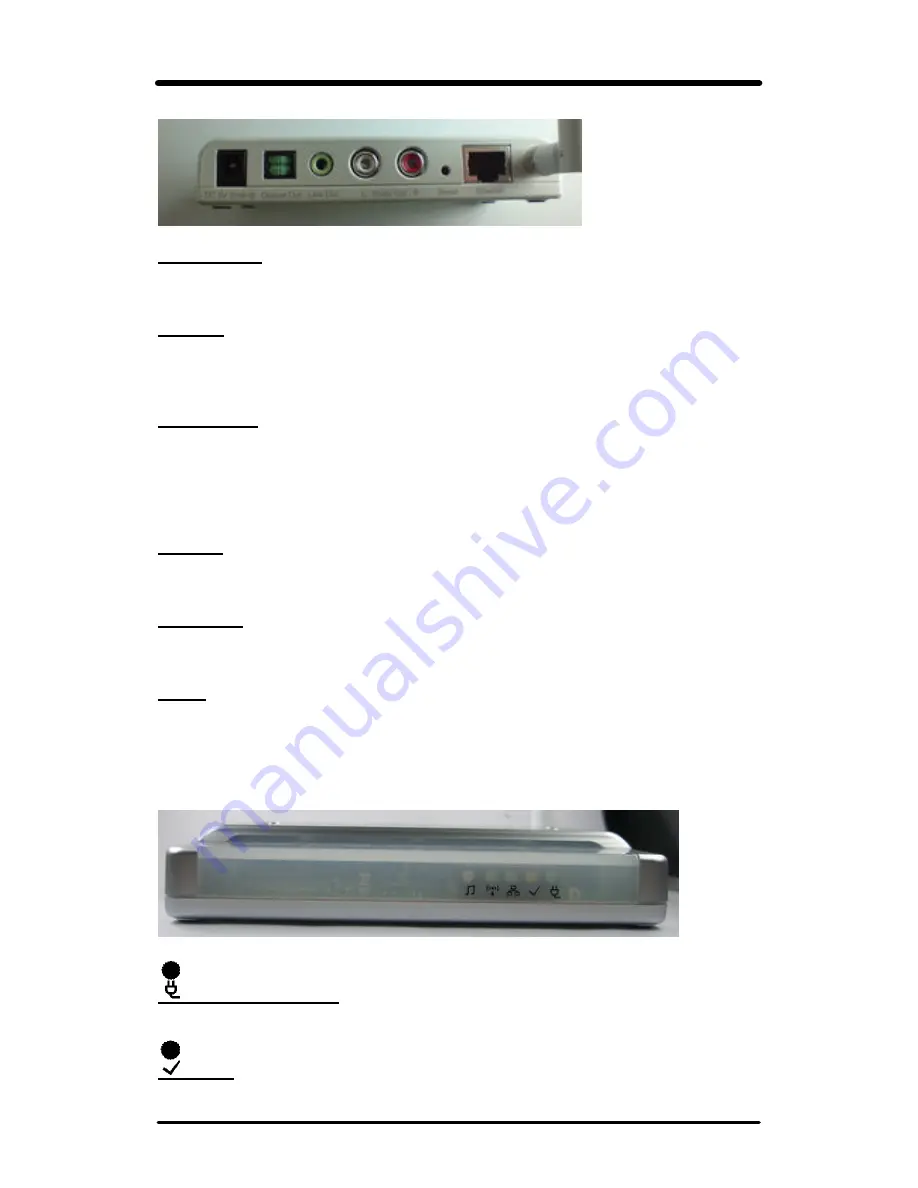
Audio Out L/R  

The Audio Out (Left and Right) ports connect to the Audio In (Left and Right) ports of 
your audio receiver. 
 

Ethernet  

This Ethernet port connects to Ethernet network devices, such as a switch or router, if 
using a 
wired connection. 
 

Reset Button  

There are two ways to Reset the Device's factory defaults. Either press the Reset 
Button, for approximately ten seconds, or restore the defaults from the Password tab in 
the device's Web Based Utility. 
*Important: Resetting the device will erase all of your settings and replace them with the 
factory defaults. Do not reset the device if you want to retain these settings. 
 

Line Out  

The Line Out port is where you can connect headphones or portable audio speakers 
with a headphone jack. 
 

Optical Out  

The Optical Out (SPDIF) port is where you connect the cable from the Optical In port of 
your audio receiver. 
 

Power  

The Power port is where you will connect the power adapter. 
 

2.2.2 The LEDs 

 
The LEDs is located in front panel, it can indicate some device information 


Power (Green color) 

. The Power LED lights up when the device is powered on. 
 

 Ready 

. The Ready LED lights up when the device is ready. It will be flashing while upgrading 
firmware, after firmware upgrade process is done, the Ready LED will be back to light 

Содержание AW-GA200

Страница 1: ...lution User Manual AzureWave Technologies Inc 2006 Contents Chapter 1 Introduction 1 Chapter 2 Getting Start with AW GA100 1 Chapter 3 How to make wireless audio feature working 3 Chapter 4 Installati...

Страница 2: ...hrough 802 11 wireless connection The device will bundle with AzureWave wireless audio driver and utility It creates a virtual sound system in your PC which sends the audio output of any application t...

Страница 3: ...them with the factory defaults Do not reset the device if you want to retain these settings Line Out The Line Out port is where you can connect headphones or portable audio speakers with a headphone...

Страница 4: ...manual 3 RJ45 cable 4 Quick Installation Guide 5 Power Adapter 5V DC output Chapter 3 How to Make Wireless Audio Feature Working It s very easy to enable AW GA100 wireless audio feature just need to f...

Страница 5: ...fault SSID is AW GA100 When you got successful network connection the Access Point feature of AW GA100 will be working But you still have to run wireless audio utility to enable wireless audio feature...

Страница 6: ...to your PC then click start button and select run enter d setup exe if D is the letter of your PC s CDROM drive When auto installation utility is staring please follow utility s instruction to complet...

Страница 7: ...to configure Device Before your starting setup wizard please connect device through Ethernet cable The setup wizard will help you to finish AW GA201 configuration step by step If you are first time to...

Страница 8: ...DHCP feature Once configuration process is done the Setup Wizard could be ask you to restart your computer Please restart your PC and go to next step 2 GA201 under AP Client mode Step 1 Operation Same...

Страница 9: ...your complete Setup Wizard process the device will be configured as a Access Point or Client mode link to specific network according to your previous setup AW GA201 is configured as AP RT mode Please...

Страница 10: ...will switch PC audio to local speaker or wireless audio Multi Device Management All the audio AP Receiver connects to same network will be displayed on utility the maximum quantity will up to 36 devic...

Страница 11: ...equently Asked Questions What player I can use with AW GA100 You can use most any player you like such as iTunes or Windows Media Player Can I listen to music from more than one AW GA100 at the same t...

Страница 12: ...wever there is no guarantee that interference will not occur in a particular installation If this equipment does cause harmful interference to radio or television reception which can be determined by...

Отзывы: