


USER MANUAL
_
14
MASTER fixture sends “Auto Program Part 1” to this SLAVE fixture. If it
was assigned to “Slave 2”, the SLAVE fixture would receive the program
“Auto Program Part 2” from the MASTER fixture.
To launch a program, follow this procedure:
1. Slave Settings - SLAVE fixture adjustment
Use the buttons to select “Function Mode.”
Press ENTER to confirm.
Use the buttons to select “Set slave to.”
Press ENTER to confirm.
Use the buttons to select “Slave 1”, “Slave 2” or “Slave 3.”
Press ENTER to confirm.
Press MODE/ESC to return to the main menu.
2. Automatic Program Run
Use the buttons to select “Function Mode.”
Press ENTER to confirm.
Use the buttons to select “Auto Program.”
Press ENTER to confirm.
Use the buttons to select “Master” or “Alone.” “Master” sets the fixture
as the master.
Press ENTER to confirm.
Press MODE/ESC to return to the main menu.
3. Program selection for Auto Pro Part
Use the buttons to select “Edit program.”
Press ENTER to confirm.
Use the buttons to select “Select programs.”
Press ENTER to confirm.
Select “Auto Program Part 1”, “Auto Program Part 2” or “Auto Program
Part 3”, for the Slave program to be sent. Selecting “Part 1” will cause the
SLAVE to run the same program as the MASTER fixture.
Press ENTER to confirm.
Press MODE/ESC to return to the main menu.
4. Program selection for Edit Program
Use the buttons to select “Edit program.”
Press ENTER to confirm.
Use the buttons to select “Edit program.”
Press ENTER to confirm.
Use the buttons to select the desired program.
You can edit specific scenes in a given program.
Press ENTER to confirm.
Press MODE/ESC to return to the main menu.
5. Automatic Scene Recording
Use the buttons to select “Edit program.”
Press ENTER to confirm.
Use the buttons to select “Edit scenes.”
Use the buttons to select the number of desired scenes. (maximum
amount: 250 scenes)
Press ENTER to confirm.
Press MODE/ESC to return to the main menu.
Example:
”Program 2” includes scenes: 10, 11, 12, 13.
”Program 4” includes scenes: 8, 9, 10.
”Program 6” includes scenes: 12, 13, 14, 15.
”Auto Program Part 1” is “Program 2.”
”Auto Program Part 2” is “Program 3.”
”Auto Program Part 3” is “Program 6.”
The 3 groups of SLAVE fixtures run the “Auto Program” in the following
sequence:
Part 1:
Scene 10
Scene 11
Scene 12
Scene 13
Part 2:
Scene 8S
cene 9S
cene 10
Scene 8
Part 3:
Scene 12
Scene 13
Scene 14
Scene 15
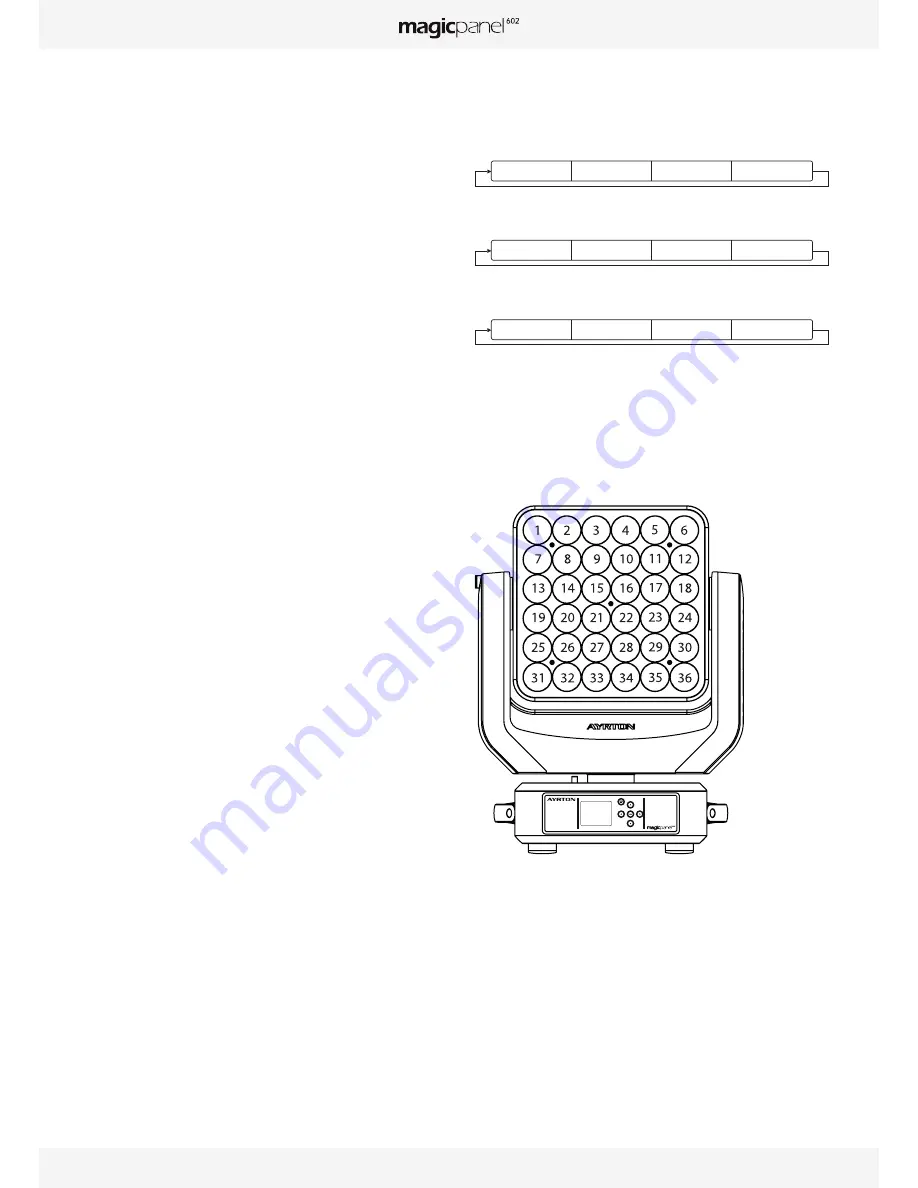
LEd mAPPInG
The diagram shows the order of the LED addresses from a front view of
the fixture and control panel, with the latch to the left.
Содержание magicpanel 602
Страница 1: ...USER MANUAL V 3 2 ENGLISH VERSION 12 16 2014...
Страница 2: ......
Страница 19: ...USER MANUAL _ 19...
Страница 20: ...www ayrton eu...


