


System Map: Bottom View 1 - 17
Quick Start Guide
1
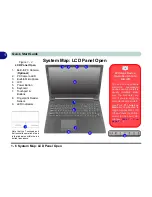
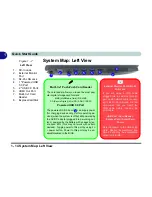
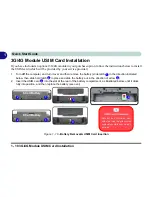
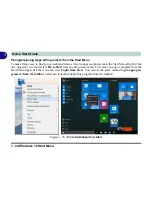
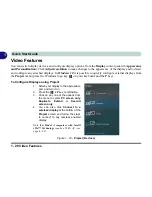
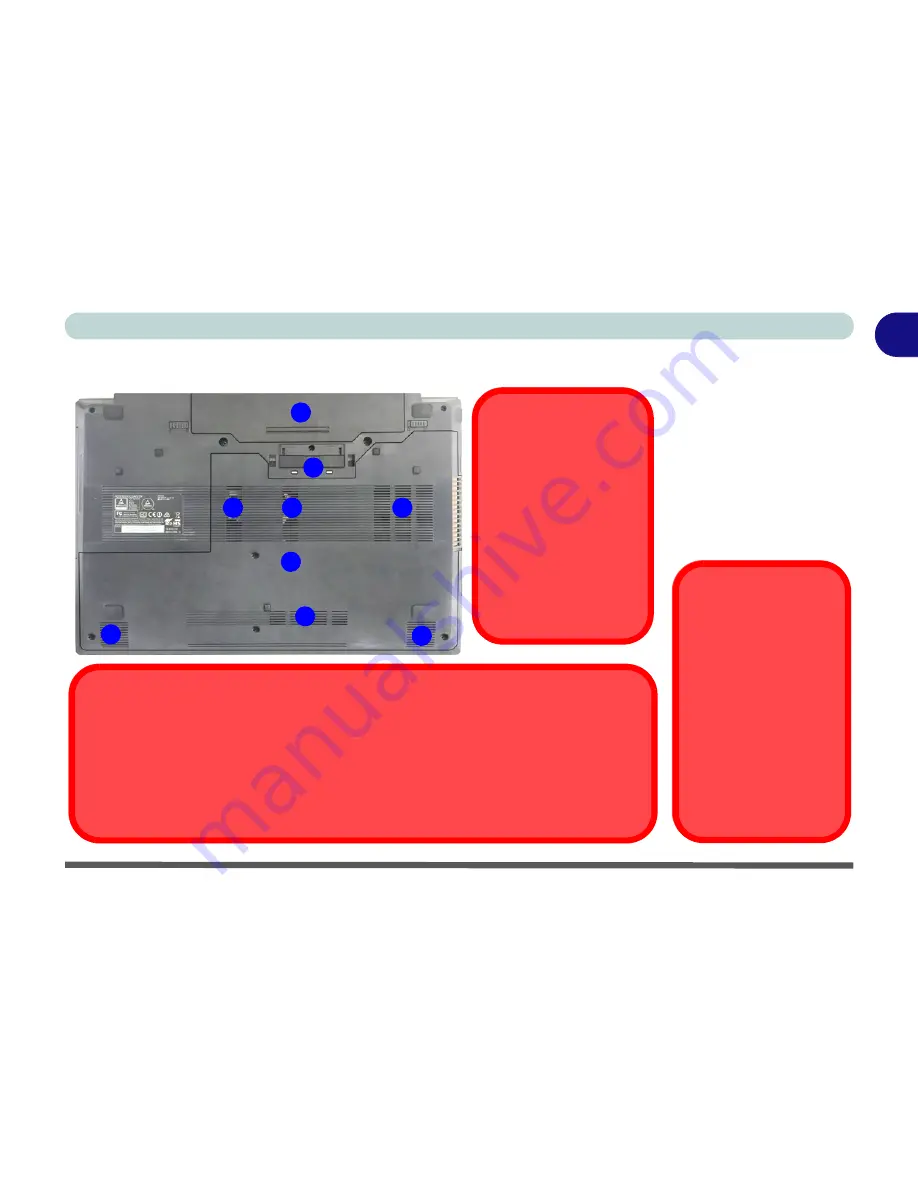
System Map: Bottom View
Figure 1 - 9
Bottom View
1.
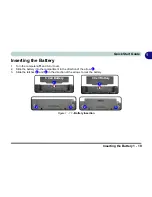
Battery
2.
Docking Port
3.
Fan Intake/Vent
4.
Component Bay
Cover
5.
Speakers
Bottom Cover Removal
Warning
Do not remove any cov-
er(s) and /or screw(s) for
the purposes of device up-
grade as this may violate
the terms of your warranty.
If you need to replace/re-
move the hard disk/RAM/
optical device etc., for any
reason, please contact
your distributor/supplier for
further information.
2
1
4
3
CPU
The CPU is not a user
serviceable part.
Overheating
To prevent your com-
puter from overheating
make sure nothing
blocks the Vent/Fan In-
take while the computer
is in use.
5
5
3
3
3
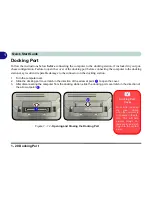
Docking Port Cover
If your purchase option includes the docking station
, make sure you keep the cover closed when
the computer is not docked in the station. This will help prevent foreign objects and/or dust getting in to
the contact area.
If your purchase option does not include the docking station
, an insert will be provided to prevent
accidentally opening the docking port. Do not attempt to open the cover or remove the insert in this
case.
Содержание 15S14
Страница 1: ...V16 1 00...
Страница 2: ......
Страница 20: ...XVIII Preface...
Страница 84: ...Features Components 2 18 2...
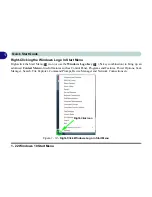
Страница 127: ...BIOS Utilities Advanced Menu 5 7 5 Advanced Menu Figure 5 3 Advanced Menu...
Страница 230: ...Video Driver Controls C 28 C...