


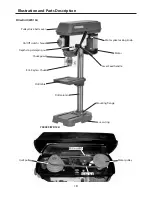


Assembly
13
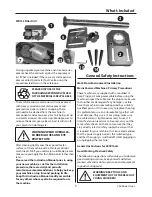
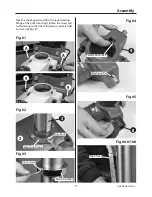
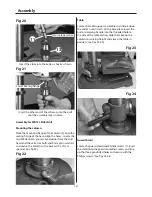
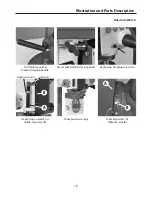
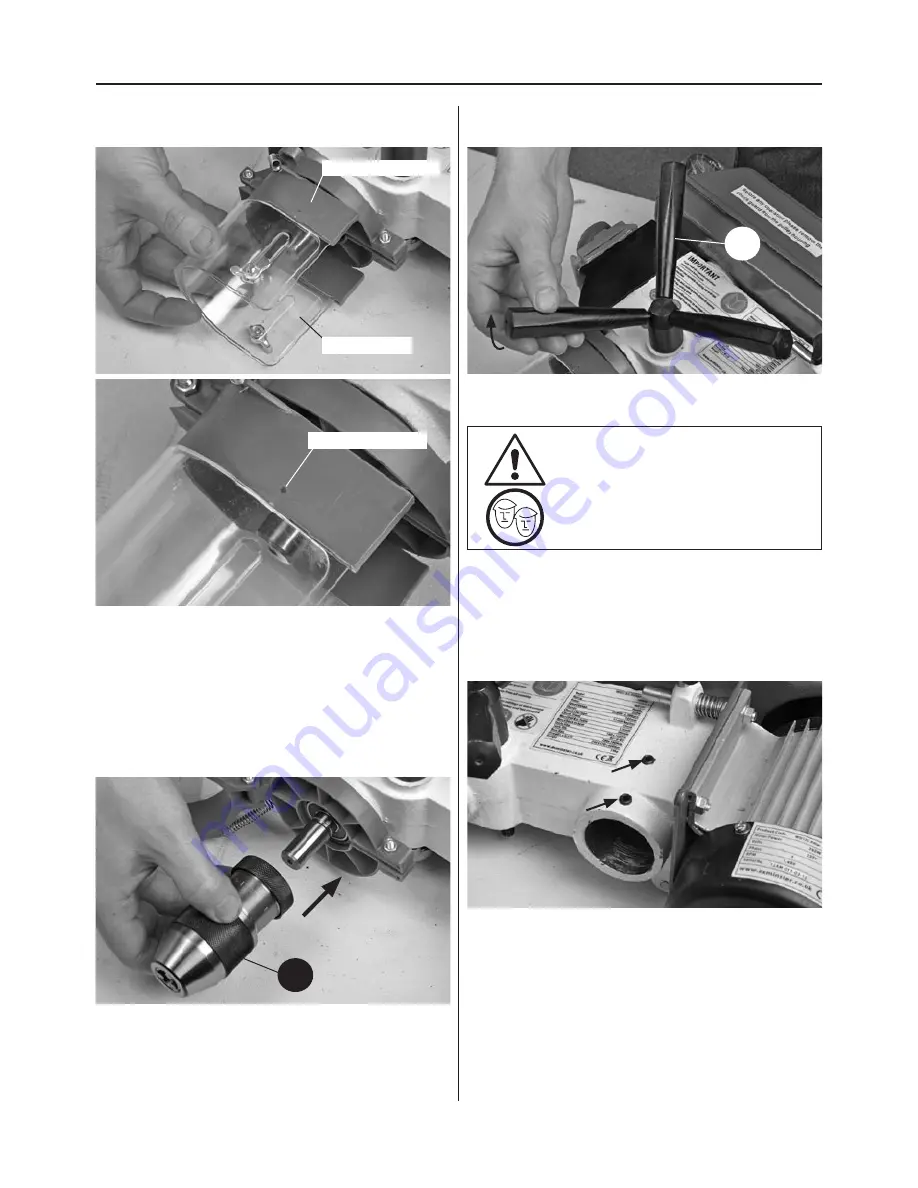
Pillar drill head
Fig 29
Using the 3mm Hex key loosen the two grub screws
to the right side of the head, (see fig 29) lift the drill
head above the column and let it drop into place.
Set the drillhead approximately fore and aft and
lock in position using the two caphead grub screws
mentioned earlier.
Check that the drillhead is immobile. Everything on
the drilling machine is now secured, and if you now
wish to move it to its preferred workplace, nothing
should slew during the lift and move. Once the
drilling machine is correctly positioned and fastened
down, it is ready for use.
WARNING! THE DRILLHEAD IS A
HEAVY AND SUBSTANTIAL PIECE
OF MACHINERY, YOU ARE ADVISED
TO HAVE HELP!
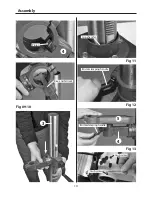
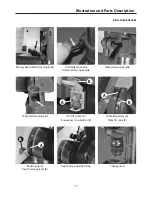
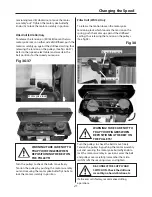
Fig 25-26
Line up the three pre-drilled holes and secure with
the Phillips screws
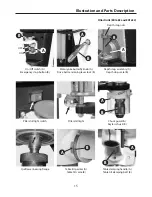
Guard moulding
Pre-drilled hole
Fig 27
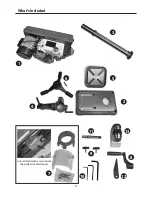
Keyless chuck
Insert the keyless chuck (13) over the morse taper
arbor as shown in (fig 27) and press home.
13
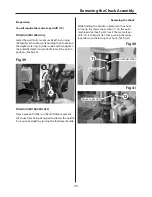
Fig 28
Lever feed handles
Locate the three lever handles (14) and screw them
into the threaded holes on the feed shaft, (See fig 28)
14
Guard shield
Содержание ED16B2
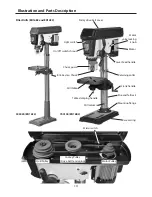
Страница 25: ...Parts Breakdown List 25 Pillar Drills 505024 ED16F 700100 ED16B2 ...
Страница 27: ...Parts Breakdown List 27 Pillar Drill 700101 ED16SB ...
Страница 28: ...Parts Breakdown List 28 Pillar Drill 700101 ED16SB ...
Страница 29: ...Parts Breakdown List 29 Pillar Drill 700099 WD13L ...
Страница 30: ...Parts Breakdown List 30 Pillar Drill 700099 WD13L ...
Страница 31: ...Notes 31 ...


