Page 10
AXIS Q1755-E Installation Guide
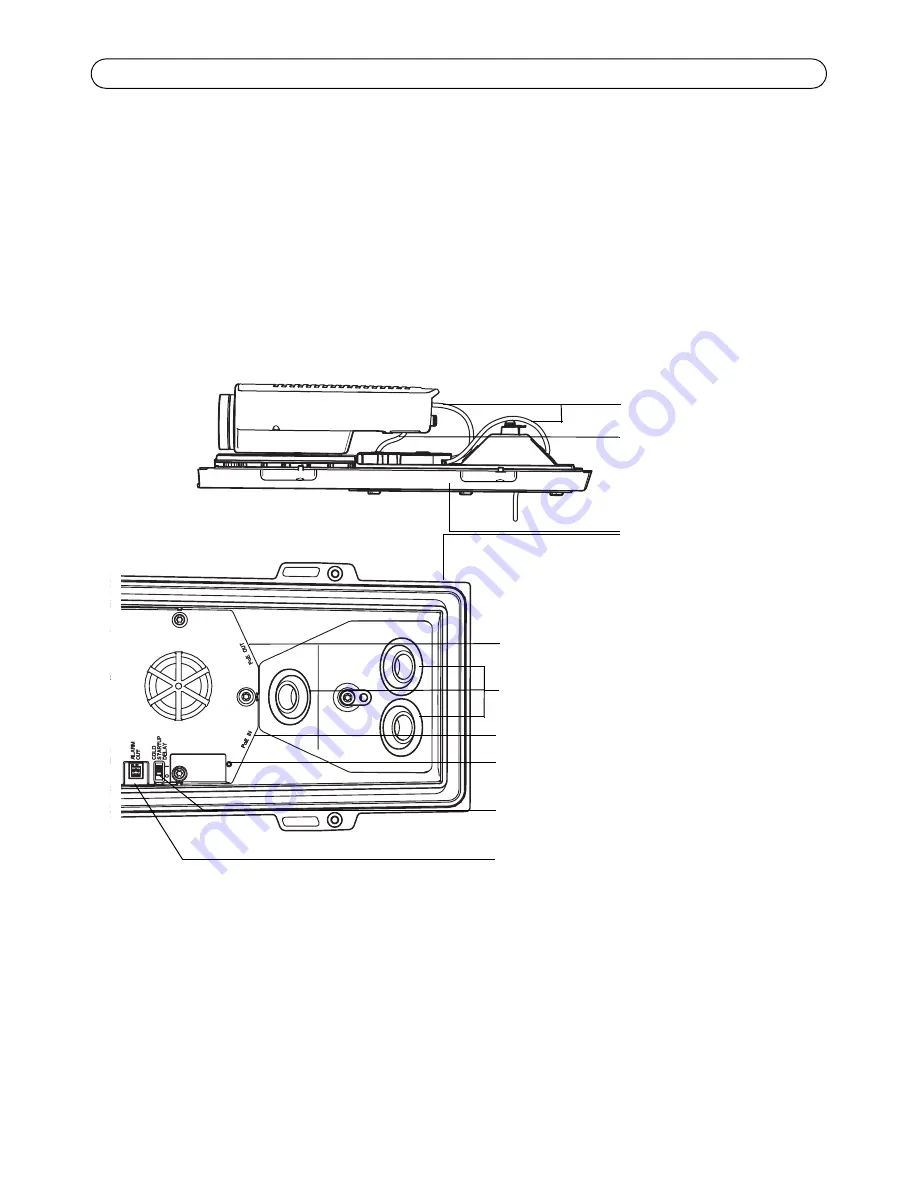
Connect the cables
1. Optionally insert an SD memory card (not included) into the SDHC (Secure Digital High
Capacity) card slot. A standard or high capacity SD card is required to store images locally in
the camera.
2. Optionally connect external input/output devices. See page 18 for information on the terminal
connector pins. Prepare the cables with gaskets, see
Prepare the network cable,
on page 8, and
route the cables through the cable holes into the bottom cover and to the camera.
3. Connect the camera to the network using a shielded network cable. Use the network connector
(PoE IN ) on the bottom cover. The network cable and the I/O cable between the bottom cover
and the camera are already connected at delivery.
4. Check that the indicator LEDs indicate the correct conditions. See the table on page 21 for
further details.
Cable holes
Network connector (PoE IN)
Alarm output
Arctic Temperature Control switch
LED indicator
(disabling not recommended)
Network connector (PoE OUT,
connected at delivery)
Bottom cover
I/O cable
Network cables
(connected at delivery)
Содержание Q1755-E
Страница 1: ...ENGLISH DEUTSCH ITALIANO ESPAÑOL INSTALLATION GUIDE FRANÇAIS AXIS Q1755 E Network Camera ...
Страница 5: ......
Страница 25: ......
Страница 45: ......
Страница 47: ......
Страница 67: ......
Страница 69: ......
Страница 89: ......
Страница 91: ......
Страница 111: ......
Страница 112: ......
Страница 113: ...Installation Guide Ver 1 3 AXIS Q1755 E Printed April 2014 Axis Communications AB 2010 2013 Part No 57193 ...


