


3
Step1: Connect your laptop / PC to the wireless network with the camera connected.
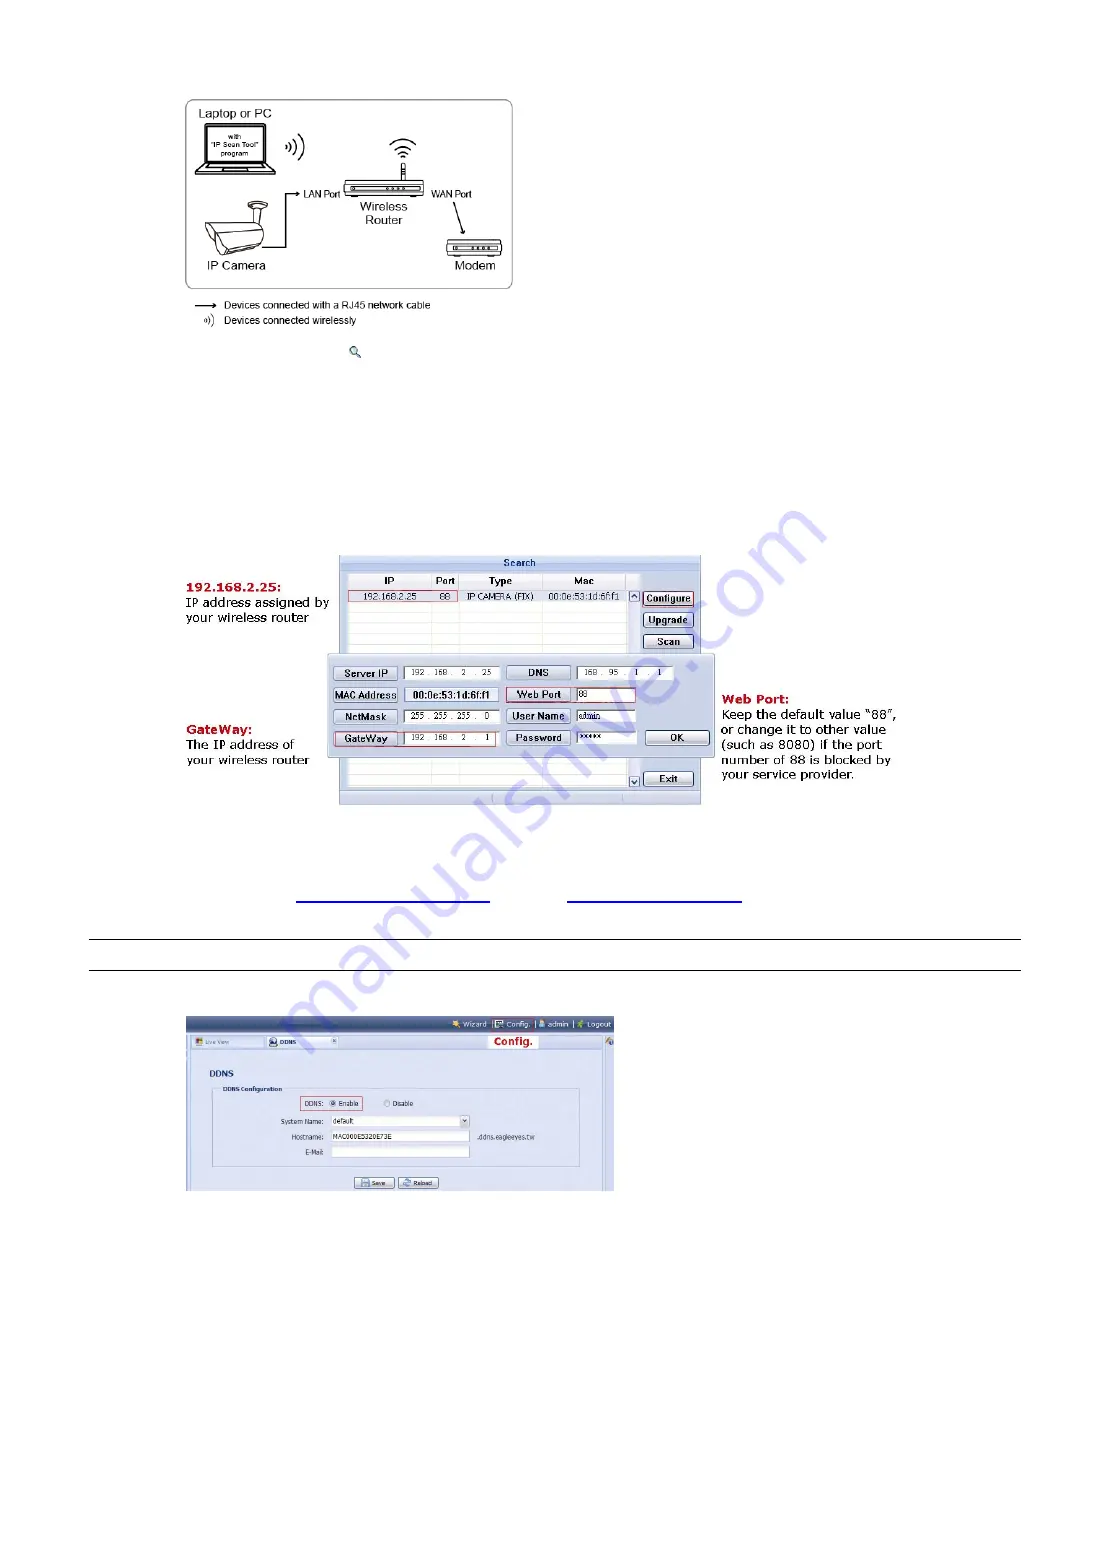
Step2: Open “IPScan.exe” ( ) to search your camera, and:
Note down the IP address and port number after search, such as “192.168.2.25” and “88” in our example.
Select the IP address, and click “Configure” to note down the gateway IP address. It’s the address of your wireless router,
and you might need it later for port forwarding.
Change the port you’re using for this camera to other value (such as “8080”) in “Web Port” if you know the default port
number “88” is blocked by your Internet service provider or phone carrier. Then, enter the user name (admin) and
password (admin) to confirm.
The number of “80” is not recommended to use since some Internet service providers and phone carriers might block the
use of “80”.
Step3: Open Internet Explorer on your laptop / computer, and enter the IP address and port number you just
found in the URL column to access this camera.
The format is
http://ipaddress:portnum
, such as
http://192.168.2.25:88
in our example.
In the login page, enter the user name, password, and security code to access.
Note: Please skip the wizard.
Step4: Go to “Config.”
“DDNS”, and enable the DDNS service.
If your router supports UPnP, please proceed Step5.
If your router doesn’t support UPnP, note down the host name, such as
MAC000E5320E73E.ddns.eagleeyes.tw
, and click
“Save”. Then, access your wireless router for port forwarding as instructed in “APPENDIX 4 CONFIGURE PORT
FORWARDING” at page 18.
Step5: Go to “UPnP”, and enable the UPnP service.
Then, enable “Port Mapping”, and click “Save” to start port mapping automatically.
When the configurations are saved successfully, you’ll see a message indicating the IP address and port
number assigned to your camera.
Note down the IP address and port number, and log out the camera.


