


Page
13
of
31
INITIAL SETUP
Make the physical connections to the input and output devices using the following steps below. For initial
setup, it is recommended to connect the AC-AEX-RC-HUB to a LAN (Local Area Network) using a control PC on
the same network once all the physical connections are made, followed by accessing the Web UI and checking
for any firmware updates to the unit.
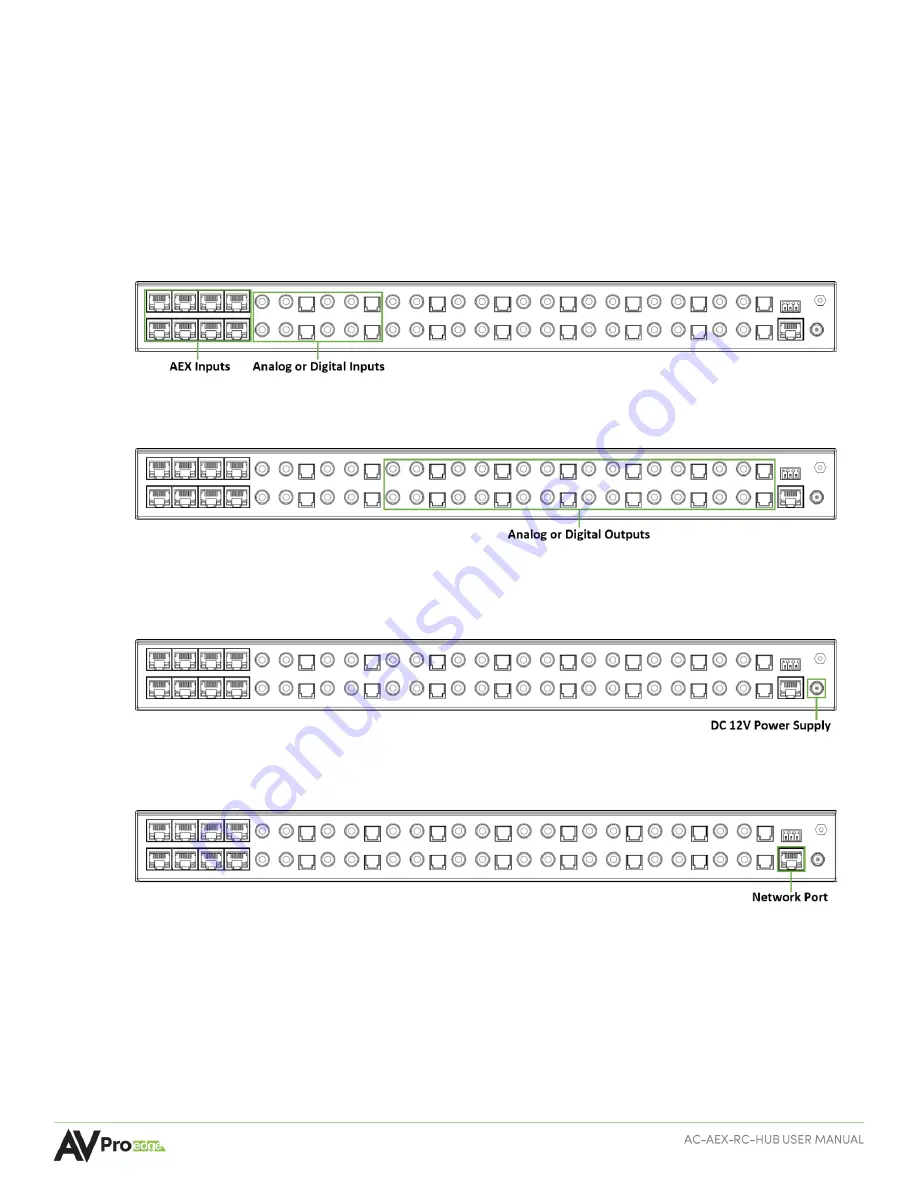
Connecting the Devices
1
Connect the audio source devices to the audio inputs on the back of the unit.
2
Connect the audio output devices to the audio outputs on the back of the unit.
3
Connect the power port on the back of the unit to a suitable power source with the supplied power
cable.
4
Connect the NETWORK port on the back of the unit to a LAN, router, or third-party control system.
Locating the IP Address
The default IP setting is DHCP mode, an IP address will automatically be assigned to the unit by the DHCP
server within the router. Use a control PC on the same network
to locate the unit’s IP addres
s, then enter it
into a web browser (such as Chrome or Edge)
to access the unit’s Web UI
. Once connected, you can use the
Web UI to assign a new IP address or set the IP mode to static. If there is no DHCP server on the network,
the
unit’s
IP address can also be located by connecting to the RS-232 port on the back of the unit and
sending serial commands using the API. For more information, see the
RS-232 Control
page.


