background image

The EDID options are:

1. 1080P_2CH
2. 1080P_6CH
3. 1080P_8CH
4. 1080P_3D_2CH
5. 1080P_3D_6CH
6. 1080P_3D_8CH
7. 4K30HZ_3D_2CH
8. 4K30HZ_3D_6CH
9. 4K30HZ_3D_8CH
10. 4K60HzY420_3D_2CH
11. 4K60HzY420_3D_6CH
12. 4K60HzY420_3D_8CH
13. 4K60HZ_3D_2CH
14. 4K60HZ_3D_6CH
15. 4K60HZ_3D_8CH
16. 1080P_2CH_HDR

17. 1080P_6CH_HDR
18. 1080P_8CH_HDR
19. 1080P_3D_2CH_HDR
20. 1080P_3D_6CH_HDR
21. 1080P_3D_8CH_HDR
22. 4K30HZ_3D_2CH_HDR
23. 4K30HZ_3D_6CH_HDR
24. 4K30HZ_3D_8CH_HDR
25. 4K60HzY420_3D_2CH_HDR
26. 4K60HzY420_3D_6CH_HDR
27. 4K60HzY420_3D_8CH_HDR
28. 4K60HZ_3D_2CH_HDR
29. 4K60HZ_3D_6CH_HDR
30. 4K60HZ_3D_8CH_HDR
31. User EDID 1
32. User EDID 2
33. User EDID 3

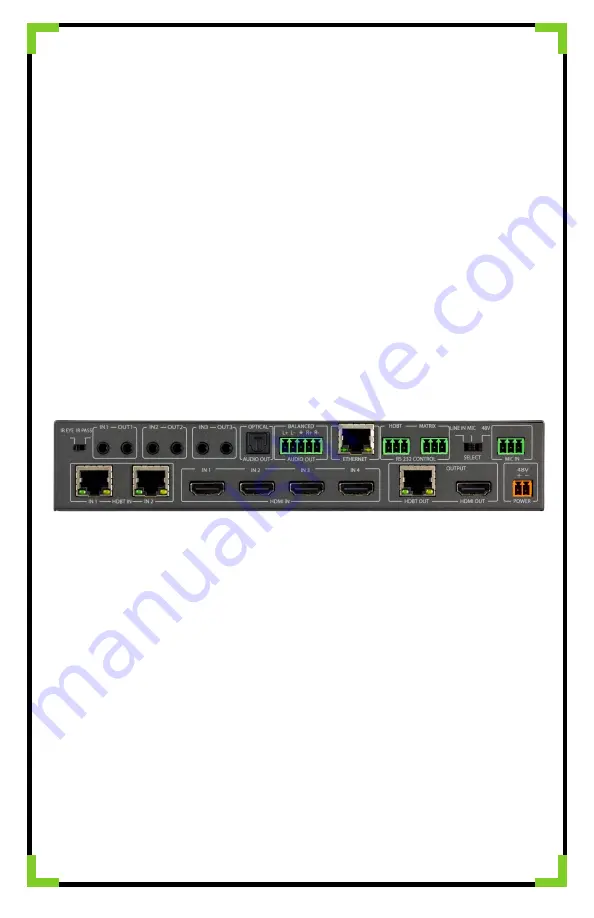
Back Panel:

IR Ports

Used for IR extension over HDBT. Choose IR Input type using the dipswitch on the back of 
the unit (insert pic of dipswitch). 
IR Eye = IR from remote/emitter
IR Pass = IR direct from control system
IR can be routed. By default, the switch comes in:
IN1/OUT1 = Bound to HDBT Input
IN2/OUT2 = Bound to HDBT Output

MIC IN

Allows for a mic to be injected into the extracted audio outputs (Show Pic). Select 
Microphone type by using the dipswitch located next to the input.
Line In = Line level input (PC, Phone, etc..)
MIC = Microphone input for dynamic microphones
48V = Microphone input for condenser microphones. Provides 48V Phantom Power.

Содержание AC-CX42-AUHD

Страница 1: ...eo signal into a video conferencing codec with very little setup This is an ideal solution for digital entertainment centers HDTV retail show sites data centers schools conference and training centers...

Страница 2: ...You can enable only one output to auto switch or both when both are enabled they will be mirrored EDID is ideally set from the Web Interface but can be set from the front panel will be walked through...

Страница 3: ...Audio the options are ON Extracted audio ports are ON Default OFF Extracted audio ports are muted Audio Binding Bind the audio to a specific OUTPUT The audio will always follow one output this means...

Страница 4: ...to toggle through the EDID index 4 Once you land on the EDID you want to use press and hold the HDmi OUTPUT button for 3 seconds All LEDs will flash one time indicating success 5 NOTE When in the EDID...

Страница 5: ...3D_2CH_HDR 29 4K60HZ_3D_6CH_HDR 30 4K60HZ_3D_8CH_HDR 31 User EDID 1 32 User EDID 2 33 User EDID 3 Back Panel IR Ports Used for IR extension over HDBT Choose IR Input type using the dipswitch on the ba...

Страница 6: ...e and power Verify Connections Check all cables are properly connected Issues with one INPUT OUTPUT Swap ports to see if the issue stays with the port or with the device Follows the device then it may...

Страница 7: ...Have a question or need assistance Don t hesitate to contact us SUPPORT 1 605 274 6055 USA TOLL FREE 877 886 5112 EMAIL support avproedge com...

Отзывы: