


MLN-192 Option Card Installation
2
5
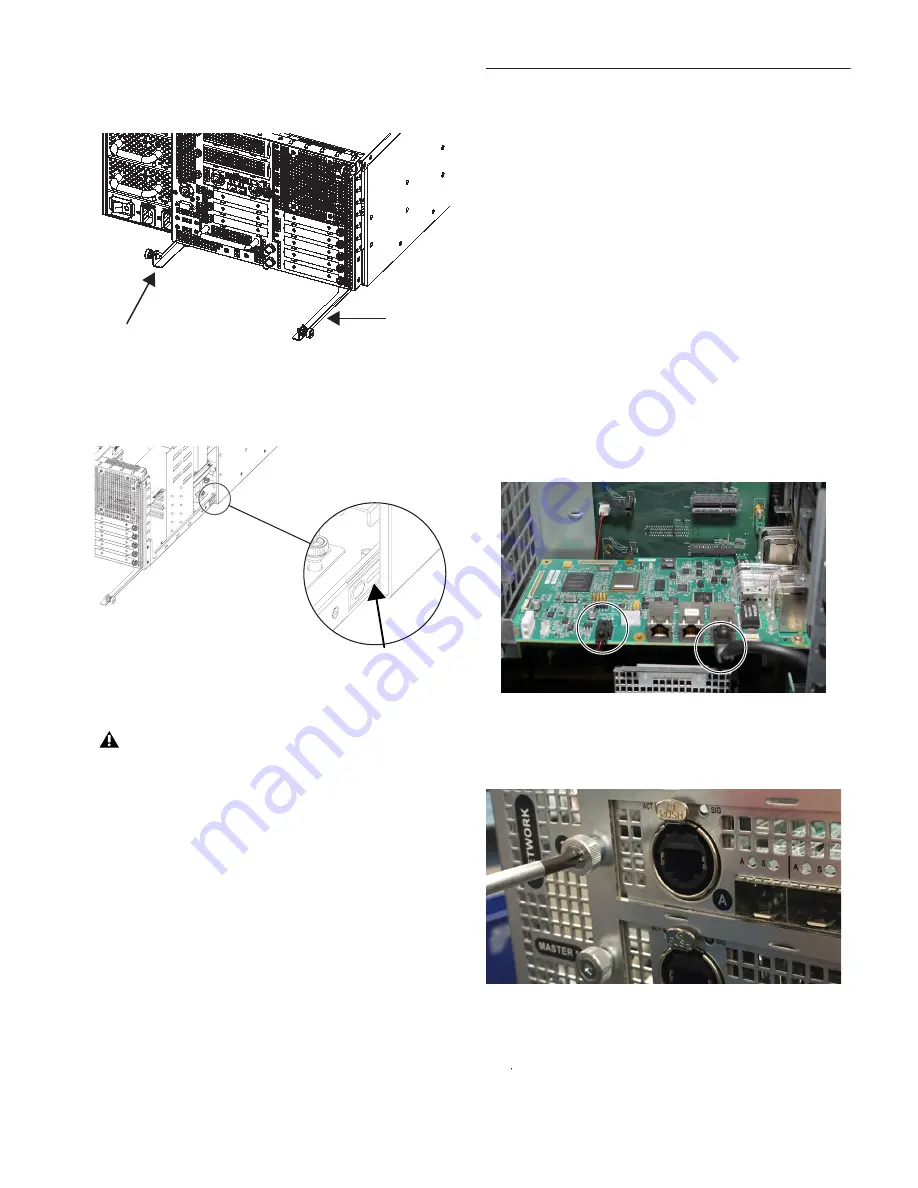
Simultaneously pull the two bottom thumbscrews outward so
the latches they are attached to are fully extended, as shown in
Figure 2.
6
Using the handle, slowly slide the core partially out, locate the
interior catch on the right side of the tray, and press it to release
the core from the chassis.
7
Slowly slide the core out of the E6L chassis completely, and
place it on your work surface.
Remove AVB-192 Network Cards
E6L-192 and E6L-144 Only
Before installing an MLN-192 Card in an E6L-192 or E6L-144,
both AVB-192 Network Cards must be temporarily removed.
If you are installing into an E6L-112, skip to “E6L-112” on
page 5.
To remove AVB-192 Network Cards:
1
Disconnect the short Ethernet cable that connects the upper
AVB-192 Network Card (slot 2/middle) to the lower AVB-192
Network Card (slot 1/lower). Set the cable aside (you will
re-install it later).
2
Disconnect all cables connected to the AVB-192 Network card
in slot 1/Master.
• Disconnect the small power cable assembly at left from its
connector on the AVB-192 card. Use your thumb to depress
the catch, then pull to disconnect the cable.
• Disconnect the Ethernet cable that connects the E6L to the
AVB-192 card.
3
With all cables removed,
\
loosen the exterior captive thumb-
screw that secures the faceplate of the Network 2 AVB card to
the E6L, then repeat for the Master AVB card.
Figure 2. Latches fully extended
Figure 3. Location of the interior catch
The core will not slide out of the E6L chassis until the
latches are fully extended and the catch has been released.
Figure 4. AVB-192 cables to disconnect (Master AVB-192 shown)
Figure 5. Loosening the exterior thumbscrew
Содержание Milan MLN-192
Страница 16: ...MLN 192 Option Card Installation 16...


