


MADI-192 MADI Option Card Installation Guide
2
7
Slowly slide the core out of the E6L chassis completely and
place it on your work surface.
Installing the Card
The E6L engine core has eight half-length PCIe slots for Option
cards.
E6L-192/144
Install MADI-192 cards into Option slots 1–4 only.
E6L-112
Install one MADI-192 card in Option slot 1. If using two
MADI-192 cards, the second must be installed in AVB Network
slot 3 which requires replacing the faceplate on the second
MADI-192 card as explained later in this guide.
When standing at the back of the E6L engine, Option slots 1–5
are at the lower right and slots 6–8 are in the middle (below the
AVB Network slots) as shown in Figure 4.
Always install new MADI-192 cards in the lowest numbered
available slot. For example, if one MADI-192 card is already in-
stalled in Option slot 1, install the next MADI-192 card in slot 2
(E6L-192/144), or into AVB Network slot 3 (E6L-112 only).
The following instructions show a MADI-192 card being in-
stalled into Option slot 1 (all E6L engines), as well as how to in-
stall a second MADI-192 card into AVB Network slot 3
(E6L-112 only).
Before installing cards in slots 1–4 you must first remove the card
retaining bracket.
To remove the card retaining bracket and install the card:
1
Looking inside the core from the right side, locate the E6L
card retaining bracket.
2
Locate the thumbscrew that secures the bracket to the bottom
of the unit and loosen it completely.
3
Locate the two Phillips head screws on the top of the bracket,
remove them, carefully remove the bracket, and set them all
aside.
4
Locate the next available Option Card slot below any currently
installed Option card(s), and remove the blank faceplate. The
faceplate can be recycled or discarded.
The core will not slide out of the E6L chassis until the
latches are fully extended and the catch has been released.
If you experience any resistance, make sure the latches are
fully extended before pulling.
Figure 4. E6L Option card slots 1–4 (lower right) and AVB Network
slot 3 (top)
IN
OUT
NETWORK
MASTER 1
WORD CLOCK
UTIL
EXPANSION
2
3
6
7
8
1
2
3
4
5
AVB-192
ACT
SIG
ACT
SIG
ACT SIG
ACT SIG
A
B
1-4
AVB Network slot 3
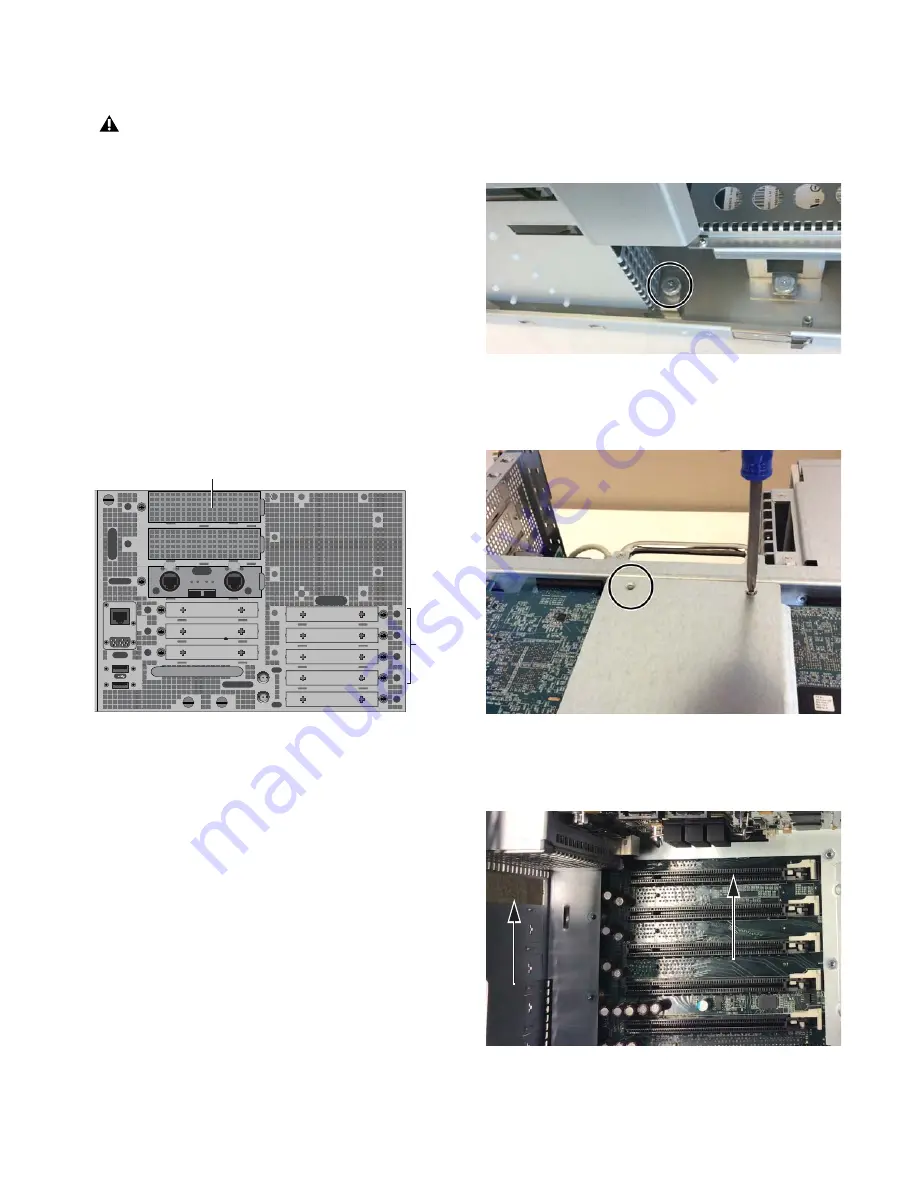
Figure 5. E6L card bracket thumbscrew
Figure 6. Removing one of two card bracket screws
Figure 7. Open Option card slot (right) and blank faceplate removed
(left)


