


8-4
System Administrator’s Guide
Selecting the Inlay
This option only appears in the Easy Setup menu. You must know the name of the RFID
inlay being used.
Names and pictures of the approved inlays are in the RFID Printer
Setup Utility.
Load RFID supply before you enter values in the Easy Setup menu.
The printer contains a list of approved inlays. If your RFID inlay is not listed, it may not
be qualified for use or update the printer’s
RFID inlay database (
d46ESxx.db
). See
“
Updating the RFID Inlay Database
” for more
information. The
RFID Printer Setup
Utility
has database updates and downloads.
1.
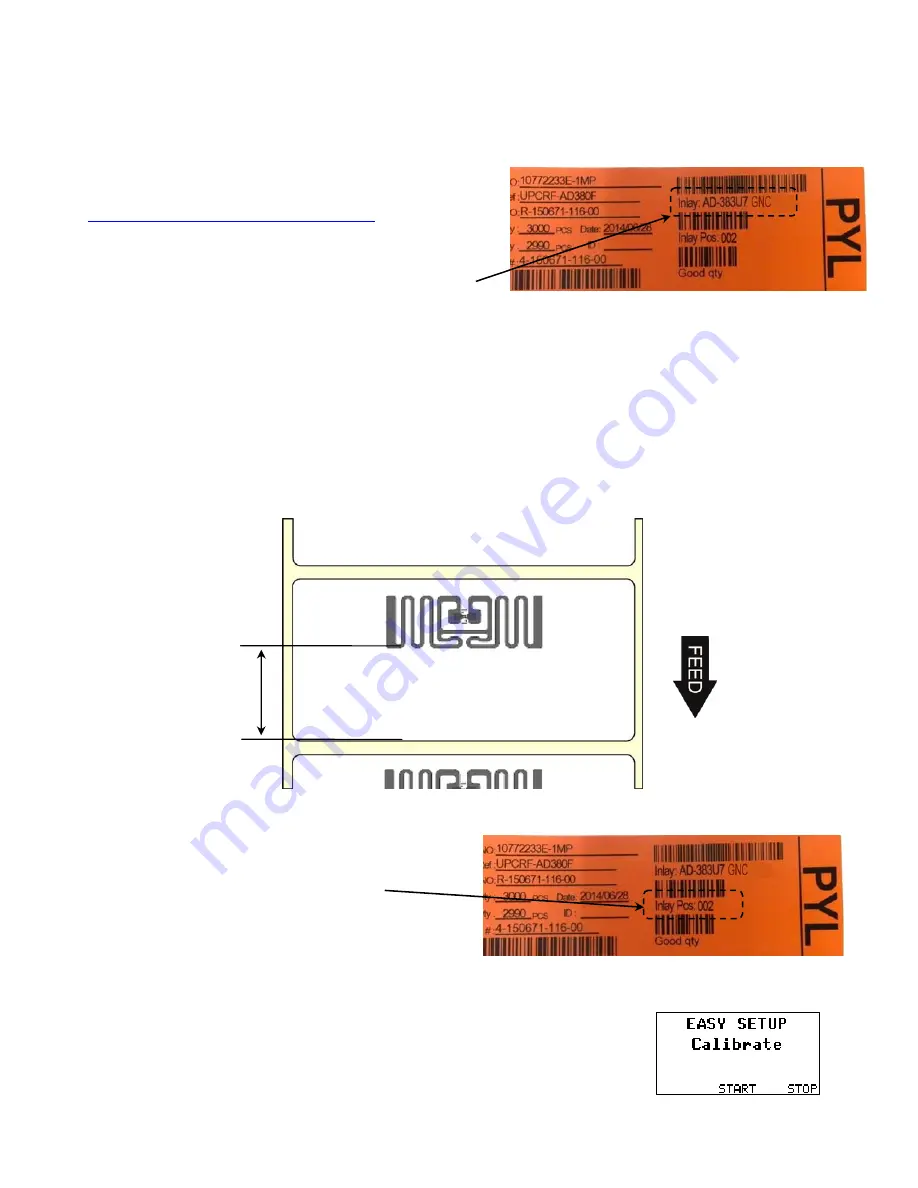
The inlay’s name may be on the supply core’s
label; otherwise, look at pictures of the approved inlays in the
RFID Printer Setup
Utility
. For example, AD-383U7 GNC.
2.
Press
or
to select your inlay, then press
SET
. “Custom” appears as the
selected inlay’s name if the print speed is increased or any RFID settings are
changed.
Entering the Inlay Position
This option only appears in the Easy Setup menu. The inlay position must be entered in
millimeters. Measure the inlay position as shown to the nearest whole millimeter. For
example, if the measured distance is 7.25mm, enter 7mm.
Note:
Press the left function button to change the amount (by 1, 10, or 100).
1.
The inlay’s position (in millimeters) may
be on the supply core’s label. For example,
enter 002 as 2.
2.
Enter the inlay’s position, then press
SET
.
Select To
Decrease the inlay distance.
Increase the inlay distance.
The printer may prompt to calibrate when exiting the
Easy Setup menu. Press
START
to calibrate or
STOP
to cancel.
The calibration prompt appears when the inlay type or the inlay
distance changes.
M e a su re t hi s
d i s t a nc e
Содержание Monarch Tabletop Printer 1
Страница 10: ...1 4 System Administrator s Guide...
Страница 30: ...3 8 System Administrator s Guide...
Страница 52: ...6 14 System Administrator s Guide...
Страница 56: ...7 4 Operator s Handbook...
Страница 90: ...B 2 Operator s Handbook...
Страница 93: ......


