www.avenview.com
Page 11
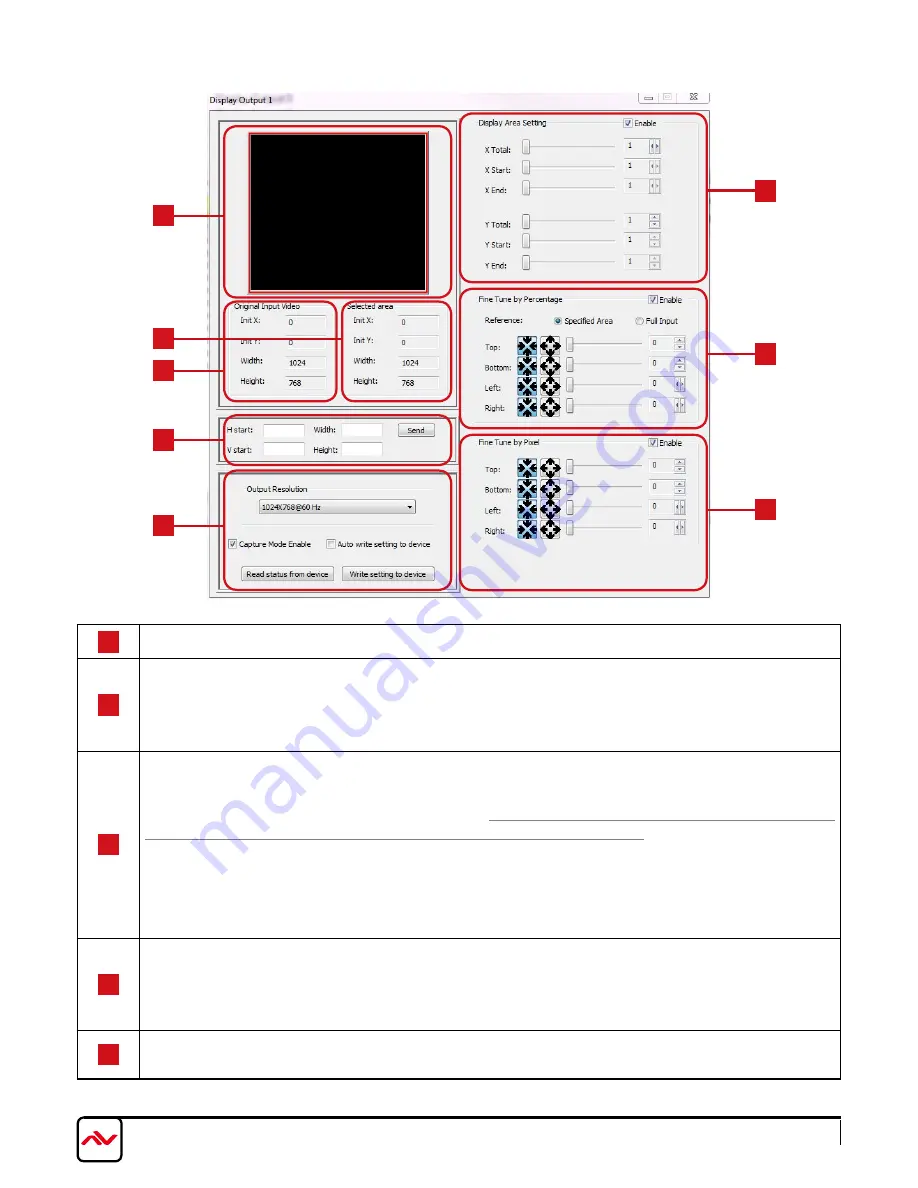
1
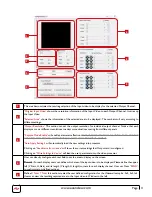
This area demonstrates the resulting selection of the Input video to be display for the selected Output Channel.
2
“Original Input Video”
shows the resolution information of the Input Video to each Output Channel. It varies up
the Input Video
“Selected Area”
shows the information of the selected area to be displayed. The numbers will vary according to
different settings.
3
“Output Resolution”
This section can set the output resolution for individual output channel. Notice that each
display can run at different resolutions to adapt more situations coming from different panels
“Capture Mode Enable”
will enable parameters effective.
IF USERS DISABLED THIS SELECTION, EACH OUTPUT
CHANNEL WILL DISPLAy SIMPLy THE FULL DISPLAy OF THE INPUT SOURCE.
“Auto Apply Settings”
will automatically load the new settings into processor.
Clicking on
“Read status from device”
will show the current settings that Output card is configured.
Clicking on
“Write Settings to device”
will load the user parameters into the video processor.
4
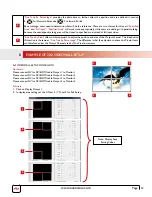
User can directly configure each text field to set the area to display on the screen.
Remark: For each display, users can define which area of the input video is to be displayed. Please define the upper-
left (V Start, H Start) and its length (V length, H length) corners for each display channel. User can Press
“SEND”
to confirm custom defined settings.
5
Define
X Total, Y Total,
this
section creates the user defined configuration for the Videowall setup Ex. 2x2, 3x3,1x4.
Users can view the resulting captured area to the Input video in Window to the left.
1
4
5
5
2
2
3
3
Содержание DVI-VIDEOWALL-9X
Страница 7: ...www avenview com Page 4...

