background image


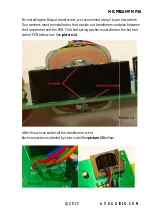
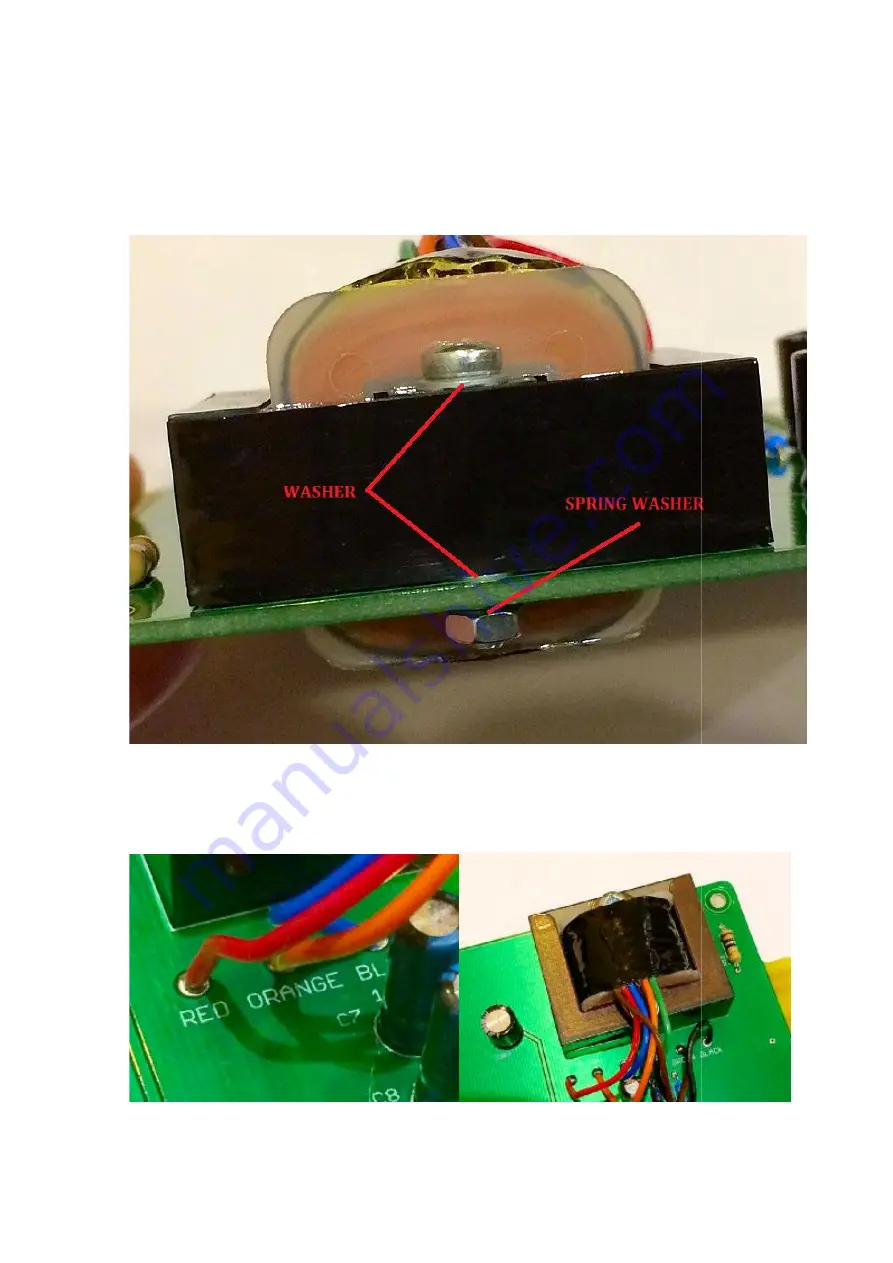
For installing the Output transformer, we recommend using 3 types of washers
Two washers must be installed on the top side out transfor
the transformer and the PCB. The third spring washer is installed on the bottom 
side of PCB bellow nut. See 

picture 14


After this we can solder all the transformer wires
Each connection is labeled by color cod


        Picture 15 


MIC PREAMP MP36

©

2017                  AVDAUDIO.COM

For installing the Output transformer, we recommend using 3 types of washers
Two washers must be installed on the top side out transformer and also between 
the transformer and the PCB. The third spring washer is installed on the bottom 

picture 14

.   

                                                                                                                        P

After this we can solder all the transformer wires. 
Each connection is labeled by color code! See 

picture 15 

bellow. 

MIC PREAMP MP36 

AVDAUDIO.COM 

For installing the Output transformer, we recommend using 3 types of washers. 

mer and also between 

the transformer and the PCB. The third spring washer is installed on the bottom 

Picture 14 

Содержание MP36

Страница 1: ... model MP36 This preamp was replicated from the vintage API style 528 or 536 module Much time has been spent to create input and output transformers which possess the same sound and characteristics of the original API transformers The AVD versions of these transformers are faithful reproductions and we think you them And we are proud we can have did same best sound It is our hope that these pres a...

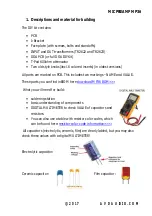
Страница 2: ...ULTIMETER Electrolytic capacitor Ceramic capacitor MIC PREAMP MP36 2017 AVDAUDIO COM Descriptions and material for building Face plate with screws bolts and standoffs INPUT and OUT transformers TR2622 and TR2623 DOA PCB or full DOA DIY Kit Pad 600ohm attenuator Two old style knobs incl 6 colored inserts in oldest versions All parts are marked on PCB This includes two markings NAME and VALUE parts ...

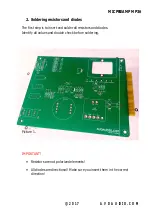
Страница 3: ...re directional Make sure you insert them in the correct direction MIC PREAMP MP36 2017 AVDAUDIO COM Soldering resistors and diodes The first step is to insert and solder all resistors and diodes Identify all values and double check before soldering Resistors are not polarized elements directional Make sure you insert them in the correct MIC PREAMP MP36 AVDAUDIO COM directional Make sure you insert...

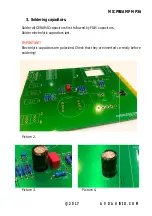
Страница 4: ...ore soldering Picture 2 Picture 3 Picture 4 MIC PREAMP MP36 2017 AVDAUDIO COM Soldering capacitors Solder all CERAMIC capacitors first followed by FILM capacitors Solder electrolytic capacitors last Electrolytic capacitors are polarized Check that they are inserted correctly before Picture 3 Picture 4 MIC PREAMP MP36 AVDAUDIO COM Electrolytic capacitors are polarized Check that they are inserted c...

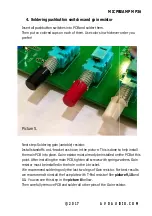
Страница 5: ...ps on each of them Use colors in whichever order you Next step Soldering gain variable resistor bracket as shown in the picture This is done to help install the main PCB into place Gain resistor must already be installed on the PCB at this fter installing the main PCB tighten all screws with spring washers Gain resistor must be installed in the hole on the L bracket We recommend soldering only the...

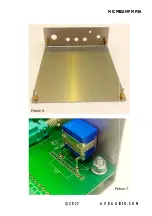
Страница 6: ...Picture 6 MIC PREAMP MP36 2017 AVDAUDIO COM Picture 7 MIC PREAMP MP36 AVDAUDIO COM Picture 7 ...

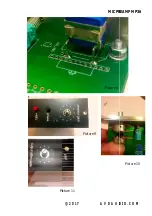
Страница 7: ...Picture 11 MIC PREAMP MP36 2017 AVDAUDIO COM Picture 8 Picture 9 Picture 11 MIC PREAMP MP36 AVDAUDIO COM Picture 10 ...

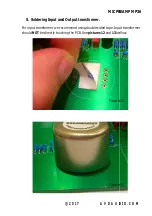
Страница 8: ...he PCB MIC PREAMP MP36 2017 AVDAUDIO COM Soldering Input and Output transformer For input transformer we recommend using double sided tape Input transformer be directly touching the PCB See pictures 12 and 13 bellow Picture 12 Picture 13 MIC PREAMP MP36 AVDAUDIO COM sided tape Input transformer bellow Picture 12 Picture 13 ...

Страница 9: ...IO COM For installing the Output transformer we recommend using 3 types of washers Two washers must be installed on the top side out transformer and also between the transformer and the PCB The third spring washer is installed on the bottom picture 14 P After this we can solder all the transformer wires Each connection is labeled by color code See picture 15 bellow MIC PREAMP MP36 AVDAUDIO COM For...

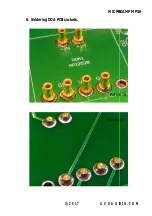
Страница 10: ...6 Soldering DOA PCB sockets MIC PREAMP MP36 2017 AVDAUDIO COM Soldering DOA PCB sockets Picture 16 Picture 17 MIC PREAMP MP36 AVDAUDIO COM Picture 16 Picture 17 ...

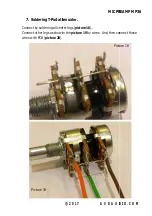
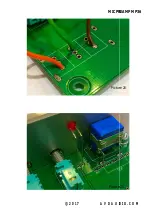
Страница 11: ...the wires with PCB picture 20 Picture 19 MIC PREAMP MP36 2017 AVDAUDIO COM Pad attenuator Connect by soldering all center legs picture 18 Connect other legs as show in the picture 19 by wires And then connect these Picture 18 MIC PREAMP MP36 AVDAUDIO COM by wires And then connect these Picture 18 ...

Страница 12: ...MIC PREAMP MP36 2017 AVDAUDIO COM Picture Picture MIC PREAMP MP36 AVDAUDIO COM Picture 20 Picture 21 ...

Страница 13: ... And again attach the PCB to L bracket Next install the face plate Attach T Pad and then install knobs with colored inserts of your choice The preamp is now complete For comments or recommendations send mail please to info avdaudio com ...

Отзывы: