


Before you begin
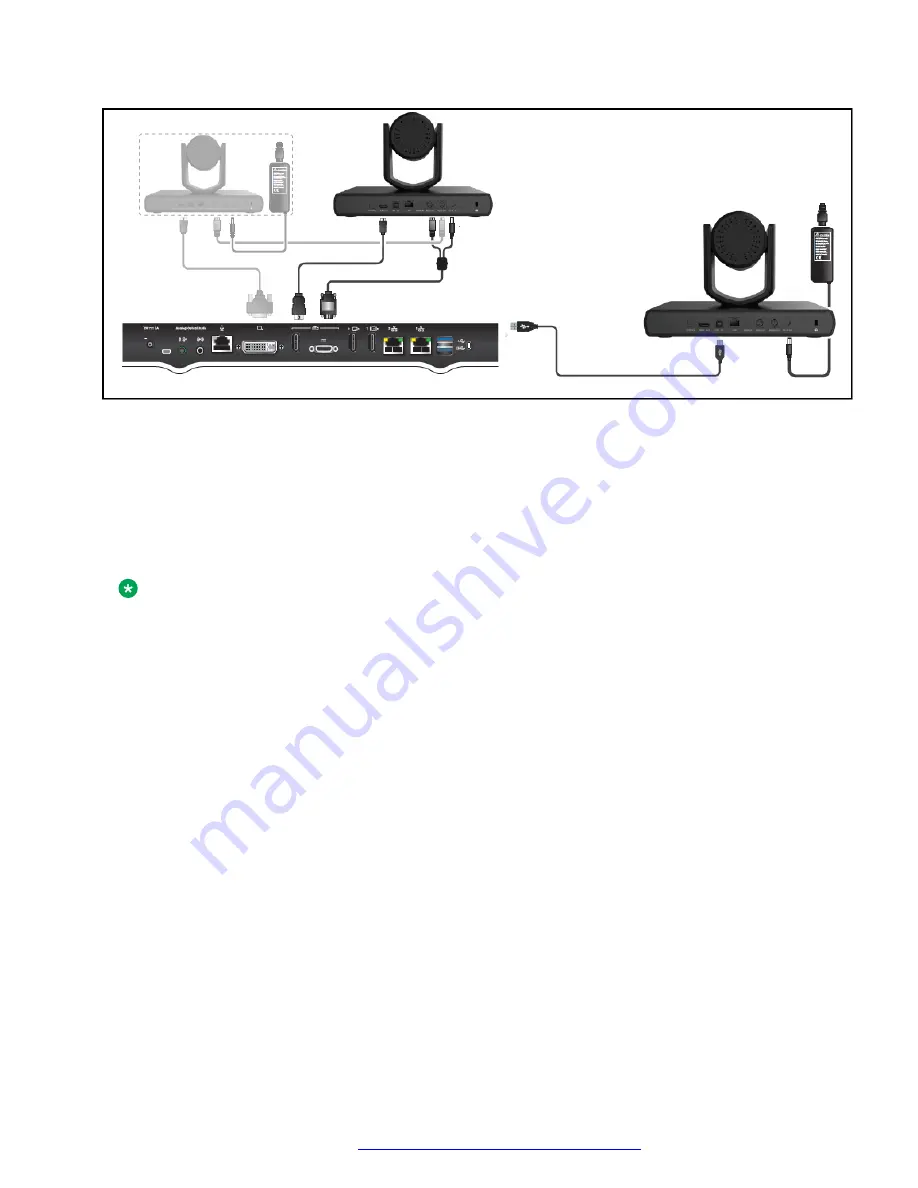
• Connect one side of the HDMI cable to the Avaya Room Camera RC100 HDMI OUT port and
the other side to the Avaya XT Series DVI/HDMI IN 2 port.
• Connect the VISCA Control Cross cable to the RS232 OUT port of the first Camera and the
RS232 IN of your Avaya Room Camera RC100.
• Connect the power supply plug to the DC IN 12V port of the Avaya Room Camera RC100
and turn on the Avaya XT Series endpoint.
Note:
You can connect a line-level audio source to the AUDIO IN Camera connector. The audio is
present in the Avaya XT Series endpoint through HDMI.
• Enable the advanced settings for the Avaya XT Series endpoint.
• Log in to the Avaya XT Series web interface.
Procedure
1. Do one of the following:
• On the endpoint main menu, click
Configure
.
• On the web interface, click
Administrator Settings
.
2. On the endpoint, click
Advanced
.
The default PIN for Advanced settings on the endpoint is 1234.
If your administrator configures a PIN to access the advanced settings on the endpoint,
Avaya XT Series prompts you to enter the PIN. After you enter the PIN, Avaya XT Series
displays the Advanced window.
3. On the endpoint and web interface, click
I/O Connections
>
Cameras
>
DVI/HD2
.
4. Configure the following fields:
•
Enable
:
Yes
Configuring Avaya Room Camera RC100 as an additional HD camera for Avaya XT Series
May 2022
Using Avaya Room Camera RC100
25


