background image

 Using Quick Edition IP Telephones

Avaya Quick Edition Release 4.0, 46xx Telephone User Guide

June 2008

29


6. Press 

ON

 to enable the waiting tone or 

OFF

 to disable it.

When the call waiting tone is enabled, you will hear a beep when a second call comes in. 

7. Press 

Exit

.

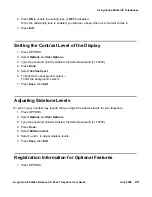
Setting the Contrast Level of the Display

1. Press OPTIONS.

2. Select 

Options

 and 

User Options

.

3. Type the password (initially enabled, the default password is 123456).

4. Press 

Done

.

5. Select 

Contrast level

.

6. To brighten the background, select 

-

To dim the background, select 

+

7. Press 

Save

, then 

Exit

.

Adjusting Sidetone Levels

An echo in your handset may require that you adjust the sidetone levels for your telephone.

1. Press OPTIONS.

2. Select 

Options

 and 

User Options

.

3. Type the password (initially enabled, the default password is 123456).

4. Press 

Done

.

5. Select 

Sidetone level

.

6. Select 

and 

+

. to adjust sidetone levels.

7. Press 

Save

, then 

Exit

.

Registration Information for Optional Features 

1. Press OPTIONS.

Содержание IP Telephones

Страница 1: ...Avaya Quick Edition Release 4 0 Telephone User Guide 16 601411 Release 4 0 June 2008 Issue 5 ...

Страница 2: ... Software License USE OR INSTALLATION OF THE PRODUCT INDICATES THE END USER S ACCEPTANCE OF THE TERMS SET FORTH HEREIN AND THE GENERAL LICENSE TERMS AVAILABLE ON THE AVAYA WEBSITE AT http support avaya com LicenseInfo GENERAL LICENSE TERMS IF YOU DO NOT WISH TO BE BOUND BY THESE TERMS YOU MUST RETURN THE PRODUCT S TO THE POINT OF PURCHASE WITHIN TEN 10 DAYS OF DELIVERY FOR A REFUND OR CREDIT Avaya...

Страница 3: ...ing to Voicemail Messages 15 Using Directories 18 Status 20 Do Not Disturb 22 Paging 22 Speed Dial 23 Accessing Telephone Applications and Options 24 Programmable Softkeys 25 Accessing User Options 26 Setting Password Options 27 Adjusting the Volume 27 Muting the Active Microphone 27 Changing the User Language 28 Choosing a Personalized Ringer Tone 28 Setting the Call Waiting Tone 28 Setting the C...

Страница 4: ...Contents 4 Avaya Quick Edition Release 4 0 46xx Telephone User Guide June 2008 ...

Страница 5: ...Avaya Quick Edition Release 4 0 46xx Telephone User Guide June 2008 5 Using Quick Edition IP Telephones Introduction ...

Страница 6: ...or press HEADSET 2 Press REDIAL to dial the last number that you dialed Note Note Pressing REDIAL when the phone is idle will display the outgoing call log REDIAL will dial the telephone not the voicemail To make a call from the list of call logs You must subscribe to Caller ID service for the name and number of incoming calls to be recorded in the Incoming list 1 Press OPTIONS and select Call Log...

Страница 7: ...ing call Press Answ or Ignore while the telephone is ringing If you choose to answer the first call is put on hold Tip Tip When you have multiple incoming calls four or more for the 4610 five or more for the 4621 you must transfer park or place the call on hold before answering the next one Call Pickup Call pickup permits a user to answer a call that is ringing on another telephone in the same pic...

Страница 8: ... the caller if all call display lines are consumed by unanswered call pickup calls 1 Visual alert the interface will display the calling party number and the called party name Audio alert the telephone will provide an audible page tone ring 2 Press Answ to answer the call press Ignore to ignore the call To enable or disable an audio or visual alert 1 Access User Options see page 26 2 Select Call P...

Страница 9: ...r press FrDir and select the number 3 After the dialed party answers your call announce the caller 4 When you are ready to transfer the call press TRANSFER and press Ok To transfer a call without speaking to the receiving party 1 With the calling party on the line press TRANSFER 2 When you hear the dial tone dial the number or press FrDir and select the number 3 When the telephone at the far end b...

Страница 10: ...ieve Conference Calls You can create a conference call with three participants Each of the other participants can in turn add one additional participant to the conference call for a maximum of five parties per conference call To create a conference call with three participants 1 Call the first party 2 When the call is answered press CONFERENCE 3 Press Dial and dial the number of the second party o...

Страница 11: ...r 1 Press CFwd 2 Select All Calls or After 3 Rings or On Busy 3 Press Chg and then select Directory or press the indicated dialpad key 4 If you want to switch to your Personal directory press MyDir 5 Select the Line Feature button beside the number to which calls will be forwarded 6 Press Save then Exit To forward calls to an external number 1 Press CFwd 2 Select All Calls or After 3 Rings or On B...

Страница 12: ... Chg 4 Press the or softkey to decrease or increase the number of rings 5 Do one of the following Press 1 to redirect calls to voicemail and then select Save Press 2 and select the Line Feature button beside the number to which calls will be redirected or select MyDir to choose a number from your Personal directory Press 3 enter the number and select Next to redirect calls to your specified number...

Страница 13: ...redirect 1 Access User Options 2 Select Voicemail 3 Select Zero Redirect 4 Press On or Off then Exit Using Call Logs Your telephone will record 100 incoming and 100 outgoing logs When the number exceeds 100 the oldest record is deleted To view call log entries 1 Press OPTIONS 2 Press Call Log 3 Press PAGE LEFT and PAGE RIGHT to view the next or previous set of entries To edit a call log number bef...

Страница 14: ...ng Clears the list of incoming calls Clear Outgoing Clears the list of outgoing calls Clear All Clears the missed call counter and both lists of calls 5 Press Yes then Exit Using Voicemail Record Your Name and Greeting To record your name 1 Press OPTIONS 2 Select Options and User Options 3 When you are prompted enter the password the default password is 123456 4 Press Done Voicemail then Record Na...

Страница 15: ...80 of the voice mailbox capacity of 20 minutes the telephone display will provide a warning Delete old messages so that you can continue to receive new ones The maximum length of each message is 2 minutes To listen to a voicemail message using Vmail 1 Press Vmail and enter the password and then press Done 2 Select the Line Feature button beside the entry that you want to play 3 Press Play and then...

Страница 16: ...message press Lstn You can hear the caller speaking but the caller cannot hear you 2 To speak to the caller press Answ To access your voicemail using any telephone To retrieve voicemail messages through the PSTN the network must be have a PSTN gateway 1 Using any touch tone telephone that has access to the one X Quick Edition network dial your extension 2 Wait for voicemail to answer the call 3 As...

Страница 17: ...cord 4 Add additional recording to the name Exit without changes and return to record name menu 3 Record personal greeting Stop recording 1 Satisfied and store 2 Listen to message 3 Erase and re record 4 Add additional recording to the message Exit without changes and return to personal greeting menu 4 Delete personal greeting and use standard greeting 5 Change password 6 Configure zero redirect 1...

Страница 18: ...hen MyDir to view your Personal directory 2 Press PAGE LEFT or PAGE RIGHT to move through directory pages To change your name in the Corporate directory 1 Press OPTIONS and log in to User Options 2 Press Name and then Chg 3 Type a name starting with the last name and ending with the first name for example Young Mary Press Bksp to delete characters if necessary Return to main menu Exit voicemail sy...

Страница 19: ...ect Log 2 Select the Line Feature button beside the number that you want to copy 3 Press Copy then select My Personal Dir 4 Press Ok then Exit To copy an entry from a voicemail record 1 Press Vmail and enter the password and then press Done 2 Select the Line Feature button beside the voicemail record that you want to copy 3 Press Copy then select My Personal Dir Case softkey To change a character ...

Страница 20: ... the Line Feature button beside the entry that you want to delete 3 Press Del then Exit Status Status information is the advertisement of a user s availability to communicate with others You can monitor a maximum three telephones on the 4610SW IP and four on the 4621SW IP You cannot monitor Auto Attendant group external numbers A10 analog extensions SIP softphone or WiFi sets When Status is set ma...

Страница 21: ... monitored list or StsRm to remove from your monitored list To view the status information for a monitored user 1 The home screen will display monitored users on the right and active calls on the left 2 Select the Line Feature button beside the entry for which you want to view information To dial a monitored user 1 Select the Line Feature button beside the entry 2 Press Dial To configure your own ...

Страница 22: ...telephone from ringing or receiving pages 1 Press OPTIONS and select DND or press a programmed DND softkey 2 Select ON or OFF to toggle between turning the feature on and off Paging To broadcast an announcement to a paging zone 1 Press OPTIONS and select Paging 2 Lift the handset and perform one of the following actions select General Page to broadcast a message to all devices in the network selec...

Страница 23: ...d Dial number 6 Press Save then Exit To copy an entry from the corporate directory 1 Press Dir 2 Select the Line Feature button beside the number that you want to copy 3 Press Copy 4 Press Speed Dial 5 Select the Line Feature button beside any available Speed Dial number 6 Press Ok then Exit To copy an entry from the call log 1 Select Log 2 If you want to copy an entry from the list of dialed numb...

Страница 24: ...ss Next 5 If required edit the number then press Next 6 If you want to change the Speed Dial button assignment select the Line Feature button beside the entry that you want to use 7 Press Save then Exit To delete a speed dial entry 1 Press OPTIONS and select Speed Dial 2 Select the Line Feature button beside the entry that you want to delete 3 Press Del then Ok 4 Press Exit Accessing Telephone App...

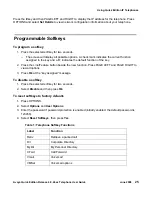
Страница 25: ...ates the default function of the key 2 Press the Line Feature button beside the new function Press PAGE LEFT and PAGE RIGHT to view all options 3 Press Ok at the key assigned message To disable a softkey 1 Press the selected softkey for two seconds 2 Select Disable and then press Ok To reset softkeys to factory defaults 1 Press OPTIONS 2 Select Options and User Options 3 Enter the password if pass...

Страница 26: ...2 Select Options and User Options Page Paging DND Do Not Disturb MySts My Status Lgout Outgoing call log Log Incoming call log SDial Speed Dial Tw Teleworker RngTn Personalized ringing CWtTn Call waiting tone CnLvl Contrast level Grtn Greeting night switching will let you select the auto attendant greeting key is programmed by the administrator PkAny Pick up a call selected by the system within yo...

Страница 27: ...ssword protection 1 Access the User Options menu 2 Select Password 3 Select Turn Pswd OFF or Turn Pswd ON 4 Press Yes to activate or deactivate password protection 5 Press Exit Note Note Disabling password protection for accessing user options does not disable the voicemail password Adjusting the Volume Use Volume Up and Volume Down to adjust the handset speakerphone headset or ringer volume The v...

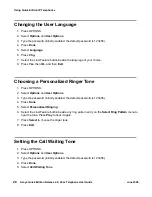
Страница 28: ...hen Exit Choosing a Personalized Ringer Tone 1 Press OPTIONS 2 Select Options and User Options 3 Type the password initially enabled the default password is 123456 4 Press Done 5 Select Personalized Ringing 6 Select the Line Feature button beside any ring pattern entry on the Select Ring Pattern menu to hear the tone Press Play to hear it again 7 Press Select to choose the ringer tone 8 Press Exit...

Страница 29: ...rd initially enabled the default password is 123456 4 Press Done 5 Select Contrast level 6 To brighten the background select To dim the background select 7 Press Save then Exit Adjusting Sidetone Levels An echo in your handset may require that you adjust the sidetone levels for your telephone 1 Press OPTIONS 2 Select Options and User Options 3 Type the password initially enabled the default passwo...

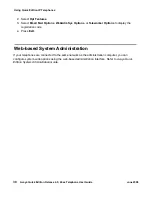
Страница 30: ...ptions WebAdm Sys Options or Teleworker Options to display the registration code 4 Press Exit Web based System Administration If your telephones are connected to the same network as the administration computer you can configure system wide options using the web based administration interface Refer to Avaya Quick Edition System Administration Guide ...

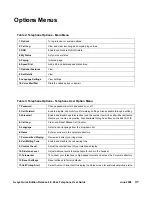
Страница 31: ...vailable through a softkey 3 Voicemail Enable and disable operator redirect and the number to which a call will be redirected Record your name and greeting Also available through a softkey on the 4621 SW IP 4 Call Log Clear and Reset Missed Call Counter 5 Language Select a user language from the drop down list 6 Name Enter your name in the corporate directory 7 Personalized Ringing Review and sele...

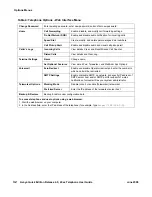
Страница 32: ...ar Log Terminal Settings Name Change name Set Optional Features View e mail Fwd Teleworker and WebAdm Sys Options Voicemail Zero Redirect Enable and disable Operator redirect and enter the number to which a call will be redirected SMTP Settings Enable or disable SMTP on network and specify IP address of SMTP server host and or SMTP port for support of e mail notification of voicemail See your syst...

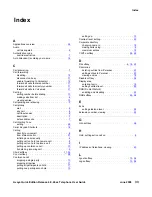
Страница 33: ...monitor 21 initiating a call manually 6 putting call on hold to answer a call 9 putting call on hold to place a call 8 setting up conference call 10 transferring incoming call 9 CFwd softkey 11 25 CnLvl softkey 26 Conference call dropping a single party 10 dropping all parties 11 putting all participants on hold 11 putting one participant on hold 10 setting up 10 Contrast level setting 29 Corporat...

Страница 34: ...up alert 8 any call 8 call to extension 8 description 7 list available calls 7 PkAny softkey 8 26 PkExt softkey 8 26 PkLst softkey 7 26 Presence see Status Programmable softkeys disable a softkey 25 list of functions 25 program a softkey 25 reset to factory default 25 R Recording name for personalized greeting 14 Registration information for special features 29 Restricted calls authorization code ...

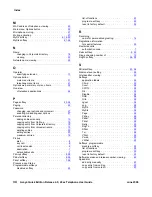
Страница 35: ...play area 18 Transferring a call attended transfer 9 blind transfer 9 directly to voice mail box 9 Tw softkey 26 U User Keypad Shortcuts 16 User Options accessing 26 User Options Options button contrast level menu items 29 language menu items 28 password menu items 27 ringtone menu items 28 set details menu items 25 sidetone level menu items 29 voicemail keypad shortcuts 16 voicemail menu items 14...

Страница 36: ...36 Avaya Quick Edition Release 4 0 46xx Telephone User Guide June 2008 Index ...

Отзывы: