


Avaya B179 SIP Conference Phone
Installation and Administration Guide
86
d. The certificate is saved to the location specified while setting up the CA.
3. Install the certificate
a. Import the certificate to the web browser.
4. Export private key
a. Go to Internet Options > Content > Certificates, select the certificate you installed, and click
Export.
b. Select Yes, export the private key, and click Next.
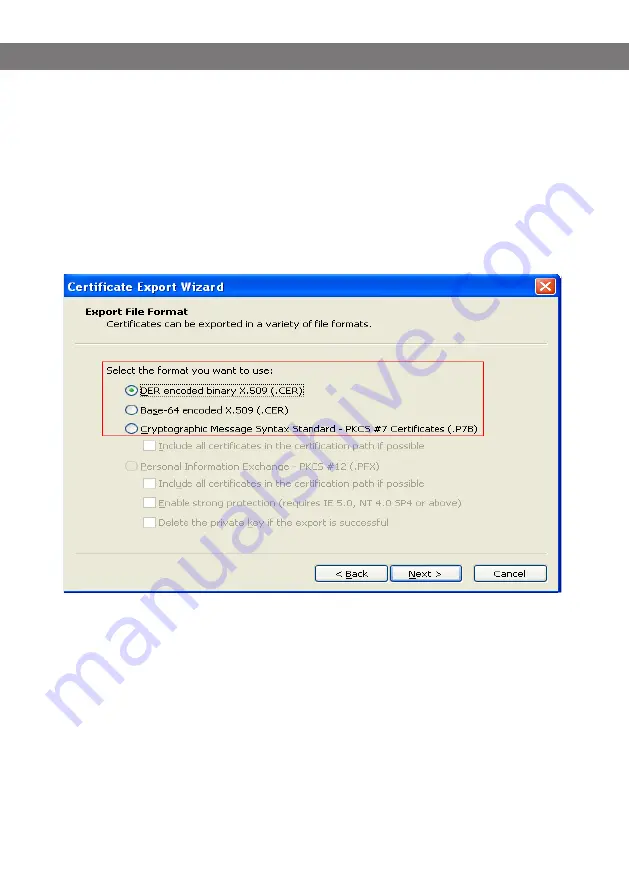
c. Select the format in which you want to export the certificate file, and click Next.
d. Specify the file name and browse to the location to where the certificate must be exported.
6. Convert the certificates to .PEM format
The B179 phone supports certificates in the .PEM format only. You must convert the certificates
and private keys to .PEM before using in the B179 phones.
a. Use the following Openssl commands to convert the files:
From .DER to .PEM
openssl x509 -inform der -in certificate.cer -out certificate.pem
From .PFX to .PEM
openssl pkcs12 -in certificate.pfx -out certificate.cer -nodes
Next steps
Browse to the .PEM files from the B179 web UI to use EAP TLS mode of authentication.
Содержание B179 SIP
Страница 1: ...Avaya B179 SIP Conference Phone Installation and Administration Guide Issue 1 March 2016...
Страница 24: ...Avaya B179 SIP Conference Phone Installation and Administration Guide 20 SIP Select Settings SIP...
Страница 30: ...Avaya B179 SIP Conference Phone Installation and Administration Guide 26 NETWORK Select Settings Network...
Страница 49: ...Avaya B179 SIP Conference Phone Installation and Administration Guide 45...


