


Job Aid: Installing the upgrade memory kit in the G450 / G430 Media Gateway
10 Job Aid: Installing the upgrade memory kit in the G450 / G430 Media Gateway
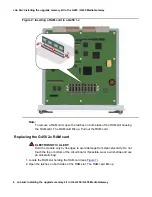
Replacing the G430 cover
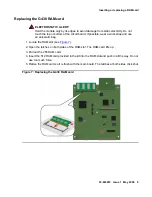
ELECTROSTATIC ALERT:
ELECTROSTATIC ALERT:
Do not touch any components on the printed circuit board.
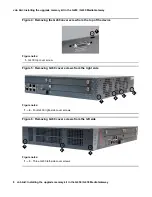
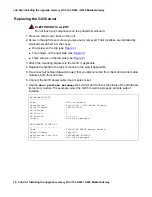
1. Place the G430 cover back on the unit.
2. Screw in the eight cover screws you previously removed. Their locations are indicated by
small arrows etched into the cover:
●
●
Four screws on the right side (see
●
Three screws on the left side (see
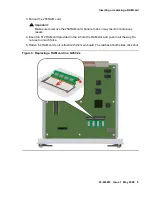
3. Attach the mounting brackets to the G430, if applicable.
4. Replace the G430 in the rack or mount on the wall, if applicable.
5. Re-connect all cables (data and power) that you disconnected from the G430 and its media
modules, both front and rear.
6. Connect the G430 power cable into a mains socket.
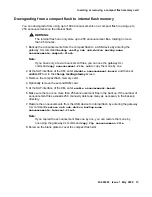
7. Use the
show platform mainboard
CLI command to check the status of the G430 and
its memory module. For example, when the G430 is working properly, sample output
includes:
MAINBOARD BOARD
---------------
Type : G430 mainboard
Description : Avaya Inc., G430 Media Gateway
Serial Number : 08IS26191011
HW Vintage : 1
HW Suffix : C
FW Version : 29.22.50
Faults : No Fault Messages
RAM MEMORY SOCKET #1
--------------------
Type : 512MB DDR SDRAM memory module
Serial Number : 0b2c7605
Manufacture Part Num : 64A6M64M8L-A06EWQU
Faults : No Fault Messages