


3 XGT Project Settings
© Copyright Reserved Autonics Co., Ltd.
13
3
XGT Project Settings
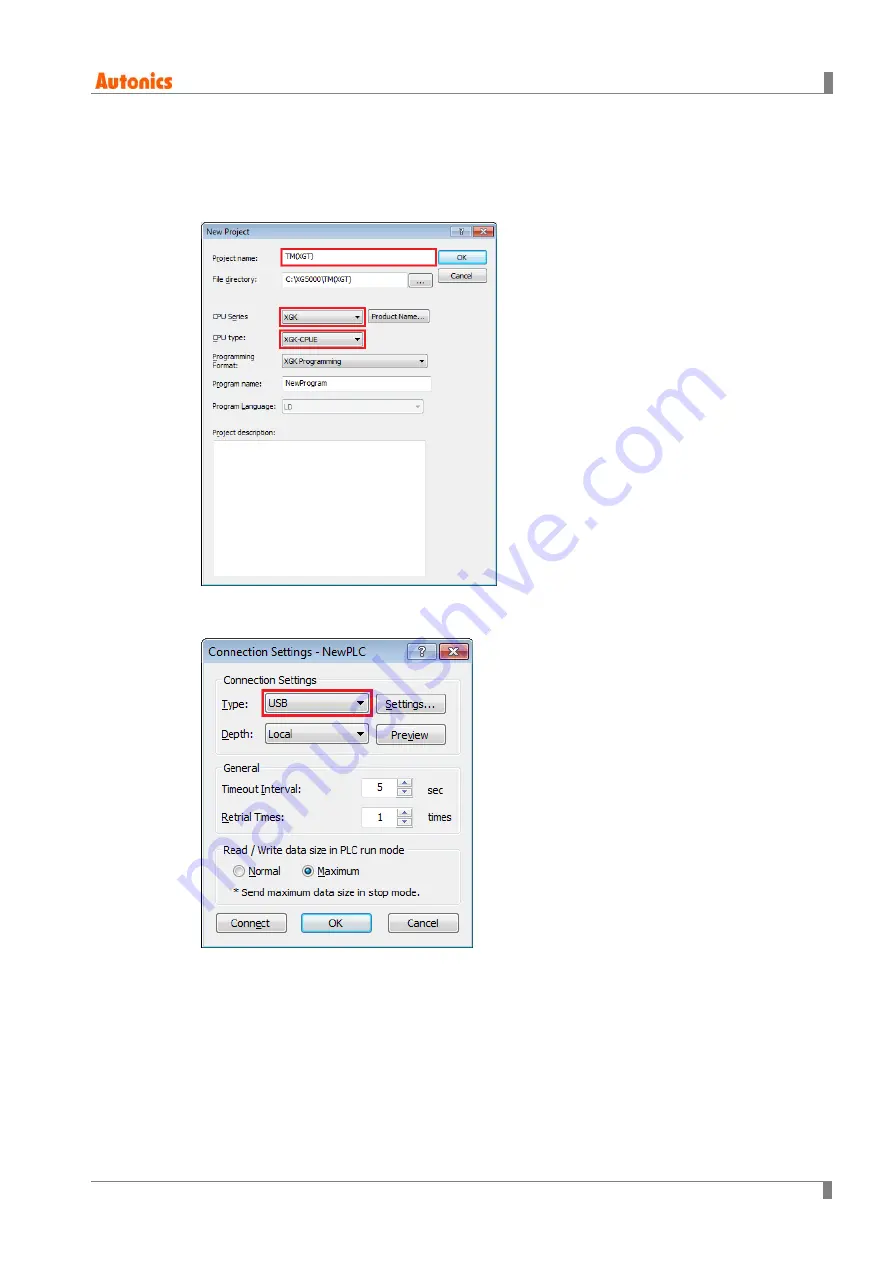
Run XG5000 and select [Project]
–
[New Project] in the menu bar. Enter project name and
1st
select CPU type
‘XGK’-‘XGK-CPUE’ in the ‘New Project’ dialog box. Click ‘OK’.
Set connection method at [Online]
– [Connection Settings]. This example is connection via USB,
2nd
select connection type as
‘USB’ and click ‘OK’.
Start connection at [Online]
– [Connect].
3rd
To synchronize the modules information, stop the PLC processing by selecting [Online]
–
4th
[Change Mode]
– [Stop]. If you cannot stop the PLC with this method, change the ‘RUN/STOP’
switch of the PLC CPU from ‘RUN’ to ‘STOP’.
Содержание TM-XGT
Страница 1: ...Copyright Reserved Autonics Co Ltd iii TM XGT RS485 Solution Guide...
Страница 2: ...ii Copyright Reserved Autonics Co Ltd...
Страница 8: ...8 Copyright Reserved Autonics Co Ltd...
Страница 18: ...3 XGT Project Settings 18 Copyright Reserved Autonics Co Ltd...
Страница 26: ...4 Data Exchange Example 26 Copyright Reserved Autonics Co Ltd...
Страница 32: ...6 Troubleshooting 32 Copyright Reserved Autonics Co Ltd...