background image

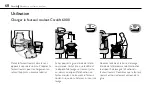
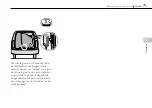
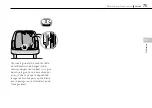
Tournez la grue dans la voiture à l’aide 
de la télécommande. Rangez la télé-
commande dans son support sur la grue 
pour que la grue ne soit pas activée par 
erreur. Veillez à ce que le dispositif de 
levage soit bien fixé pour qu’il ne blesse 
pas un passager en cas d’accident ou de 
freinage violent.

FR

71

Élévateurs pour fauteuil roulant    

Carolift

U

tili

sat

io

n

Содержание Carolift 6000

Страница 1: ...el 6000 Model 6900 SV 4 Bruksanvisning EN 24 User manual DE 44 Gebrauchsanweisung FR 64 Instructions d utilisation ES 84 Instrucciones de uso IT 104 Istruzioni per l uso Carolift Autoadapt Wheelchair hoist ...

Страница 2: ......

Страница 3: ...SV EN DE FR ES IT ...

Страница 4: ...n Följande manual är en integrerad och viktig del av produkten som ger information om hur du uppnår ett optimalt och säkert brukande Förvara därför manualen så att den lätt återfinns vid behov Har du några frågor kring din anpassning är du välkommen att kontakta din installatör Om du önskar delge oss dina åsikter om produkten eller företaget finns möjligheten att registrera detta på www autoadapt ...

Страница 5: ... 6000 12 Att lasta in Carolift 6900 14 Att lasta ur Carolift 6900 Nödmanövrering 16 Skötselanvisning 18 Felsökare 19 Teknisk specifikation 21 Tekniska data Introduktion för användare 22 5 Rullstolslyftar Carolift SV Innehåll Serviceinformation och Declaration of conformity längst bak i manualen ...

Страница 6: ...6 Carolift Rullstolslyftar Säkerhet Säkerhetsåtgärder ...

Страница 7: ...På kranarnas nederdel sitter en strömbrytare Denna skall vara påslagen för att kranan skall kunna användas 7 Rullstolslyftar Carolift SV Säkerhet ...

Страница 8: ... lina med lyftanordning hamnar så rakt över rullstolens fästanordning som möj ligt Annars finns risk att rullstolen kan komma i gungning när den börjar lyftas Sänk ned lina med lyftok med hjälp av handkontrollen Kroka i spänn fast lyftan ordningen i rullstolens fäste Kontrollera att rullstolen är ordentligt fastkrokad i kranen Handhavande Att lasta in Carolift 6000 8 Carolift Rullstolslyftar ...

Страница 9: ...med ena handen så att den hamnar rätt i bilen Sänk ned så att lasten står stadigt på bilens golv Lås rullstolens bromsar Rullstolen skall vara ordentligt nedsänkt på bilgolvet och stå stadigt Linan kan vara kvar fastkrokad i rullstolen men då i sträckt läge så att den ej lossar under färd Häng upp handkontrollen i sin hålla re på kranen så att inte kranen aktiveras av misstag Förankra rullstolen i...

Страница 10: ...fritt över dörröpp ningens nederkant Vrid ut rullstolen till lämplig position vid sidan av bilens bakparti Sänk ned rullstolen via handkontrollen Lossa lyftanordningen från rullstolens fäste Hissa upp lina och lyftanordnig via handkontrollen Stoppa kranen INNAN det vita strecket nått upp till kranhuvudet 10 Carolift Rullstolslyftar ...

Страница 11: ...len Placera handkontrollen i fästet på kranen så att kranen ej aktiveras av misstag Se till att lyftanordningen säkras väl så att det inte kan skada passagerare vid krock eller kraftig inbromsning 11 Rullstolslyftar Carolift SV Handhavande ...

Страница 12: ...För läng yttre kranarmen via handkontrollens knapp EXTEND Se till att lina med lyf tanordning hamnar så rakt över rullsto lens fäste som möjligt Annars finns risk att rullstolen kan komma i gungning när den börjar lyftas Sänk ned lina med lyftok via handkon trollen Kroka i spänn fast lyftanord ningen i rullstolens fäste Kontrollera att rullstolen är ordentligt fastkrokad i kranen 12 Carolift Rulls...

Страница 13: ...dkontrollens knapp RETRACT Vrid in rullstolen via handkontrollen Styr samtidigt in rullstolen med ena handen så att den hamnar rätt i bilen Sänk ned rullstolen och lås bromsarna Rullstolen skall vara ordentligt nedsänkt på bilgolvet och stå stadigt Linan kan vara kvar fastkrokad i rullstolen men då i sträckt läge så att den ej lossar under färd Häng upp handkontrollen i sin hålla re så att inte kr...

Страница 14: ... rullstolen genom dörröppningen När rullstolen befinner sig utanför dör röppningen förlängs yttre kranarm via handkontrollens knapp EXTEND Vrid ut rullstolen till lämplig position vid sidan av bilens bakparti Sänk ned rullstolen via handkontrollen Lossa lyftanordningen från rullstolens fäste Hissa upp lina och lyftanordning via handkontrollen Stoppa kranen INNAN det vita strecket nått upp till kra...

Страница 15: ...len Placera handkontrollen i fästet på kranen så att kranen ej aktiveras av misstag Se till att lyftanordningen säkras väl så att det inte kan skada passagerare vid krock eller kraftig inbromsning 15 Rullstolslyftar Carolift SV Handhavande ...

Страница 16: ...v Avlägsna motorkåpans 4 skruvar 1 Kläm ihop gummihylsan vid kranpe larens nederdel och tryck ner dess kanter i motorkåpan 2 Lyft upp motorkåpan och vrid un dan den så att nödveven kan lossas från sitt fäste Klipp ej bort fästet 3 16 Carolift Rullstolslyftar Nödmanövrering ...

Страница 17: ...nödveven på motorns axel Veva tills kranan nått ändläge Åter montera nödveven bakom fästet vid motorn Lämna in kranen för översyn hos auktoriserad återför säljare 4 17 Rullstolslyftar Carolift SV Nödmanövrering ...

Страница 18: ...heter Använd lätt fuktad trasa för att torka av damm och smuts Kontakta din installatör för bokning av service se längst bak i manualen 18 Carolift Rullstolslyftar Skötselanvisning Produktdokumentationen skall alltid medtas vid besiktning av fordonet Vid demontering kontakta alltid din installatör ...

Страница 19: ... vid körning av kranen Blytaren på kontrollboxen är i läge off Tryck på brytarknappen så att den är påslagen Krananen har körts ner för långt och lyftbältet har snurrats åt motsatt håll runt vindan Kör ner kranen så långt det går och sedan upp igen tills bältet vindas åt rätt håll Defekt motor eller utslitna drev Kontakta din installatör Felsökare 19 Rullstolslyftar Carolift SV Felsökare ...

Страница 20: ...ller garantifrågor kontakta din installatör Följande information rekommenderas att ha till hands Modell Kontaktuppgifter till installatör Serienummer Tillverkningsår Datum vid inköp Noteringar 20 Carolift Rullstolslyftar ...

Страница 21: ...arolift 6900 Fällbart kranhuvud Ja Teleskoperande kranhuvud 20 cm Lyftkapacitet 181 kg Spänning 12V Strömförbrukning vid maximal belastning 15A Carolift har ett kranhuvud som är fällbart Lossa sprinten som sitter vid kranhuvudets bakdel Fäll ner kranhuvudet Teknisk specifikation Tekniska data 21 Rullstolslyftar Carolift SV Teknisk specifikation ...

Страница 22: ...änna dig trygg och bekväm med din nya produkt Därför har din installatör till uppgift att gå igenom följande med dig Säkerhet Handhavande Nödmanövrering Om frågor kring produkten skulle uppstå vid ett senare tillfälle är du givetvis välkom men att kontakta din installatör igen Ovanstående kapitel är genomgångna 22 Carolift Rullstolslyftar ...

Страница 23: ...23 Rullstolslyftar Carolift SV Introduktion för användare ...

Страница 24: ...al in a safe place so that you can refer to it when necessary If you have any questions about your adaptation please feel free to contact your installation engineer If you wish to share your opinions about the product or the company with us you can register them on www autoadapt com register That way you will be helping us to become a better supplier Once again thank you for placing your confidenc...

Страница 25: ... of the manual Safety 26 Safety measures Operation 28 Loading the Carolift 6000 30 Unloading the Carolift 6000 32 Loading the Carolift 6900 34 Unloading the Carolift 6900 Emergency mode operation 36 Care instructions 38 Troubleshooting 39 Technical specification 41 Components Introduction for users 42 ...

Страница 26: ...26 Carolift Wheelchair lifts Safety Safety measures ...

Страница 27: ...A power switch is located on the lower part of the lifter This should be switched on in order to use the hoist 27 Wheelchair lifts Carolift EN Safety ...

Страница 28: ...t belt with lifting device is positioned as directly above the wheelchair s fixing point as possible Oth erwise there is a risk that the wheelchair can start to swing when lifted Lower the lift belt with lifting device using the hand control Hook tension the lifting device in the wheelchair s attachment Check that the wheelchair is secured correctly in the hiost Loading the Carolift 6000 28 Caroli...

Страница 29: ...omes in the right position in the car Lower so that the load stands firmly on the floor of the car Lock the brakes on the wheelchair The wheelchair should be completely lowered onto the car floor so that it stands firmly The lift belt can remain hooked in the wheelchair but in the tensioned position so that it does not come loose during transport Hang the hand control in its holder on the hoist to...

Страница 30: ...the wheelchair to a suitable posi tion to the side of the car s rear section Lower the wheelchair using the hand control Loosen the lifting device from the wheelchair s attachment Wind in the lift belt and lifting device using the hand control Stop the hoist BEFORE the white line reaches the hoist head Unloading the Carolift 6000 30 Carolift Wheelchair lifts ...

Страница 31: ...lace the hand control in the holder on the hoist to prevent unintentional operation Ensure the lifting device is secured well so that it cannot injure passengers in the event of an acci dent or when braking heavily 31 Wheelchair lifts Carolift EN Operation ...

Страница 32: ... the EXTEND button Make sure the lift belt with lifting device is positioned as di rectly above the wheelchair s attachment as possible To avoid the risk that the wheelchair starts swinging when lifted Lower the lift belt with lifting device using the hand control Hook tension the lifting device in the wheelchair s attachment Check that the wheelchair is secured correctly in the hoist Loading the ...

Страница 33: ...and control s RETRACT button Rotate the wheelchair using the hand controller At the same time guide the wheelchair with one hand so that it comes in the right position in the car Lower the wheelchair and lock the brakes The wheelchair should be completely lowered onto the car floor so that it stands firmly The lift belt can remain hooked in the wheelchair but in the tensioned position so that it d...

Страница 34: ...lchair is outside of the door opening extend the outer lift arm using the EXTEND button on the hand control Turn the wheelchair to a suitable position to the side of the car s rear section Lower the wheelchair using the hand control Loosen the lifting device from the wheelchair s attachment Wind in the lift belt and lifting device using the hand control Stop the hoist BEFORE the white line reaches...

Страница 35: ...l Place the hand control in the holder on the hoist to prevent unintentional operation Ensure the lifting device is secured so that it cannot injure passengers in the event of an accident or when braking heavily 35 Wheelchair lifts Carolift EN Operation ...

Страница 36: ...ing the cover to the hoist base 1 Compress the boot with your hand and tuck it inside the cover 2 Lift the cover up and rotate it to provide access to the crank placed on the base motor Slide the crank out from behind the wire tie Do not cut the tie 3 36 Carolift Wheelchair lifts Emergency mode operation ...

Страница 37: ...or shaft Rotate the crank until the lift has returned to its end position Slide the crank back behind the wire tie Have the lift examined by an authorized Autoadapt dealer 4 37 Wheelchair lifts Carolift EN Emergency mode operation ...

Страница 38: ...cavities Use a moist towel to clean from dirt etc Contact your installer to book the annual service see the end of the manual 38 Carolift Wheelchair lifts Care instructions The product documentation must always be available during inspection of the vehicle Always contact your dealer for disassembly ...

Страница 39: ...r The switch on the hand control is in the off position Press the switch button so that it is switched on The lifter has been run down too far and the lifting strop has twisted in the opposite direction around the reel Run the lifter down as far as possible and then up again until the strop winds the right way Defective motor or worn pinion Contact your installer 39 Wheelchair lifts Carolift EN Tr...

Страница 40: ...ther assistance or need to ask questions about warranty We recommend keeping the following information to hand at all times Model Contact details for the installation engineer Serial number Year of manufacture Date of purchase Notes 40 Carolift Wheelchair lifts ...

Страница 41: ...olift 6900 Fällbart kranhuvud Ja Teleskoperande kranhuvud 20 cm Lyftkapacitet 181 kg Spänning 12V Strömförbrukning vid maximal belastning 15A Carolift har ett kranhuvud som är fällbart Lossa sprinten som sitter vid kranhuvu dets bakdel Fäll ner kranhuvudet Technical specification 41 Wheelchair lifts Carolift EN Technical specification Components ...

Страница 42: ...son it is your installer s duty to go through the following with you Safety Operation Emergency mode operation If any questions about the product should come up later on you are of course very welcome to contact your installation engineer again The above chapters have been gone through Date Name of dealer Signature installation engineer Signature user ...

Страница 43: ...43 Wheelchair lifts Carolift EN Introduction for users ...

Страница 44: ...findbar ist Sollten Sie Fragen zu Ihrer Umrüstung haben dann setzen Sie sich bitte mit Ihrem Fachhändler Monteur in Verbindung Wenn Sie uns gern Ihre Meinung zum Produkt bzw zum Unternehmen mitteilen möchten können Sie sich auf unserer Homepage unter www autoadapt com register registrieren Damit helfen Sie uns ein noch besserer Anbieter zu werden Nochmals vielen Dank für Ihr Vertrauen Autoadapt Vi...

Страница 45: ...lift 6000 52 Das einladen des Carolift 6900 54 Das ausladen des Carolift 6900 Notbetrieb 56 Pflegeanleitung 58 Fehlersuche 59 Technische Spezifikation 61 Technische Daten Einweisung des Benutzers 62 DE Inhalt 45 Rollstuhllifte Carolift Service Informationen und Declaration of conformity hinten im Handbuch ...

Страница 46: ...46 Carolift Rollstuhllifte Sicherheit Sicherheitsmaßnahmen ...

Страница 47: ...Ein Schalter ist am unteren Teil des Krans angebracht Er muss eingeschaltet werden um den Kran zu benutzen DE 47 Rollstuhllifte Carolift Sicherheit ...

Страница 48: ...für dass das Drahtseil mit dem Hebeteil genau über dem Andockpunkt des Rollstuhls ist Es besteht sonst die Gefahr dass der Rollstuhl ins Schwingen gerät wenn er gehoben wird Senken Sie das Drahtseil mit dem Hebeteil durch Benutzen des Handkon trollgeräts Haken Sie das Hebeteil in die dafür vorgesehenen Andockpunkte am Rollstuhl Prüfen Sie ob der Rollstuhl sicher am Kran verankert ist Das einladen ...

Страница 49: ... Hand in die richtige Position im Fahrzeug Senken Sie den Rollstuhl so dass er fest auf dem Fahr zeugboden steht Ziehen Sie die Brem sen am Rollstuhl an Der Rollstuhl sollte ganz auf den Fahr zeugboden gesenkt werden damit er fest steht Das Drahtseil kann am Rollstuhl verbleiben allerdings in gespanntem Zu stand damit es sich nicht beim Transport lösen kann Hängen Sie das Handkont rollgerät an den...

Страница 50: ...e den Rollstuhl in eine Ihnen passende Position seitwärts am Hinte rem Ende des Fahrzeugs Senken Sie den Rollstuhl mit dem Hand kontrollgerät und lösen das Hebegerät vom Rollstuhl Rollen Sie das Drahtseil mit dem Hebegerät auf unter Benutzung des Handkontrollgeräts Stoppen Sie die Aufhebung bevor der weißen Linie den Kranarm erreicht Das ausladen des Carolift 6000 50 Carolift Rollstuhllifte ...

Страница 51: ...dkontrollgerät an den dafür vorgesehenen Halter damit der Kran nicht unabsichtigt aktiviert werden kann Versichern Sie sich dass das Hebegerät gut gesichert ist damit es keine Passa giere verletzt wenn Sie scharf bremsen oder im Falle eines Unfalls DE 51 Rollstuhllifte Carolift Handhabung ...

Страница 52: ...arm mit dem EX TEND Knopf am Handkontrollgerät Sehen Sie zu dass das Drahtseil mit dem Hebeteil genau über den An dock punkten ist Es besteht sonst die Gefahr dass der Rollstuhl beim Heben an zu schwingen fängt Senken Sie das Drahtseil mit dem He beteilmit Hilfe des Handkontrollgeräts Verhaken Sie den Hebeteil an den An dockpunktenund spannen das Drahtseil Prufen Sie ob der Rollstuhl sicher am Kra...

Страница 53: ... TRACT Knopf am Kontrollgerät Drehen Sie den Rollstuhl mit dem Handkontroll gerät und führen Sie gleichzeitig mit der Hand den Rollstuhl in die richtige Positi on im Fahrzeug Senken Sie den Rollstuhl und ziehen die Bremsen an Der Rollstuhl muss vollstän dig bis zum Fahrzeugboden gesenkt wer den damit er sicher steht Das Drahtseil kann am Rollstuhl verbleiben allerdings gespannt damit es sich nicht...

Страница 54: ...Rollstuhl durch die Türöffnung aus dem Fahrzeug Wenn der Rollstuhl ganz aus dem Fahrzeug ist fahren Sie den äusseren Kranarm aus indem Sie den EXTEND Knopf am Handkontrollgerät drücken Drehen Sie den Rollstuhl in eine Ihnen passen de Position an der hinteren Seite des Fahrzeugs Senken Sie den Rollstuhl mit Hilfe des Handkontoll geräts und lösen das Hebegerät vom Rollstuhl Rollen Sie das Drahtseil ...

Страница 55: ... Handkontrollgerät an den dafür vorgesehenen Halter damit der Kran nicht unabsichtigt aktiviert werden kann Versichern Sie sich dass das Hebegerät gut gesichert ist damit es keine Passagiere verletzt wenn Sie scharf bremsen oder im Falle eines Unfalls DE 55 Rollstuhllifte Carolift Handhabung ...

Страница 56: ...n an der Motorabde ckung entfernen 1 Gummihülse unten an der Kran säule zusammendrücken und die Kanten in die Motorabdeckung schieben 2 Motorabdeckung anheben und zur Seite schwenken um die Notkur bel von ihrer Befestigung lösen zu können Die Befestigung nicht abschneiden 3 56 Carolift Rollstuhllifte Notbetrieb ...

Страница 57: ...en Kurbel drehen bis der Kran die Endposition erreicht hat Notkurbel wieder hinter die Befestigung am Motor stecken Lassen Sie anschlie ßend den Kran von einem autori sierten Händler überprüfen 4 DE 57 Rollstuhllifte Carolift Notbetrieb ...

Страница 58: ...aub und Schmutz bei Bedarf mit einem leicht feuchten Tuch ab Wenden Sie sich zwecks Service an Ihren Monteur siehe hinten im Handbuch Die Produktdokumentation muss bei der Fahrzeuguntersuchung TÜV vorgezeigt werden können Zur Demontage setzen Sie sich bitte immer mit Ihrem Fachhändler Monteur in Verbindung 58 Carolift Rollstuhllifte Pflegeanleitung ...

Страница 59: ...llgerät ist in OFF Stellung Drücken den Knopf um ihn ein zuschalten Der Kran ist zu tief gesenkt worden dabei hat sich der Hebegurt in die entgegengesetzte Richtung um die Rolle gewickelt Senken Sie den Kran so tief wie möglich und dann wiederr nach oben Der Hebegurt rollt sich dann wieder normal auf Fehlerhafter Motor oder verschlissenes Teil Kontaktieren Sie Ihren Monteur DE 59 Rollstuhllifte Ca...

Страница 60: ... Hilfe brauchen kontaktieren Sie bitte Ihren Fachhändler Monteur Folgende Daten sollten Sie dabei zur Hand zu haben Model Angaben beim Kontakt mit dem Fachhändler Monteur Seriennummer Baujahr Kaufdatum Aufzeichnungen 60 Carolift Rollstuhllifte ...

Страница 61: ...pbarer Krankopf Ja Elektrisch betriebener Teleskop Krankopf 20 cm Hebekapazität 181 kg Spannung 12V Energieverbrauch bei Höchstbelastung 15A Der Krankopf des Carolift kann zusammengeklappt werden wenn der Kran nicht ge nutzt wird Stift an der Rückseite des Krankopfs lösen Krankopf hinunterklappen DE 61 Rollstuhllifte Carolift Technishe Spezifikation Technische Spezifikation Technische Daten ...

Страница 62: ... folgende Punkte zu informieren Sicherheit Handhabung Notbetrieb Sollten zu einem späteren Zeitpunkt Fragen zum Produkt auftauchen dürfen Sie sich selbstverständlich auch dann gern wieder an Ihren Fachhändler Monteur wenden Die oben aufgeführten Kapitel wurden durchgesprochen durchgenommen Datum Name des Fachhändlers Unterschrift Monteur Unterschrift Benutzer 62 Carolift Rollstuhllifte ...

Страница 63: ...DE 63 Rollstuhllifte Carolift Einweisung des Benutzers ...

Страница 64: ...e pouvoir le consulter au besoin Si vous avez des questions concernant votre adaptation n hésitez pas à contacter votre installateur Si vous souhaitez nous donner votre opinion sur le produit ou l entreprise vous pouvez les enregistrer sur www autoadapt com register De cette façon vous nous aiderez à devenir un meilleur fournisseur Et merci encore pour votre confiance Autoadapt Merci d avoir chois...

Страница 65: ...il roulant Carolift 6900 74 Décharger le fauteuil roulant Carolift 6900 Manœuvre d urgence 76 Instructions de maintenance 78 Recherche de pannes 79 Spécifications techniques 81 Données techniques Introduction pour l utilisateur 82 FR Contenu 65 Élévateurs pour fauteuil roulant Carolift Informations de service et Declaration of conformity à la fin du manuel ...

Страница 66: ...66 Carolift Élévateurs pour fauteuil roulant Sécurité Mesures de sécurité ...

Страница 67: ...Un interrupteur se trouve sur la partie inférieure des grues Il doit être mis sur marche pour que la grue puisse être utilisée FR 67 Élévateurs pour fauteuil roulant Carolift Sécurité ...

Страница 68: ... levage se trouvent juste au dessus du dispositif de fixation du fauteuil roulant Autrement le fauteuil roulant risque de se balancer au cours du levage Abaissez le câble et la barre de levage à l aide de la télécommande Accrochez le dispositif de levage à la fixation du fauteuil roulant Contrôlez que le fauteuil roulant est correctement accroché à la grue Charger le fauteuil roulant Carolift 6000...

Страница 69: ...cer au bon endroit dans la voiture Abaissez pour que la charge soit stable sur le plancher de la voiture Bloquez les freins du fauteuil roulant Le fauteuil roulant doit reposer correc tement sur le plancher de la voiture de façon stable Le câble peut rester ac croché au fauteuil roulant mais doit être tendu pour ne pas se défaire au cours du voyage Rangez la télécommande dans son support sur la gr...

Страница 70: ...la porte Tournez le fauteuil roulant dans la po sition souhaitée à côté de l arrière de la voiture Abaissez le fauteuil roulant à l aide de la télécom mande Détachez le dispo sitif de levage de la fixation du fauteuil roulant Remontez le câble et le dispositif de levage à l aide de la télécommande Arrêtez le soulèvement AVANT que la ligne blanche atteind le bras de grue 70 Carolift Élévateurs pour...

Страница 71: ...ommande dans son support sur la grue pour que la grue ne soit pas activée par erreur Veillez à ce que le dispositif de levage soit bien fixé pour qu il ne blesse pas un passager en cas d accident ou de freinage violent FR 71 Élévateurs pour fauteuil roulant Carolift Utilisation ...

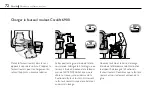
Страница 72: ... télécom mande EXTEND Veillez à ce que le câble se trouve juste au dessus de la fixation du fauteuil roulant Autrement le fauteuil roulant risque de se balancer au cours du levage Abaissez le câble et la barre de levage à l aide de la télécommande Accrochez le dispositif de levage à la fixation du fauteuil roulant Contrôlez que le fauteuil roulant est correctement accroché à la grue Charger le fau...

Страница 73: ...nt à l aide de la télécommande Dirigez simultanément le fauteuil roulant d une main pour le placer au bon endroit dans la voiture Abaissez le fauteuil roulant et bloquez les freins Le fauteuil roulant doit repo ser correctement sur le plancher de la voiture de façon stable Le câble peut rester accroché au fauteuil roulant mais doit être tendu pour ne pas se défaire au cours du voyage Rangez la tél...

Страница 74: ...uil roulant en dehors de la porte étirez le bras extérieur à l aide du bouton de la télécommande EXTEND Tournez le fauteuil roulant dans la position souhaitée à côté de l arrière de la voiture Abaissez le fauteuil roulant à l aide de la télécommande Détachez le dispositif de levage de la fixation du fauteuil roulant Remontez le câble et le dispositif de levage à l aide de la télécommande Arrê tez ...

Страница 75: ...ommande dans son support sur la grue pour que la grue ne soit pas activée par erreur Veillez à ce que le dispositif de levage soit bien fixé pour qu il ne blesse pas un passager en cas d accident ou de freinage violent FR 75 Élévateurs pour fauteuil roulant Carolift Utilisation ...

Страница 76: ...vis du capot moteur 1 Presser sur les côtés du manchon en caoutchouc pour les faire entrer dans le capot moteur 2 Lever le capot moteur et le faire pivoter sur le côté afin de pouvoir libérer la manivelle de secours de sa fixation Ne pas couper la fixation 3 76 Carolift Élévateurs pour fauteuil roulant Manœuvre d urgence ...

Страница 77: ...ner la manivelle jusqu à ce que la grue soit en position de butée Remettre en place la manivelle de secours derrière la fixation sur le moteur Confier la grue à un atelier agréé pour inspection 4 FR 77 Élévateurs pour fauteuil roulant Carolift Manœuvre d urgence ...

Страница 78: ...ide pour essuyer poussière et saleté au besoin Contactez votre installateur pour la maintenance reportez vous à la fin du manuel La documentation du produit doit toujours être comprise lors du contrôle technique du véhicule En cas de démontage contactez toujours votre installateur 78 Carolift Élévateurs pour fauteuil roulant Instructions de maintenance ...

Страница 79: ...ôle sur arrêt Appuyez sur l interrupteur pour e mettre sur marche Le bras de grue a été trop descendu et la courroie de levage s est enroulée dans le sens contraire sur l enrouleur Descendez la grue au maximum et remontez la jusqu à ce que la courroie s enroule dans le bon sens Moteur défectueux ou pignon usé Contactez votre installateur Recherche de pannes FR 79 Élévateurs pour fauteuil roulant C...

Страница 80: ...nce ou pour toute question rel ative à la garantie Ayez sous la main les informations suivantes Modèle Informations de contact de l installateur Numéro de série Année de fabrication Date d achat Remarques 80 Carolift Élévateurs pour fauteuil roulant ...

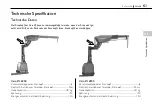
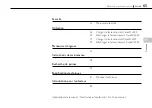
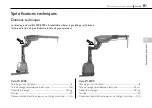
Страница 81: ...e Ja Tête de levage télescopique électrique 20 cm Capacité de levage 181 kg Tension 12V Consommation électrique pour une charge maximale 15A La tête de grue Carolift 6000 6900 est rabattable Libérer la goupille qui est placée à l arrière de la tête de grue Rabattre la tête de grue vers le bas Spécifications techniques Données techniques FR 81 Élévateurs pour fauteuil roulant Carolift Spécification...

Страница 82: ...se avec votre nouveau produit Votre installateur va donc parcourir les chapitres suivants avec vous Sécurité Utilisation Manœuvre d urgence Si vous deviez ultérieurement avoir des questions sur le produit n hésitez pas à contacter de nouveau votre installateur Les chapitres ci dessus ont été lus Date Nom du revendeur Signature installateur Signature utilisateur ...

Страница 83: ...FR 83 Élévateurs pour fauteuil roulant Carolift Introduction pour l utilisateur ...

Страница 84: ...nte accesible en caso de necesidad Si tiene alguna pregunta sobre su adaptación le pedimos que se ponga en contacto con el instalador local Si desea hacernos llegar sus opiniones sobre el producto o la empresa puede registrarse en www autoadapt com register De esa manera nos ayuda a ser aún mejores Una vez más muchas gracias por su confianza Autoadapt Gracias por elegir una Soluciones para la adap...

Страница 85: ...de ruedas Carolift 6900 94 Extracción de la silla de ruedas Carolift 6900 Manejo de emergencia 96 Instrucciones de mantenimiento 98 Localización de fallos 99 Especificaciones técnicas 101 Datos técnicos Introducción para usuarios 102 ES Indice 85 Elevadores de sillas de ruedas Carolift Información sobre el servicio y Declaration of conformity al final del manual ...

Страница 86: ...86 Carolift Elevadores de sillas de ruedas Seguridad Medidas de seguridad ...

Страница 87: ...En la parte inferior de las grúas hay un interruptor Para poder emplear la grúa el interruptor deberá estar activado ES 87 Elevadores de sillas de ruedas Carolift Seguridad ...

Страница 88: ...vación quede justo encima del dispositivo de fijación de la silla De lo contrario la silla de ruedas puede empezar a balancearse al iniciar su alzamiento Con ayuda del mando manual baje el cable con el yugo de suspensión Engan che encaje el dispositivo de elevación en la fijación de la silla de ruedas Verifique que la silla de ruedas esté correctamente enganchada a la unidad de grúa Inserción de l...

Страница 89: ...arga repose firmemente sobre el piso del vehículo Bloquee los frenos de la silla de ruedas Es fundamental que la silla repose totalmente sobre el piso del vehículo completamente estable Puede dejarse el cable enganchado a la silla pero siempre tensado para así evitar que se desprenda durante el trayecto Coloque el mando manual en su soporte de la unidad de grúa a fin de impedir que ésta se active ...

Страница 90: ... inferior del hueco de la puerta Despliegue la silla de ruedas en una posición adecuada en el lateral del tren trasero del vehículo Baje la silla con ayuda del mando manual Suelte de la fijación de la silla el dispo sitivo de elevación Eleve el cable y el dispositivo de elevación con el mando Detener la elevación ANTES de llegar a la linea blanca 90 Carolift Elevadores de sillas de ruedas ...

Страница 91: ...el mando manual en su so porte a fin de impedir que la grúa se active accidentalmente Asegúrese de afianzar correctamente el dispositivo de elevación para que no produzca lesiones en caso de colisión o frenada brusca del automóvil ES 91 Elevadores de sillas de ruedas Carolift Uso ...

Страница 92: ...se de que el cable con el dispositivo de elevación quede justo encima de la fijación de la silla De lo contrario la silla de ruedas puede empezar a balancearse al iniciar su alzamiento Con ayuda del mando manual baje el cable con el yugo de suspensión Engan che encaje el dispositivo de elevación en la fijación de la silla de ruedas Verifique que la silla de ruedas esté correctamente enganchada a l...

Страница 93: ...s con el mando mientras acompaña con una mano la silla para que se sitúe correctamente dentro del automóvil Bájela la silla de ruedas y bloquee sus frenos Es fundamental que la silla repose totalmente sobre el piso del vehículo completamente estable Puede dejarse el cable enganchado a la silla pero siempre tensado para así evitar que se desprenda durante el trayecto Coloque el mando manual en su s...

Страница 94: ...la silla de ruedas por el hueco de la puerta Cuando la silla se encuentre fuera del hueco extienda el brazo exterior de grúa con el botón EXTEND del mando manual Desplie gue la silla en una posición adecuada en el lateral del tren trasero del vehículo Baje la silla con ayuda del mando manual Suelte de la fijación de la silla el dispo sitivo de elevación Eleve el cable y el dispositivo de elevación...

Страница 95: ...el mando manual en su soporte a fin de impedir que la grúa se active accidentalmente Asegúrese de afianzar cor rectamente el dispositivo de eleva ción para que no produzca lesiones en caso de colisión o frenada brusca del automóvil ES 95 Elevadores de sillas de ruedas Carolift Uso ...

Страница 96: ...a del motor 1 Comprima el manguito de goma situado en la parte inferior de la columna de la grúa y encaje sus bordes en la cubierta del motor 2 Alce la cubierta del motor y ex traiga girándola para poder soltar la manivela de emergencia de su fijación No corte la fijación 3 96 Carolift Elevadores de sillas de ruedas Manejo de emergencia ...

Страница 97: ...del motor Gire la manivela hasta que la grúa alcance el tope Recoloque la manivela detrás de la fijación del motor Lleve la grúa para su revisión a un distribuidor autorizado 4 ES 97 Elevadores de sillas de ruedas Carolift Manejo de emergencia ...

Страница 98: ... para limpiar el polvo y la suciedad si es necesario Contactar con el instalador local para reservar el servicio véase al final del manual Llevar siempre la documentación del producto al efectuar la inspección técnica del vehículo Para el desmontaje contactar siempre con el distribuidor local 98 Carolift Elevadores de sillas de ruedas Instrucciones de mantenimiento ...

Страница 99: ...rruptor de la caja de control está en posición OFF Pulse el interruptor para activarlo El brazo de grúa se ha bajado demasiado lo que ha hecho que se enrolle en el tambor del revés Baje la grúa hasta su tope inferior y vuelva a subirla hasta que la cinta se enrolle en el sentido correcto Fallo en el motor o engranajes desgastados Contactar con el instalador Localización de fallos ES 99 Elevadores ...

Страница 100: ...la garantía contactar con el distribuidor local Se recomienda tener accesible la siguiente información Modelo Datos de contacto del instalador Núm de serie Año de fabricación Fecha de compra Notas 100 Carolift Elevadores de sillas de ruedas ...

Страница 101: ...r de grúa inclinabile Ja Brazo exterior de grúa de tipo telescópico 20 cm Capacidad de carga 181 kg Tensión 12V Consumo de corriente en carga máxima 15A Carolift incluye un cabezal de grúa plegable Suelte el fiador ubicado en la parte poste rior del cabezal de grúa y pliegue éste hacia abajo Especificaciones técnicas Datos técnicos ES 101 Elevadores de sillas de ruedas Carolift Especificaciones té...

Страница 102: ...cto Por eso el instalador local debe repasar lo siguiente con el usuario Seguridad Uso Manejo de emergencia Si en una etapa posterior surgiesen preguntas en cuanto al producto el usuario puede volver a contactarse con el distribuidor local Se han repasado los capítulos antes mencionados Fecha Nombre del distribuidor Firma del instalador Firma del usuario ...

Страница 103: ...ES 103 Elevadores de sillas de ruedas Carolift Introducción para usuarios ...

Страница 104: ...qualsiasi evenienza Per qualsiasi domanda sulla vostra soluzione personalizzata rivolgetevi all installatore Eventuali commenti sul prodotto o l azienda possono essere registrati su www autoadapt com register Così facendo ci aiutate a migliorare Di nuovo grazie per la fiducia accordataci Autoadapt Grazie per avere scelto Soluzioni sicure per l adattamento di vetture Per garantire la sicurezza degl...

Страница 105: ...lle Carolift 6900 114 Scaricare la sedia a rotelle Carolift 6900 Azionamento di emergenza 116 Istruzioni di manutenzione 118 Ricerca dei guasti 119 Specificazioni tecniche 121 Dati tecnici Introduzione per utenti 122 IT Introduzioni 105 Sollevatori per sedie a rotelle Carolift Informazioni per la manutenzione e Declaration of conformity alla fine del manuale ...

Страница 106: ...106 Carolift Sollevatori per sedie a rotelle Sicurezza Misure di sicurezza ...

Страница 107: ...L interruttore alla base della gru deve essere nella posizione on al momento dell attivazione della stessa IT 107 Sollevatori per sedie a rotelle Carolift Sicurezza ...

Страница 108: ...llevamento penda più verticalmente possibile sopra il punto d aggancio della sedia altrimenti c è rischio che il carico inizi a dondolare quando viene sollevato Servendosi della tastiera abbassare la fune con il gancio Agganciare allacciare il dispositivo di sollevamento al punto d attacco sulla sedia Controllare che la sedia sia ben agganciata alla gru Caricare la sedia a rotelle Carolift 6000 10...

Страница 109: ...as sare la sedia e controllare che poggi sal damente sul pavimento del portabagagli Bloccare i freni della sedia a rotelle La sedia deve essere collocata in modo stabile sul pavimento del portabagagli La fune rimasta agganciata al carico deve essere ben tirata per evitare che si stac chi durante la marcia Mettere la tastiera nel suo contenitore per non correre il rischio che la gru venga attivata ...

Страница 110: ...i la sedia fino a raggiun gere la posizione laterale al retro del veicolo Azionando la tastiera abbassare la sedia Staccare il dispositivo di sollevamento dal punto d attacco sulla sedia Sempre azionando la tastiera alzare la fune e il dispositivo di sollevamento Arrestare la sollevamente PRIMA della linea bianca raggiunge il braccio della gru 110 Carolift Sollevatori per sedie a rotelle ...

Страница 111: ... suo alloggiamento sulla gru in modo che questa non venga attivata per sbaglio Assicurarsi che il dispositivo di sollevamento sia ben fissato così da non danneggiare i passeggeri in caso di scontro o di brusca frenata IT 111 Sollevatori per sedie a rotelle Carolift Uso ...

Страница 112: ...une con il dispositivo di sollevamento penda più verticalmente possibile sopra il punto della sedia dove va fissato altrimenti c è rischio che la sedia inizi a dondolare quando viene sollevata Servendosi della tastiera abbassare la fune con il gancio Agganciare allacciare il dispositivo di sollevamento al punto d at tacco sulla sedia Controllare che la sedia a rotelle sia ben agganciata alla gru C...

Страница 113: ...do la tastiera ruotare la sedia nel veicolo guidandola con la mano per metterla nella giusta posizione Abbassare il carico e serrare i freni La sedia deve essere collocata in modo stabile sul pavimento del portabagagli La fune può rimanere agganciata al cari co ma deve essere ben tirata per evitare che si stacchi durante la marcia Mettere la tastiera nel suo contenitore per non correre il rischio ...

Страница 114: ...uesta si trova fuori del veicolo allungare il braccio telesco pico spingendo il tasto EXTEND sulla tastiera Ruotare in fuori la sedia fino a raggiungere la posizione laterale al retro del veicolo Azionando la tastiera abbassare la sedia Staccare il dispositivo di sollevamento dal punto d attacco sulla sedia Sempre azionando la tastiera alzare la fune e il dispositivo di sollevamento Arrestare la s...

Страница 115: ...o alloggiamento sulla gru in modo che questa non venga attivata per sbaglio Assicurarsi che il dispositivo di sollevamento sia ben fissato così da non danneggiare i passeggeri in caso di scontro o di brusca frenata IT 115 Sollevatori per sedie a rotelle Carolift Uso ...

Страница 116: ...a gru 1 Comprimere con le mani l anello in plastica facendolo passare sotto la copertura della base della gru 2 Sollevare e ruotare la copertura per poter accedere alla manovella che si trova sul motore della base della gru Sfilare la manovella da dietro la fascetta Non tagliare la fascetta 3 116 Carolift Sollevatori per sedie a rotelle Azionamento di emergenza ...

Страница 117: ...a manovella fino a quando la gru ha raggiunto la propria posizione finale Infilare la manovella dietro la fascetta Recarsi da un installatore autorizzato Autoadapt per fare esaminare la gru 4 IT 117 Sollevatori per sedie a rotelle Carolift Azionamento di emergenza ...

Страница 118: ...o para limpiar el polvo y la suciedad si es necesario Contactar con el instalador local para reservar el servicio véase al final del manual Llevar siempre la documentación del producto al efectuar la inspección técnica del vehículo Para el desmontaje contactar siempre con el distribuidor local 118 Carolift Sollevatori per sedie a rotelle Istruzioni di manutenzione ...

Страница 119: ...i è in posizione off Spingere l interruttore in posiz on La gru è stata troppo abbassata e l imbrigliatura si è attorcigliata alla bobina in direzione opposta Abbassare la gru al massimo e alzarla fino a che l imbrigliatura si avvolga nella giusta direzione Motore difettoso o pignoni consumati Contactar con el instalador Ricerca dei guasti IT 119 Sollevatori per sedie a rotelle Carolift Ricera dei...

Страница 120: ...oni di garanzia rivolgersi all installa tore Si raccomanda di tenere a portata di mano i seguenti dati Modello Dati dell installatore Numero di serie Anno di produzione Data di acquisto Note 120 Carolift Sollevatori per sedie a rotelle ...

Страница 121: ...raccio piegatibile Ja Braccio estensibile 20 cm Capacità sollevamento 181 kg Tensione 12V Consumo elettrico a massimo carico 15A Il braccio del Carolift è pieghevole Rimuovere il perno posizionato nella parte posteriore del braccio Piegare il braccio Specificazioni tecniche Dati tecnici IT 121 Sollevatori per sedie a rotelle Carolift Specificazioni tecniche ...

Страница 122: ...io con il prodotto a questo scopo l installatore ha il compito di esaminare i seguenti capitoli con voi Sicurezza Uso Azionamento di emergenza Se sorgessero eventuali domande in futuro vi preghiamo di contattare nuovamente l installatore I capitoli menzionati sono stati trattati Data Nome del rivenditore Firma installatore Firma utente ...

Страница 123: ...IT 123 Sollevatori per sedie a rotelle Carolift Introduzione per utenti ...

Страница 124: ...ccordance with service schedule at dealerweb autoadapt com 1 Signature of the installer Date Frequency type Service performed by Additional work done in accordance with service schedule at dealerweb autoadapt com 2 Signature of the installer NOTE In order to improve our product please send an e mail to support autoadapt se with information about additional work done that is not specified in the se...

Страница 125: ...ork done in accordance with service schedule at dealerweb autoadapt com 5 Signature of the installer Date Frequency type Service performed by Additional work done in accordance with service schedule at dealerweb autoadapt com 6 Signature of the installer Date Frequency type Service performed by Additional work done in accordance with service schedule at dealerweb autoadapt com 7 Signature of the i...

Страница 126: ...rk done in accordance with service schedule at dealerweb autoadapt com 11 Signature of the installer Date Frequency type Service performed by Additional work done in accordance with service schedule at dealerweb autoadapt com 12 Signature of the installer Date Frequency type Service performed by Additional work done in accordance with service schedule at dealerweb autoadapt com 13 Signature of the...

Страница 127: ...rk done in accordance with service schedule at dealerweb autoadapt com 17 Signature of the installer Date Frequency type Service performed by Additional work done in accordance with service schedule at dealerweb autoadapt com 18 Signature of the installer Date Frequency type Service performed by Additional work done in accordance with service schedule at dealerweb autoadapt com 19 Signature of the...

Страница 128: ......

Страница 129: ......

Страница 130: ...nfo autoadapt com Internet www autoadapt com Declares that the product Carolift model 6000 6900 Declaration of conformity Conforms to following directives standards and regulations FMVSS 201 FMVSS 302 72 245 EEC 89 491 EEC 95 54 EC 74 60 EEC 78 632 EEC 2000 4 EG 93 42 EEC 2007 47 EEC 95 28 EG 98 37 EC EN 12182 EN 55 022 Medical Devices Directive 93 42 EEC 2007 47 EEC Autoadapt AB Stenkullen 2014 0...

Страница 131: ...2005 Quality system certified in accordance with ISO 9001 2008 Illustrations descriptions and specifications in the user manual are based on current product information Autoadapt reserves the right to make alterations without previous notice 2014 Autoadapt AB 1976 ISO IEC 17025 ...

Страница 132: ...420035 3 2014 01 facebook com autoadapt twitter com autoadapt www autoadapt com AUTOADAPT AB Åkerivägen 7 S 443 61 Stenkullen Sweden Phone 46 302 254 00 E mail info autoadapt com ...

Отзывы: