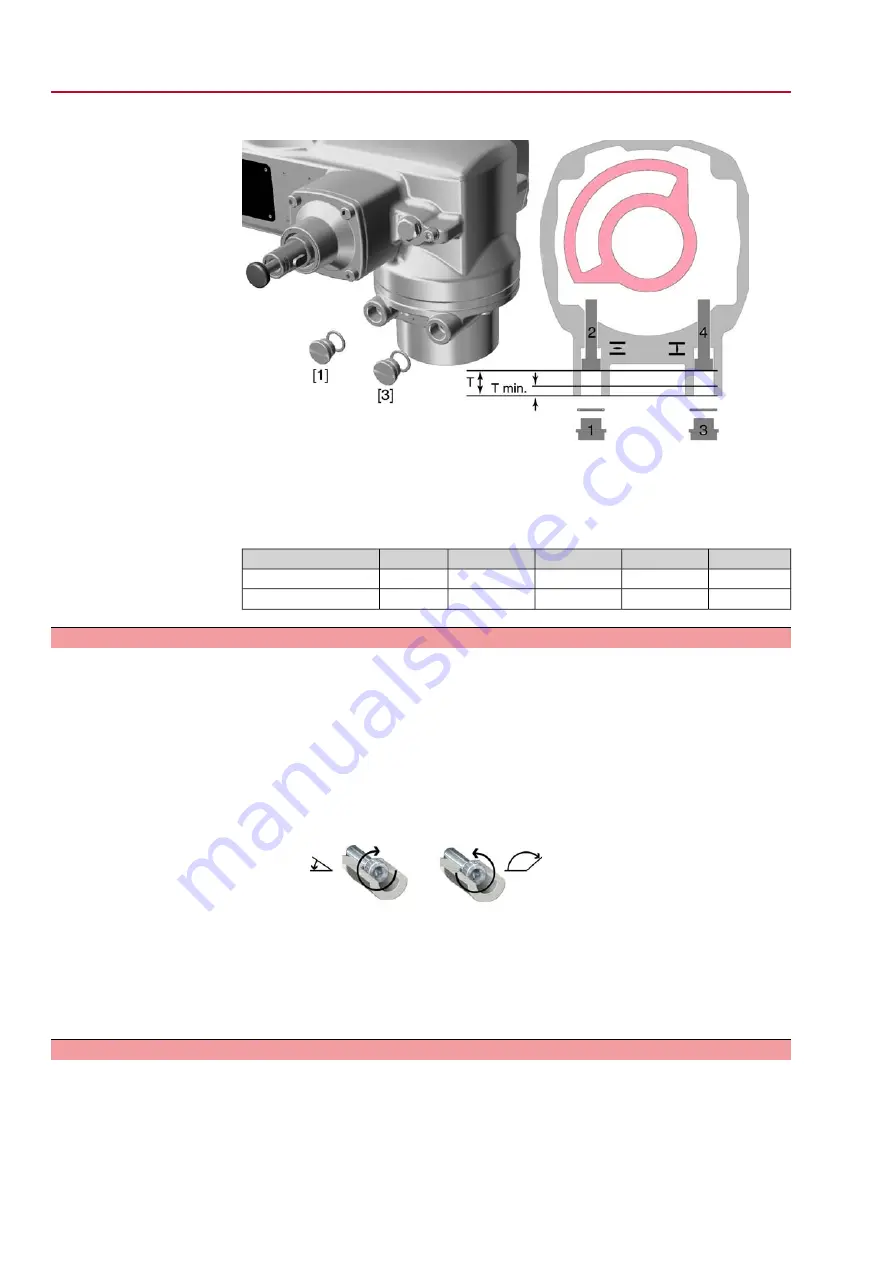
Figure 48: End stop
[1]
Screw plug for end stop OPEN
[2]
Setting screw for end stop OPEN
[3]
Screw plug for end stop CLOSED
[4]
Setting screw for end stop CLOSED
14.2
12.2
10.2
07.2
05.2
Dimensions/sizes
23
23
20
17
17
T (for 90°)
12
13
12
11
11
T
min.
9.1.1.
End stop CLOSED: set
1.
Remove screw plug [3].
2.
Move valve to end position CLOSED with handwheel.
3.
If the valve end position is not reached:
→
Slightly turn setting screw [4] counterclockwise until valve end position
CLOSED can be safely set.
➥
Turning the setting screw [4] clockwise results in a smaller swing angle.
➥
Turning the setting screw [4] counterclockwise results in a larger swing
angle.
4.
Turn setting screw [4] clockwise to the stop.
➥
This completes the setting of end stop CLOSED.
5.
Check O-ring in screw plug and replace if damaged.
6.
Fasten and tighten screw plug [3].
Having completed this procedure, the end position detection CLOSED can be set
immediately.
9.1.2.
End stop OPEN: set
Information
In general, the end stop OPEN does not have to be set.
1.
Remove screw plug [1].
2.
Move valve to end position OPEN with handwheel.
40
SQ 05.2 – SQ 14.2/SQR 05.2 – SQR 14.2 Control unit: electronic (MWG)
Commissioning (basic settings)
AC 01.2 Non-Intrusive


