background image

52 


OPERATING ATTO 


6.


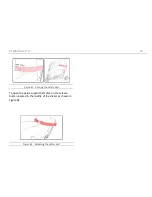
Using the main handle pull the center upwards and 
towards the rod until it clicks and locks in place (see 
Figure 39). 

 Be careful not to pinch 

your finger between the chassis. This area is a pinch 
point and requires your full attention. 


Figure 39 

7.


Use the rod lever to adjust the height of the handle 
bar to the lowest position and bring the lever back 
to the secure position (see Figure 40). 


Figure 40 

8.


Release the adjustment lever of the handle bar and 
bring the handle bar to a horizontal position. Then 
bring the lever back to secure position (see Figure 
41). 


Figure 41  

Содержание MS01068

Страница 1: ...OWNER S MANUAL movinglife com ...

Страница 2: ...WELCOME 1 WELCOME TO ATTO ...

Страница 3: ...2 WELCOME Intentionally left blank ...

Страница 4: ...ntion and care which we hope you will be able to appreciate However being human means we are not perfect and therefore for the benefit of both users and makers we urge you to contact us with any remark idea for a change complaint and even complements We want to hear it all so please register your ATTO and give us a feedback on the appropriate form on our website Enjoy your ATTO REGISTER NOW Please...

Страница 5: ...4 WELCOME Intentionally left blank ...

Страница 6: ...5 TABLE OF CONTENT PREFACE 7 ABOUT THIS MANUAL 9 BACKGROUND 12 SAFETY 14 ATTONOMY 28 OPERATING ATTO 31 TRANSPORTING ATTO 65 TROUBLESHOOTING 66 MAINTENANCE 68 SPECIFICATIONS 74 LIMITED WARRANTY 78 CONTACT INFORMATION 80 ...

Страница 7: ...6 TABLE OF CONTENT Intentionally left blank ...

Страница 8: ... person or firm or reproduced by any means without the express prior written permission of Moving Life Ltd The text and drawings in this manual are for the purposes of illustration and reference only The specifications on which they are based are subject to change without notice Trademarks ATTO is a registered trademarks of Moving Life Ltd Other company and brand product and service names are for ...

Страница 9: ...or medical condition which means that they are unable to walk or have difficulty in walking Intended users should assess eyesight reaction time balance and posture ability to sit for long periods of time concentration and ability to get on and off the mobility scooter Intended users should be able to judge distances recognize obstacles and hazards and be able to see pedestrians and other road user...

Страница 10: ...ter The purpose of the manual is to prepare you and get you acquainted with the product and all its capabilities The manual is aimed at providing you with all the answers to questions that may arise during the operation and use of the scooter If you encounter a question for which you have not found an answer please contact a Moving Life dealer near you or the company s technical support via our we...

Страница 11: ...the instructions and seek a professional or contact Moving Life support to help you find one Users and certified technicians THIS CLAUSE CONTAIN A MUST READ INFORMATION CONCERNING USERS AND CERTIFIED TECHNICIANS This Owner s Manual contains important information for the safe operation and use of this product DO NOT use this product or any available optional equipment without first reading and comp...

Страница 12: ...ans do not service or operate this equipment without first reading and understanding the Owner s Manual and service manual If you are unable to understand the warnings cautions and instructions contact Moving Life technical support before attempting to service or operate this equipment otherwise injury or damage may result This Owner s Manual is compiled from the latest specifications and product ...

Страница 13: ...f it has been a while since you have driven one you are strongly advised to get some training to ensure that you can steer and control the vehicle properly especially on uneven surfaces Your assessment should include checking your eyesight reaction time balance and posture ability to sit for long periods of time concentration and ability to get on and off the mobility scooter You may also want to ...

Страница 14: ...cal regulations you may be able to travel in your mobility scooter on buses and trains so long as those vehicles are constructed or adapted to carry a mobility scooter and providing that your mobility scooter fits in Laws and regulation may vary from country to country and from state to state Always check with local authorities to ensure you are allowed to use your mobility scooter and of the rest...

Страница 15: ...lity scooter must be used only in areas intended for pedestrians and under conditions allowing safe use and good contact with the ground Beware of snow ice sleet rain strong wind sand broken glass and other obstacles and interferences All those and other such irregularities are dangerous to you and to others and should be avoided to prevent injury and damage Do not try to descend or climb an incli...

Страница 16: ...quipment without first reading and completely understanding these instructions If you are unable to understand the warnings cautions or instructions contact a healthcare professional an authorized Moving Life dealer or Moving Life technical support before attempting to use this equipment otherwise injury or damage may occur There are certain situations including some medical conditions where the s...

Страница 17: ...ver Avoid this danger at all times by steering a wide arc around corners and obstacles To avoid the risk of tipping over reduce speed before negotiating any turns For emergency stop press the On Off button Never attempt to drive over or off obstacles higher than 20 mm 3 4 when driving forward and 18 mm 45 64 when driving in reverse This could be unsafe and could damage the scooter Avoid turning of...

Страница 18: ...owly and with caution and always look out for additional obstacles such as car mirrors or door knobs Sharp turns Avoid sudden starts while the handlebar is turned sharply Do not make a sharp turn or a sudden stop while riding your scooter Always reduce your speed and maintain a stable center of gravity when cornering sharply Do not corner sharply when driving at higher speeds Always reduce the spe...

Страница 19: ...your scooter in freewheel mode when on an incline or decline Never park on inclines or declines If you must stop on an incline always lean forward to shift the center of gravity and prevent the scooter from tipping over backwards Mobile phone Never use electronic radio transmitters such as walkie talkies or cellular phones while driving the scooter Reversing Make sure that there are no obstacles b...

Страница 20: ...urface can reach temperatures greater than 41 0 C after driving Do not touch these parts when folding or unfolding the scooter or wait until the motor is cooled down Do not touch the motor when folding or unfolding the scooter until the motor is cooled down Do not hose down your scooter Maintain and store ATTO in a clean and dry condition and avoid exposure to rain snow ice salt or standing water ...

Страница 21: ...mall luggage only if done according to instructions and only if the combined weight of the passenger plus load does not exceed the maximum allowed weight of the scooter Medical condition Never operate the scooter while you are under the influence of alcohol Never operate this scooter if your health condition or medications you are taking cause you to feel dizzy affect your vision or affect your ab...

Страница 22: ...ult in safety hazards for the driver Battery and charger Do not allow unsupervised children to play near this equipment while the batteries are charging Never charge a frozen battery If you encounter a damaged or cracked battery immediately enclose it in a plastic bag and call your authorized Moving Life dealer for recycle and disposal instructions Always avoid prevent damage to AC and DC cords Do...

Страница 23: ...failure to observe weight limitations 3 Do not carry passengers on the scooter Carrying passengers on the scooter may affect the center of gravity resulting in tipping over or a falling Temperature 1 Some of the parts of the scooter are susceptible to change in temperature The controller can only operate in temperature that ranges between 20 C and 50 C 2 At extreme low temperatures the batteries m...

Страница 24: ...nit on level ground when changing from D drive mode to N freewheel mode or freewheel mode to drive mode Do not lift marked handle while seated on ATTO Marked handle is not intended for product lifting ATTO may topple when not in parking mode Marked handle must not be used while ATTO in opened position Indicates module front or rear chassis weight in kilograms Indicate ATTO s maximum weight capacit...

Страница 25: ...ioned to provide important information regarding safe operation of the system For a description of the labels and symbols used as well as details of their location refer to the following Safety Rating and Manufacturer Identification Label on page 80 Symbols and Descriptions on page 23 Note Additional labels used on system controls accessories and disposables are illustrated and described in the fo...

Страница 26: ...TO technology has an immunity level of at least 20 V m which provides useful protection from the more common sources of EMI There are a number of sources of relatively intense electromagnetic fields in the daily environment Some of these sources are obvious and easy to avoid Others are not apparent and exposure is unavoidable However we believe that by following the warning listed below your risk ...

Страница 27: ...is possible to unintentionally bring high levels of EM energy very close to the mobility scooter control system while using these devices This can affect mobility scooter movement and braking Therefore the warnings listed below are intended to prevent possible interference with the control system of the mobility scooter Electromagnetic interference EMI from sources such as radio and TV stations am...

Страница 28: ... brake release to the mobility scooter manufacturer and note whether there is a source of EMI nearby Important EMI RFI ATTO has passed an EMI immunity test according to EN 60601 1 Class B Modification of any kind to the electronics of this mobility scooter as manufactured by Moving Life may adversely affect the EMI immunity levels The operation of the scooter might disturb the operation of devices...

Страница 29: ...28 ATTONOMY ATTONOMY Figure 1 ATTO in close mode ...

Страница 30: ...ATTONOMY 29 Figure 2 ATTO in driving mode ...

Страница 31: ...30 ATTONOMY Figure 3 More ATTO parts ...

Страница 32: ... website www movinglife com videos Injury hazard due to improper assembly disassembly opening or closing ATTO Ensure that all components in the scooter have been correctly placed before continuing to the next step Always check that all locked devices are holding correctly Opening 1 Make sure your ATTO is on flat ground before opening Make sure you have clearance of 2 meters 7 feet from the side of...

Страница 33: ... it clicks and remains pressed see Figure 5 Figure 5 4 Press the rod button and tilt it away from the main ATTO body see Figure 6 Figure 6 5 Hold ATTO with two hands see Figure 7 Figure 7 6 Tilt ATTO toward the rod until the front wheel touches the ground see Figure 8 ...

Страница 34: ...ng the back wheels away from the front wheel see Figure 9 Figure 9 8 Gently move the handle down until ATTO is flat as shown in Figure 9 see Figure 10 Keep holding the rod at upright position Figure 10 9 Place handle in the designated recess until it clicks and locks in place see Figure 11 Figure 11 ...

Страница 35: ...ooter This will release the pressure on the front lever and will make it easier to open Figure 12 11 Place one hand on the tiller and with the other hand release the secure lever of the back handle and bring the handle to upright position at 90 degrees see Figure 13 For proper operation please do not flip the handle to 180 degrees from closed position If you did and you are unable to lift the chai...

Страница 36: ...ks in place see Figure 14 Figure 14 12 Continue using the handle for pulling up the chair until it clicks and locks in place see Figure 15 Do not sit on the chair before it clicks in place to prevent it from sliding down again Figure 15 13 Open both sides of the handle bar see Figure 17 Figure 16 ...

Страница 37: ...on Figure 17 Comfort adjustments Operations described in this chapter are performed near and around pinching points Be careful and follow instructions to prevent injury Make sure your fingers are away from moving parts that may be closing gaps while moving Adjusting Driving Console height Use the rod lever to adjust the height of the handle bar at your convenience Bring the lever back to the secur...

Страница 38: ...when you are done Figure 19 Driving Console tilt lever Seat height adjustment Adjusting seat height must be performed only by certified technician to prevent injury and damage Although ATTO s seat is thin and stylish it was designed to provide comfort and safety and can be adjusted according to user s preferences The seat mechanism can be locked at one of three fixed heights To adjust seat height ...

Страница 39: ...ted in one of the three adjustment holes holding the seat in its place Remove the pin while holding the seat with your other hand see Figure 21 5 Figure 21 Seat height adjustment holes 6 Now you can adjust the seat to any of the three holes height and reinsert the pin to hold it in place 7 Reinsert the metal bracket and the cover When the seat is in its highest position the scooter will be more in...

Страница 40: ...te and release the two Alan hex screws shown in Figure 22 while holding the tiller in upright position you need to hold the tiller to prevent it from falling while releasing the screws 2 Move the tiller into the desired position and tighten the two screws back again using a thread locker such as Loctite Figure 22 Steering Rod angle adjustment screws Driving Console The Driving Console your scooter...

Страница 41: ...obstacles use extra care and reduce the maximum speed to a limit allowing you to control your mobility scooter without presenting a risk to other people and to yourself Display panel Figure 25 Display Panel Battery level meter When ATTO power is ON the battery meter indicates the approximate battery charge level As with all Li ion batteries the charge level indication is accurate only when the bat...

Страница 42: ...erate release the throttle lever to your level of comfort To bring the scooter to a complete stop simply remove your thumb from the lever which will set the lever to its off position bringing the scooter to a halt after 1 2 meter Reverse and horn buttons Figure 27 Reverse and horn buttons A ATTO is equipped with a driving direction button Press on the button to change the driving direction Once th...

Страница 43: ... dimming option Bee sounds Beeps caused by pressing buttons may be enabled or disabled To Enable press the and Horn buttons simultaneously To Mute the beeps press the and Horn buttons simultaneously horn is always active Handle bar grips Figure 28 Handlebar grip There are two grips on the handlebar one on each side To change the grips from folded position to drive position simply lift the grip aro...

Страница 44: ... result in personal injury Never step on or off the scooter using the seat or the seat backrest for support The seat back may fold down and may cause you to lose your balance which could result in personal injury Getting off ATTO Verify that the power is turned off Carefully place one foot on the ground transfer your weight to that leg and slowly come to a standing position Step away from the scoo...

Страница 45: ...ly and properly on your ATTO For you first driving sessions make sure that your ATTO starts out on a level surface and that you will continue driving on a level surface Never touch the Freewheel brake release lever while driving Do not bend lean or reach for objects if you have to pick them up from the scooter deck or from either side of the scooter Movements may change your center of gravity and ...

Страница 46: ...f position and your scooter will come to a gradual stop Note Always bring your ATTO to a full stop before changing direction from forward to reverse or from reverse to forward Reverse driving Place your hands on the handgrips Use one of your left fingers to press the direction button located on the left side of the Driving Console You should hear a double beep confirming you are now driving backwa...

Страница 47: ...ft to change the moving direction accordingly Make certain to maintain sufficient clearance when turning your scooter so that the rear wheels will clear any obstacle Turning too sharply around a corner can cause the scooter to tip over Avoid this danger by steering a wide arc around corners and obstacles Also to avoid the risk of tipping over reduce speed before negotiating any turns Steering in a...

Страница 48: ...tight corners If you do that the scooter s rear wheels will follow a wide arc not cut the corner short and not bump into or get hung up on any railing corners When driving down a ramp keep ATTO s speed set to the slowest speed setting to ensure a safely controlled descent Avoid sudden stops and starts When climbing an incline try to keep ATTO moving If you must stop start up again slowly and then ...

Страница 49: ...it or standing next to it Even though your ATTO is capable of climbing slopes greater than that illustrated in Figure 30 do not under any circumstances exceed the incline guidelines or any other specifications presented in this manual Doing so could cause your ATTO to become unstable resulting in personal injury and or damage to your ATTO Figure 30 Maximum recommended incline angle Any attempt to ...

Страница 50: ...surfaces a transition from low grip area to high grip area as moving from a grass surface to a paved surface especially at high speed while turning and abrupt changes of direction High speed turning is not recommended If you feel you are about to tip over while turning reduce speed and steering angle i e make the turn wider to prevent your scooter from tipping over When you turn a sharp corner red...

Страница 51: ... injury Make sure your fingers are away from moving parts that may be closing gaps while moving 2 Fold both sides of the handle bar see Figure 33 Figure 33 3 Release the secure lever of the back handle and bring the handle to 90 degrees position Allow the seat to slide down until it clicks in place see Figure 34 Figure 35 Figure 34 Figure 35 4 Push the back of the chair forwards until it clicks se...

Страница 52: ...t lever require too much force to operate you should apply horizontal pressure on the main handle towards the front of the scooter This will release the pressure on the front lever and will make it easier to open Figure 37 Switch hands Use one hand to keep the rod upright and use your other hand to lift the main handle see Figure 38 Figure 38 ...

Страница 53: ... This area is a pinch point and requires your full attention Figure 39 7 Use the rod lever to adjust the height of the handle bar to the lowest position and bring the lever back to the secure position see Figure 40 Figure 40 8 Release the adjustment lever of the handle bar and bring the handle bar to a horizontal position Then bring the lever back to secure position see Figure 41 Figure 41 ...

Страница 54: ...easily and effortlessly separated in only a few seconds by operating a knob and two handles The same technique applies to putting the two halves back together This is very useful when storing ATTO in the trunk or in an airplane s overhead bins 1 Make sure the handle bar is secured at an upright position see Figure 42 Figure 42 2 Open both separation levers see Figure 43 In case the separation leve...

Страница 55: ...dle bar and separate from the back chassis see Figure 45 Figure 45 Lifting separated chassis 1 Once the two chassis has been separated and you are ready to lift them for instance into your car trunk make sure both chassis is set flat on the ground where it will not be an obstacles to you or to others 2 Grab the one of the chassis from designated handles and carry it to its destination see Figure 4...

Страница 56: ...OPERATING ATTO 55 1 Front handle 2 Driving console handle 3 Frame underneath 4 Support leg Figure 46 liffting points ...

Страница 57: ...e chassis 1 Make sure the handle bar is secured at an upright position see Figure 47 Figure 47 Place the back chassis vertically Hold the front chassis from the handle bar and bring it towards the back chassis see Figure 48 Figure 48 2 Bring the two parts together Use the hanging hooks see Figure 49 to locate the two ends properly At this point the central release button will click Figure 49 ...

Страница 58: ...ecured in the downwards position Figure 50 Freewheel ATTO is equipped with a manual freewheel lever which when pushed to N state it in freewheel mode and allows the scooter to be pushed When ATTO is in freewheel mode the braking system is disengaged and ATTO will move freely with very little force This can cause injury and property damage to anyone and anything nearby Change to freewheel mode only...

Страница 59: ... freewheel lever is pushed backwards see Figure 52 Figure 52 Securing the freewheel Battery and charger ATTO s charger is a small yet smart and powerful charger with the ability to connect to any electrical grid rating 110VAC 240VAC It is fully approved and safe to use When connecting the charger connect the DC charging cord to the battery charge plug before connecting the charger AC cord to the e...

Страница 60: ...attery insert first the back end of the battery and then push the front until the battery clicks and locks in place see Figure 55 Make sure the battery is properly connected before folding ATTO or turning it on Figure 55 Removing the battery Identify the battery release button highlighted in red frame in Figure 56 ...

Страница 61: ...emoved from ATTO see Figure 58 Figure 58 NEVER attempt to recharge the batteries by attaching cables directly to the battery terminals DO NOT attempt to recharge the battery and operate ATTO at the same time DO NOT attempt to recharge the battery when ATTO has been exposed to any type of moisture DO NOT attempt to recharge the battery when ATTO is outside DO NOT sit on ATTO while recharging the ba...

Страница 62: ...ximize its life span always charge the battery when the battery meter reaches 2 green lines b Before placing the battery for a long period of time make sure to charge it at about 60 of full charge 1 Connect the charger to the electric socket The Green LED should turn green to indicate the charger is properly connected to the socket 2 Connect the other end of the charger to ATTO s battery The charg...

Страница 63: ...le as shown in Figure 59 Pill the protecting tape and stick the Velcro in place using the self adhering side Apply light pressure to ensure good contact Figure 59 Placing Velcro Stickers 2 Attach the pelvic support belt to the Velcro stickers as shown in Figure 60 You can use any of the two parts on any side left or right Figure 60 Attaching the safety belt to the Velcro stickers 3 Close the pelvi...

Страница 64: ...RATING ATTO 63 Figure 61 Clicking the safety belt To open the pelvic support belt click on the release button located in the middle of the clicker as shown in Figure 62 Figure 62 Releasing the safety belt ...

Страница 65: ...do A Low USB port reports an error Disconnect any device Check if port is wet Restart ATTO P Low Throttle may be pressed while ATTO is turned on Release the throttle If problem persists restarts ATTO o High Motor Sensors malfunction Error Number Severity Explanation and what to do Contact support L Low Motor reports an overload Shutdown ATTO wait 10 minutes and restart H Low Controller is over hea...

Страница 66: ...herwise secure the tiller and handlebar to prevent it from being damaged due to moving objects or by ATTO shifting around during transport To transport ATTO in a car please see the Separating the chassis chapter in this Owner s Manual If your scooter and its components are not properly and securely stowed the scooter or components may shift around while driving causing injury or damage If the scoo...

Страница 67: ...etween the battery and its connector If that s ok 5 Check the fuse if it is blown replace it following the procedure in the Maintenance chapter of this Owner s Manual Once you made sure the fuse is good 6 Try to turn the scooter on by pressing the On Off button for at least 2 seconds If the scooter does not turn on please contact an authorized Moving Life dealer If the scooter is ON but does not m...

Страница 68: ...tery can be charged while it is installed on the scooter or when it is removed from the scooter Do not leave the battery pack and charger plugged in for more than 12 hours Damage to the battery pack and a hazardous condition may result ...

Страница 69: ...thorized service facilities See back cover for details Electrical fuse Your ATTO Battery has a protecting fuse at the bottom of the battery pack see red circle in Figure 63 Figure 63 Fuse location Possible causes for the fuse to blow up The fuse is designed to protect the battery from over charging discharging You should check the condition of the fuse if The battery is not charging A charged batt...

Страница 70: ... gap in the wire In case it is blown see Figure 64 replace it with a new fuse blade type ATO or ATC Once a new fuse has been placed please remember to place the plastic cover back in its place Figure 65 Figure 65 Replacing a blown fuse Never soak your scooter in any liquid This may cause personal injury and or damage to your scooter If the fuse continues to blow an underlying electrical fault need...

Страница 71: ...s a need to replace a tire due to erosion or damage please contact an authorized Moving Life dealer Lubrication There are two lubrication areas where a light spray of silicon lubricant should be applied every six months or more rapidly if opening and closing ATTO becomes more difficult to perform you may use other light lubricant as long as they are not sticky or corrosive on aluminum and plastics...

Страница 72: ...etely discharge the battery before recharging it If you are not going to use your ATTO for an extended period of time charge the batteries to 60 of full charge before storing your scooter The batteries can be left unmaintained for up to 6 months if they are properly charged and kept at room temperature approximately 22 C 72 F If you have not used your scooter for more than one month make sure that...

Страница 73: ... from the scooter Store your scooter in ambient dry environment Avoid storing your scooter where it will be exposed to temperature extremes Always protect batteries from freezing temperatures and never charge a frozen battery This damages the battery and can cause personal injury To use ATTO after an extended period of storage Open ATTO if it was closed folded during storage Visually inspect all u...

Страница 74: ...re parts can be purchased directly from Moving Life or from a local representative check back cover for dealer contact information Part number Description 700 003985 Controller 700 003986 Seat Upholstery 700 003987 Rear Handle Tail 700 003988 Seat Frame 700 003989 Back Upholstery 700 003990 Front Wheel Motor 700 003991 Rear Wheels 700 003992 Throttle 700 003993 Handgrip 700 003994 Telescope lockin...

Страница 75: ... Weight Capacity Maximum user weight is 100 Kg 220 Lbs Dimensions When folded ATTO is the most compact mobility scooter in the world Nevertheless when open and ready to drive ATTO is the largest and most comfortable in its category ATTO s dimensions units in cm inch Part Height Length Width Trolley mode 72 28 39 15 3 42 16 5 Drive mode 90 35 120 47 56 22 Ground clearance ATTO s minimum ground clea...

Страница 76: ... board and off board meaning that you can but do not have to take the battery off the scooter in order to charge it Removing the battery is as easy as pressing a button Reinstalling the battery is as easy as putting it back in place Operating range Battery model Metric Imperial 250 W h 16 Km 10 Mile Charger UL and CE approved Charger with self shutdown functionality for safety and extended battery...

Страница 77: ...O continued to work with zero malfunctions which guarantees resistance to normal outdoor conditions Nevertheless we recommend storing ATTO indoor to ensure maximal lifetime of high performance and for safety reasons use it only under dry weather conditions Flammability ATTO Is designed according to UL94 V 0 Responsibility of the Manufacturer The manufacturer considers itself responsible for the ef...

Страница 78: ...77 Refrain from modifying the ATTO Mobility Scooter hardware or software in any way Never allow untrained personnel to operate the ATTO Mobility Scooter Always report to Moving Life Ltd authorized representatives only ...

Страница 79: ...ly to Moving Life at the address on the back cover provide authorized Moving Life dealer s name address date of purchase indicate nature of the defect and if the product or defect part carries a serial number indicate the serial number Do not return products to our factory or shipping center without our written prior consent THREE YEAR LIMITED WARRANTY Structural frame components including mobilit...

Страница 80: ... by Moving Life Moving Life shall not be liable for any consequential or incidental damages whatsoever There is no other express warranty Implied warranties including those of merchantability and fitness for a particular purpose are limited to one 1 year from the date of original purchase and to the extent permitted by law Any and all implied warranties are excluded This is the exclusive remedy Li...

Страница 81: ...Manufacturer Moving Life ltd 2 HaOfe st Kadima 6092000 Israel Tel 972 73 391 3999 Email info movinglife com Authorized representative Obelis Group Ltd Bd Général Wahis 53 B 1030 Brussels Belgium Serial number label Authorized service facilities label ...

Страница 82: ...NOTES 81 NOTES ...

Страница 83: ......

Страница 84: ...ATTO Owner s Manual English RG012 RG012 RG 012 ATTO 1 Owners Manual ENG Ver 2 4 docx Copyright 2016 All rights reserved ...

Отзывы: