


5
2.1.2
Login Process and Main Window Interface
Before users access the configuration, they have to log in; this can be done in two simple steps.
1.
Launch a web browser.
2.
Type in the switch IP address (e.g. http://10.0.50.1), (as shown in Figure 2.1).
*When the user name and password is left empty, the login prompt will not show.
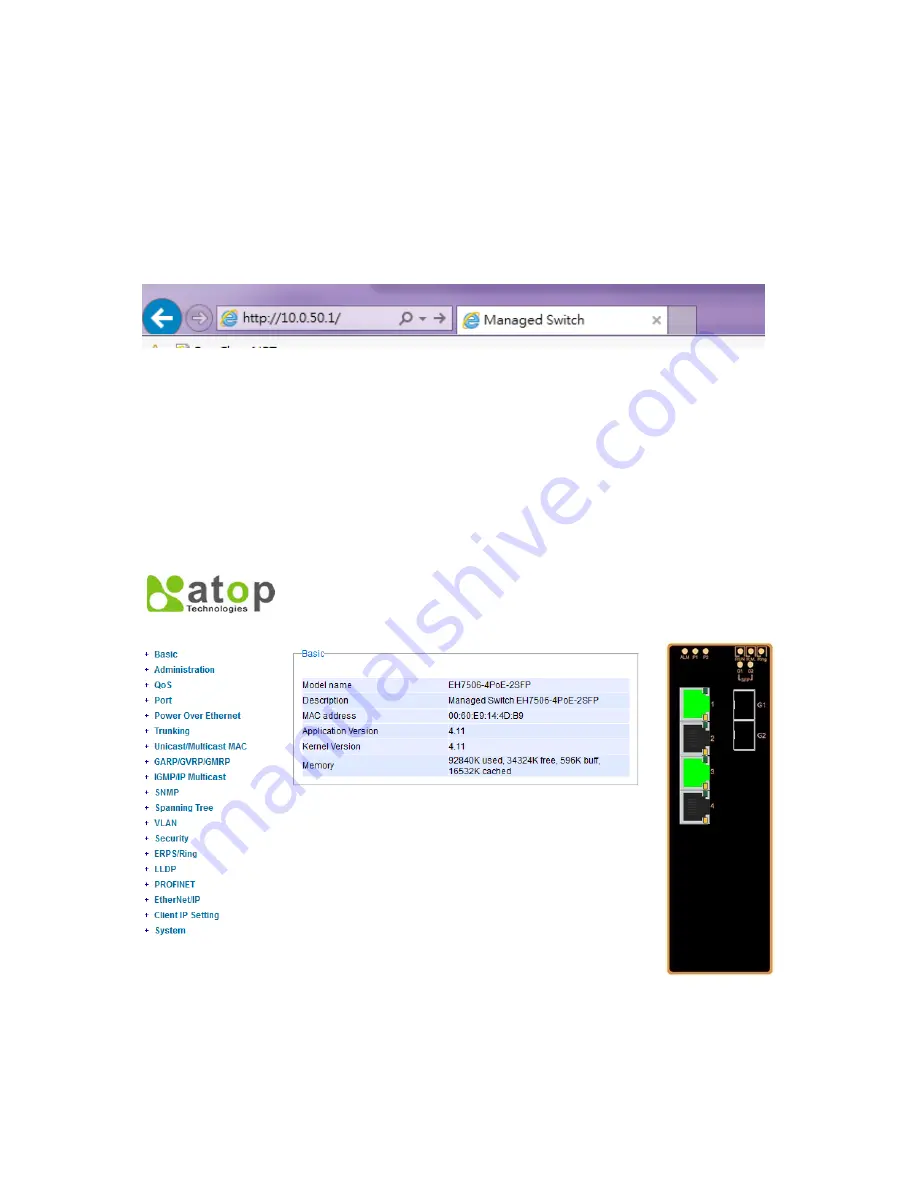
Figure 2.1 IP address for Web-based setting
After the login process, the main interface will show up, which should look as Figure 2.2. The main
menu (left side of the screen) provides the links at the top level of the menu hierarchy and allows
them to be expanded to display lower level links. Note that in this case the Port 1 and 3 is highlighted
in green; indicating that the port is being connected. Detailed explanations of each sub-section will be
addressed later as the need arises.
Figure 2.2 Default web interface
Содержание EH7506
Страница 35: ...29 Figure 2 40 Mapping Table of DSCP ECN page...
Страница 53: ...47 2 9 1 GVRP Settings Figure 2 62 GVRP setting page...
Страница 55: ...49 2 9 2 GMRP Settings Figure 2 63 GMRP setting page...
Страница 76: ...70...
Страница 90: ...84 Figure 2 97 iA Ring Example Topology...
Страница 98: ...92 Management Address Indicates neighbor s management IP address...
Страница 110: ...104 Figure 2 115 Reboot page...
Страница 117: ...111...


