HARDSCAPE LIGHTS - CCHL6 / CCHL12
Installation
Hardscape Lights are designed to be installed into walls and columns, just under capstones.
The diode assembly can be replaced without removing the cord or the capstone. The round
18” long cord between the driver and the luminaire cannot be cut, and some accommodation
must be made for the driver in most applications. We recommend installing a 1” conduit into
the wall to accommodate the cord before installing the fixtures.
When installing the mounting bracket, make sure the stone above the bracket does not rock
or pinch the cord. The holes in the bracket serve as glue points to hold the bracket in place.
NOTE: Hardscape Lights are not submersible.
Maintenance
Replacement diode assemblies are available for
Hardscape Lights. Remove the screws on the
existing light, being careful not to let the diode
assembly fall, as this could break the plug
connecting the light to the cord. Lower the diode
assembly and squeeze the locking clip to separate
the plugs. Plug in the new diode assembly, making
sure the gasket has not moved or shifted and that
the notched edge of the diode assembly fits
between the two ridges on the cord gasket. Align
the screw holes and hand tighten the screws.
4
Maintenance
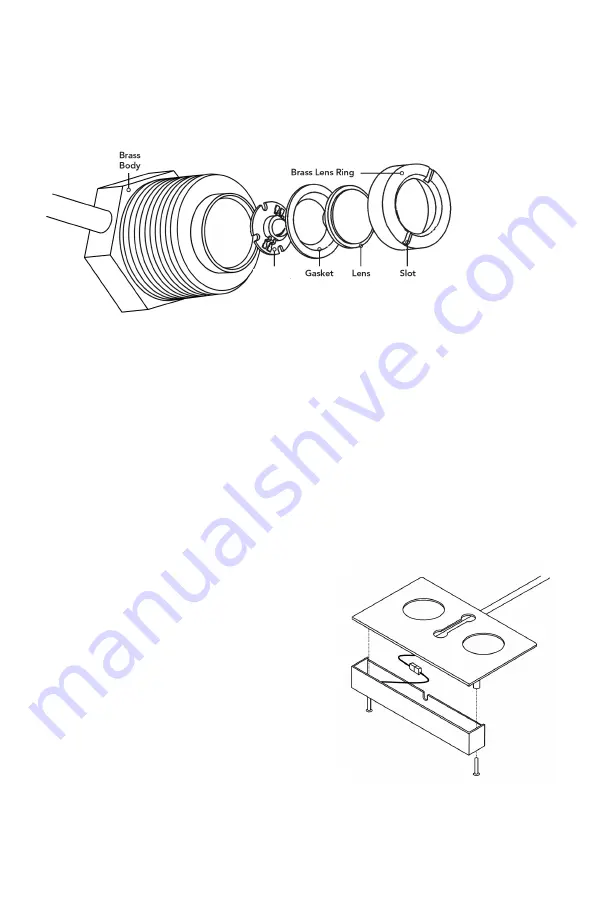
Replacement diode, gasket and lens kits are available for Spout Lights. Unplug the fixture. Loosen
the brass lens ring. Remove lens ring, lens and gasket. Carefully remove the diode assembly and
replace. Install new silicone gasket and lens and reassemble. Ensure that all components are
installed correctly after servicing and the lens ring is tightly secured before submersing the fixture.
CCHL6:
CCSL2
Diode
Содержание CCBL5
Страница 26: ...26...
Страница 27: ...27...
Страница 28: ...1 330 274 8317 www ATLANTICWATERGARDENS com...


