background image

E

nglish

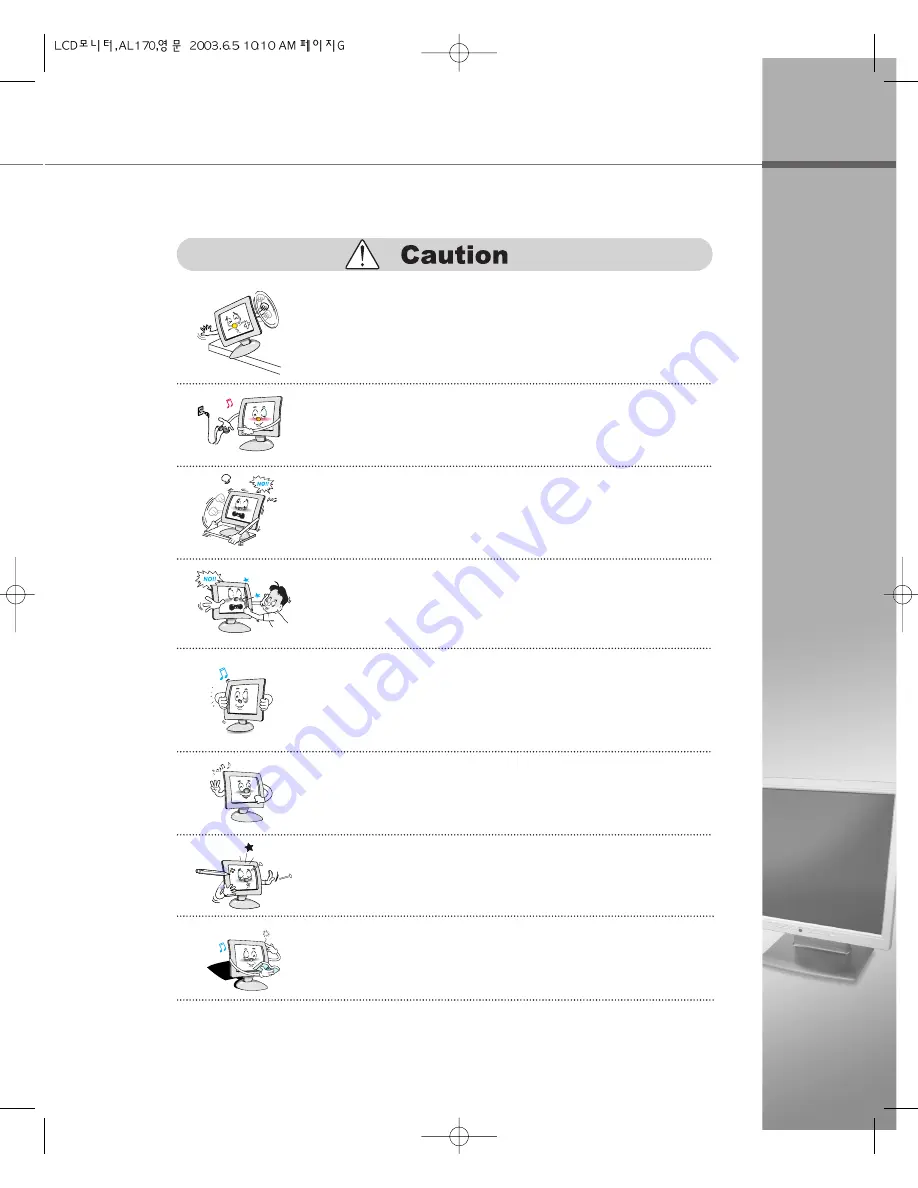
Turn off the monitor and disconnect all cables from the
monitor before moving the monitor.

Be careful with the shock when moving the monitor.

Place the monitor on a stable and secure surface.

Fall or displacement of the monitor may cause an injury.

Don’t scratch or jolt the monitor surface.

Damage or failure of the panel may be caused.

Often take a rest to protect your eyes when you work
for a long time.

Take hold of the monitor with both hands setting the 
panel forward.

If the monitor is dropped, contact the service center to check

it for a susceptibility to fire or electric shock.

Don’t press upon the panel or scratch the surface with
your hands or sharp item such as a nail, pens.

Damage or failure of the panel may be caused.

The fluorescent light of the monitor contains a mercury
which could be exploded. Don’t discard or bury the
monitor without permission of the law concerned.

Содержание AL170

Страница 1: ......

Страница 2: ...e warranty service If you have problem with your monitor please check TroubleShooting in this user manual before asking for help service center The information in this user manual is subject to change without notice If you let display the static images on the LCD monitor for prolonged time the LCD monitor may show you the screen images retention It is not a continuous condition and will fade away ...

Страница 3: ...ant to Part 15 of the FCC Rules These limits are designed to provide resonable protection against harmful interference in a residential installation This equipment generates uses and can radiate radio frequency energy and if not installed and used in accordance with the instructions may cause harmful interference to radio communication However there is no guarantee that interference will not occur...

Страница 4: ...itor If you find that any of these items is missing or appears damaged contact your dealer immediately The actual monitor and accessories may appear differently from those shown on the above figure Note Diskette Monitor Driver Power Cord User Manual DC Adapter Audio Cable VGA Signal Cable Monitor ...

Страница 5: ...nly use the adapter provided with the monitor An electric shock or fire accident may occur Don t use a power cord or plug that is frayed or damaged An electric shock or ignition may be caused Insert the plug completely so that the power supply unit can be connected tightly Unsafe power connection may cause a fire In case of the possibility that a serious injury or death may occur during a violatio...

Страница 6: ...of electric shock fire or failure may occur Avoid direct sunlight or any other source of heat such as a fireplace A fire or electric shock accident may be caused Place the monitor at a proper distance over 10 cm away from the wall for sufficient ventilation A fire may be caused due to an increase in internal temperature Place the monitor in a well ventilated room A fire may be caused due to an inc...

Страница 7: ...er counsel window for check ups Don t insert metals such as coins hair pins or ironware or flammable items such as paper or matches into the monitor A fire or electric shock accident may be caused Stop using in case of smoke or abnormal odors Immediately turn off the power and pull out the power cord from the wall and then contact the service center Continuity of use in such a state may cause a fi...

Страница 8: ...ten take a rest to protect your eyes when you work for a long time Take hold of the monitor with both hands setting the panel forward If the monitor is dropped contact the service center to check it for a susceptibility to fire or electric shock Don t press upon the panel or scratch the surface with your hands or sharp item such as a nail pens Damage or failure of the panel may be caused The fluor...

Страница 9: ...lling the Monitor Driver 2 1 Installing the Monitor Driver Under Windows 7 Windows 98 Me 7 Windows 2000 8 Windows XP 9 2 2 Installing the Monitor Driver Under Linux 10 Adjusting the OSD On Screen Display Menu A 1 Troubleshooting 15 A 2 Specification 16 Troubleshooting Specification 3 1 Selecting and Adjusting the OSD On Screen Display Menu 11 Selecting and Adjusting the OSD Menu 12 3 2 Exclusive A...

Страница 10: ...ernally installed speakers 2 W AUDIO The VESA DPMS Display Power Management Signaling function is available to reduce power consumption by automatically switching the computer into the power saving mode if the system doesn t operate for a fixed period of time Power Consumption Economy Function For optimum view you can tilt the display vertically from 5 to 30 degree When adjusting the display grasp...

Страница 11: ...on it with the screen facing downwards Take caution not to cause scratches to the LCD display 1 Push in the support in the direction of the arrow Make sure that the latches are fixed to the LCD 2 While pressing the latches on both sides push the support in the direction of the arrow and remove it 3 Latch Support Support Latch ...

Страница 12: ...m Decreases the volume without pressing the MENU Button DOWN Button Moves to the down menu item in the OSD menu window AUTO Button Press the AUTO button with no OSD menu shown on the screen and the screen is automatically adjusted into the optimal state applicable to the current mode showing the PROGRESSING AUTO CONFIGURATION message If you are not satisfied with the auto adjustment you can additi...

Страница 13: ...GA signal cable to the ANALOG connector on the computer Self Diagnostics Screen ANALOG If the signal cable is improperly connected between the monitor and the computer and if the computer is in the DPMS mode ANALOG POWER SAVER MODE message appears on the screen Note To enjoy the sound with your monitor at first you must connect the audio cable to AUDIO IN on the monitor and LINE OUT on the compute...

Страница 14: ...tor and peripheral devices 1 2 1 4 Connecting the Peripheral Devices DC IN Jack DC Adapter Power Cord ANALOG Connector ANALOG Connector VGA Cable Connecting the power Plug into the power outlet at 220V or 110V The voltage is set automatically Connecting the computer Connect the ANALOG connector on the computer ...

Страница 15: ...IO RCA Cable 3 Connecting Audio Devices Connect the audio cable to the AUDIO IN on the monitor and the LINE OUT on the computer or connect the audio cable RCA cable to the AUDIO IN on the monitor and the stereo on the camcorder TV and connect a set of headphones or external speakers to the AUDIO OUT ...

Страница 16: ...l Panel window 4 This wizard searches updated drivers for next device Click Next 7 What do you want Windows to do Select Display a list of all the drivers in a specific location so you can select the driver you want option and click Next 8 Select the manufacturer and model of your hardware device Click Have Disk 9 If it doesn t show up the relevant model in device selection window click List all D...

Страница 17: ... Driver Upgrade Wizard Click the Next button 8 Installing the Hardware Device Drivers Select a list suitable to this device to select the specific driver item and click the Next button 9 Selecting the Device Drivers Click the Have Disk button 10 Installing From Disk Click the Browse button and select A 11 Selecting the Device Drivers Select 17 0 ANALOG MONITOR and click the Next button 12 Starting...

Страница 18: ...ect Don t search I will choose the driver to install option and click Next 9 Please wait while the wizard installs the software Now start installing the monitor driver 13 Select the device drivers you want to install for this hardware Select 17 0 ANALOG MONITOR and click Next 12 Now the model name of the monitor is changed Close all windows opened and restart the computer 15 Completing the Hardwar...

Страница 19: ... frequency Please refer to the horizontal frequency in monitor manual User may directly input frequency 7 Next configure a vertical frequency Please refer to the horizontal frequency in monitor manual User may directly input frequency 8 Then configure a monitor 9 Type in the model name of monitor The monitor s identification and description typed in here aren t directly related with the execution ...

Страница 20: ...m you moved is highlighted press the SELECT button 3 Press the UP DOWN button to move the desired submenu item 4 The submenu item you moved is highlighted press the SELECT button 5 Press the LEFT RIGHT button to modify the current value 6 Press the SELECT button to save the modified value 7 MENU UP DOWN SELECT Select the main menu item MENU Exit the OSD menu window SELECT Save the modified value L...

Страница 21: ...e display EXIT Exits BRIGHTNESS CONTRAST menu BRIGHTNESS CONTRAST Screen Resolution Screen Frequency The exclusive ANALOG monitor can use only ANALOG signals as input signals RED Changes the value of red GREEN Changes the value of green BLUE Changes the value of blue EXIT Exits COLOR menu COLOR Controls the color Red Green Blue of the display Controls the brightness and contrast of the display ...

Страница 22: ...XIT Exits POSITION menu POSITION OSD POSITION Adjusts the position of the OSD window OSD LANGUAGE Adjusts the language of the OSD window ENGLISH DEUTSCH FRANAIS ESPAÑOL ITALIANO OSD TIME Adjusts the waiting time the OSD fades away Can adjust the waiting time up to 60 seconds the OSD fades away if you do not input the OSD button SETUP Adjusts the position of the display Controls and selects the OSD...

Страница 23: ......

Страница 24: ...olors On the Windows 95 98 XP perform the following process Control Panel Display Setting Color Table Screen Resolution 256 Colors OK Do you see a spot on the screen You may see a few spots in red green white and black on the screen during the operation Occurrence of such a phenomenon is not a failure but a characteristic of the LCD panel and therefore has no relation to the performance of the mon...

Страница 25: ...on LCD Panel Type a Si active matrix TFT LCD Size 17 0 459 74 mm Pixel Pitch 0 264 mm x 0 264 mm Color depth 8 bit 16 777 216 colors Video Signal Recommended Resolution 1280 x 1024 Horizontal frequency 31 5 80 KHz Vertical frequency 56 75 Hz Speaker Output Stereo 2 Watt x 2 Signal Input Input Connectors 15pin D Sub User s control Auto Configuration Brightness Contrast H Position V Position Color R...

Отзывы: