


2-14
Chapter 2: Basic installation
Chapter 2
•
Only USB 3.0 ports 5 and 6 support Ai function.
•
Only USB2.0 port 6 supports USB function
•
The plugged USB 3.0 device may run on xHCI mode or EHCI mode, depending on the
operating system’s setting.
•
USB 3.0 devices can only be used as data storage only.
•
We strongly recommend that you connect USB 3.0 devices to USB 3.0 ports for faster
and better performance for your USB 3.0 devices.
•
Due to the design of the Intel
®
9 series chipset, all USB devices connected to the
USB 2.0 and USB 3.0 ports are controlled by the xHCI controller. Some legacy USB
devices must update their firmware for better compatibility.
•
Multi-VGA output supports up to three displays under Windows
®
OS environment, two
displays under BIOS, and one display under DOS.
•
Intel display architecture design supports the following maximum supported pixel
clocks (Pixel Clock = H total x V Total x Frame Rate (Fresh screen rate)):
-
DisplayPort / Mini DisplayPort: 533 MHz
-
HDMI port: 300 MHz
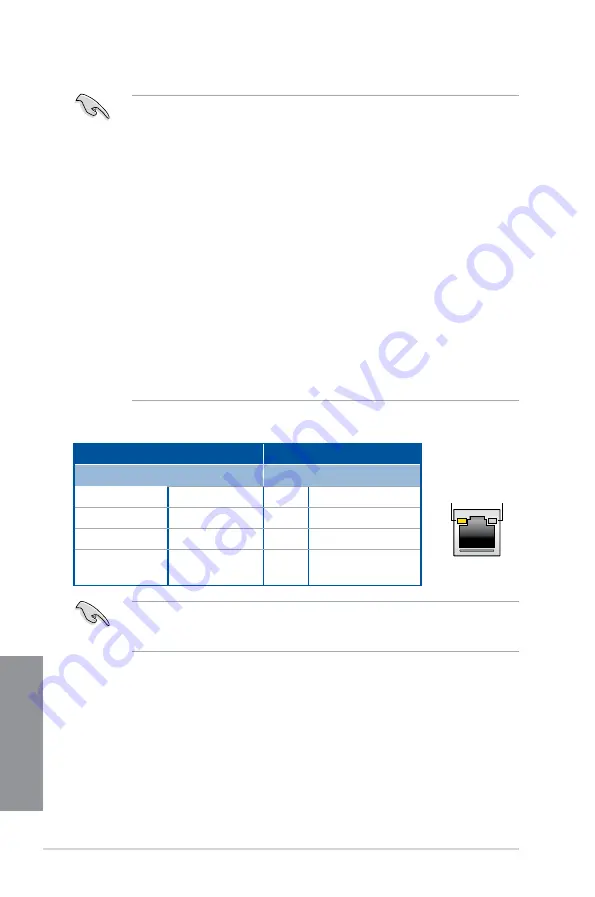
* LAN ports LED indications
ACT/LINK
LED
SPEED
LED
LAN port
Activity Link LED
Speed LED
Status
Description
Status Description
Off
No link
Off
10 Mbps connection
Orange
Linked
Orange 100 Mbps connection
Orange (Blinking) Data activity
Green
1 Gbps connection
Orange (Blinking
then steady)
Ready to wake up
from S5 mode
You can disable the LAN controllers in BIOS. Once disabled, the LAN2 port’s ACT/LINK
LED and SPEED LED stop blinking. For LAN1 port, the ACT/LINK LED still blinks even if
you disabled it.
Содержание Z97-WS
Страница 1: ...Motherboard Z97 WS ...
Страница 54: ...1 38 Chapter 1 Product introduction Chapter 1 ...
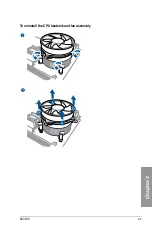
Страница 59: ...Z97 WS 2 5 Chapter 2 To uninstall the CPU heatsink and fan assembly ...
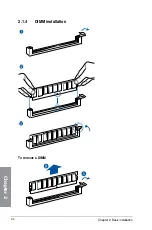
Страница 60: ...2 6 Chapter 2 Basic installation Chapter 2 To remove a DIMM 2 1 4 DIMM installation ...
Страница 61: ...Z97 WS 2 7 Chapter 2 2 1 5 ATX Power connection OR ...
Страница 62: ...2 8 Chapter 2 Basic installation Chapter 2 2 1 6 SATA device connection OR OR ...
Страница 138: ...3 66 Chapter 3 BIOS setup Chapter 3 ...
Страница 160: ...4 22 Chapter 4 Software support Chapter 4 ...
Страница 180: ...6 12 Chapter 6 Multiple GPU support Chapter 6 ...
Страница 186: ...A 6 Appendices Appendices ...


