


1-20
Chapter 1: Product Introduction
C
h
ap
te
r
1
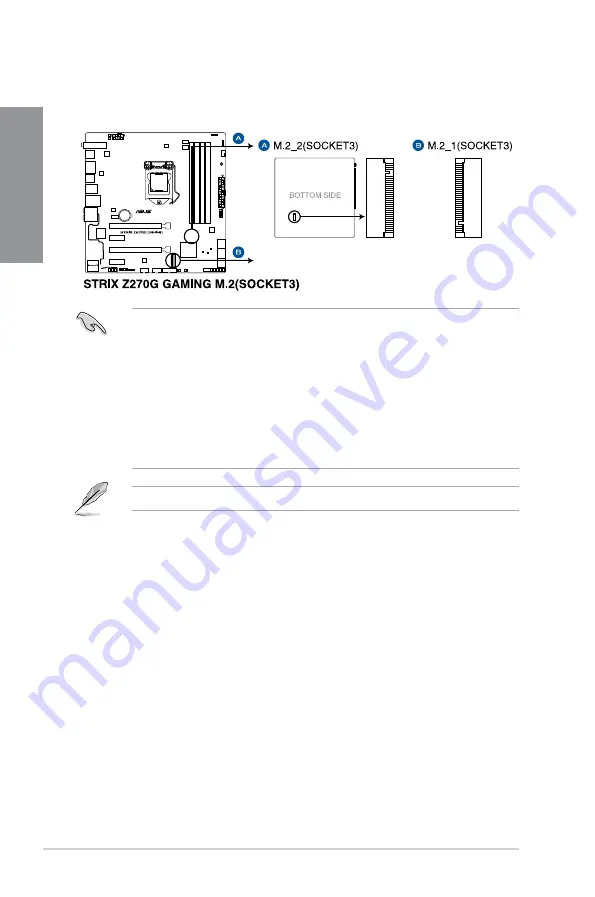
11. M.2 sockets (M.2_1; M.2_2)
These sockets allow you to install M.2 SSD modules.
M.2_2 socket is located on the bottom of the motherboard.
M.2_1 socket supports PCIe 3.0 x4 and SATA mode M Key design and type 2242 /
2260 / 2280 PCIe and SATA storage devices.
M.2_2 socket supports PCIe 3.0 x4 M Key design and type 2242 / 2260 / 2280 / 22110
PCIe storage devices.
When attaching a M.2 SSD to the M.2_2 slot on the bottom side of the motherboard,
be sure to use the bundled short M.2 xing screw and mount to avoid damaging your
board and SSD.
These sockets support IRST (Intel
®
Rapid Storage Technology).
The M.2 SSD module is purchased separately.
Содержание STRIX Z270G GAMING
Страница 1: ...Motherboard STRIX Z270G GAMING ...
Страница 16: ...xvi ...
Страница 18: ...1 2 Chapter 1 Product Introduction Chapter 1 1 1 2 Motherboard layout ...
Страница 38: ...1 22 Chapter 1 Product Introduction Chapter 1 ...
Страница 44: ...2 6 Chapter 2 Basic Installation Chapter 2 To uninstall the CPU heatsink and fan assembly ...
Страница 45: ...ROG STRIX Z270G GAMING 2 7 Chapter 2 To remove a DIMM 2 1 4 DIMM installation ...
Страница 46: ...2 8 Chapter 2 Basic Installation Chapter 2 2 1 5 ATX power connection Ensure to connect the 8 pin power plug ...
Страница 47: ...ROG STRIX Z270G GAMING 2 9 Chapter 2 2 1 6 SATA device connection OR ...
Страница 50: ...2 12 Chapter 2 Basic Installation Chapter 2 To install HYPER M 2 x4 card The SSD card is purchased separately ...
Страница 51: ...ROG STRIX Z270G GAMING 2 13 Chapter 2 2 1 9 M 2 installation ...
Страница 60: ...2 22 Chapter 2 Basic Installation Chapter 2 ...
Страница 106: ...A 8 Appendix Appendix ...