background image

109

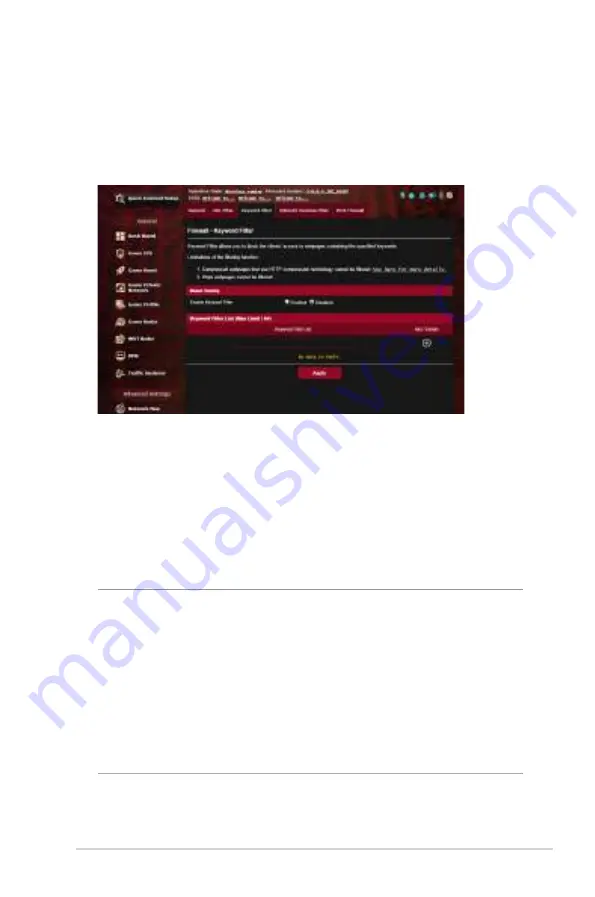
4.9.3 Keyword filter

Keyword filter blocks access to webpages containing specified 
keywords.

To set up a keyword filter:

1.  From the navigation panel, go to 

Advanced Settings

 > 

Firewall

 > 

Keyword Filter

 tab.

2.  On the 

Enable Keyword Filter

 field, select 

Enabled

.

3.  Enter a word or phrase and click the 

Add

 button.

4. Click 

Apply

.

NOTES:

• 

The Keyword Filter is based on a DNS query. If a network client 

has already accessed a website such as http://www.abcxxx.com, 

then the website will not be blocked (a DNS cache in the system 

stores previously visited websites). To resolve this issue, clear the 

DNS cache before setting up the Keyword Filter.

• 

Web pages compressed using HTTP compression cannot be 

filtered. HTTPS pages also cannot be blocked using a keyword 

filter.

Содержание Republic of Gamers GT-AC2900

Страница 1: ...E15761 ...

Страница 2: ...ICULAR PURPOSE IN NO EVENT SHALL ASUS ITS DIRECTORS OFFICERS EMPLOYEES OR AGENTS BE LIABLE FOR ANY INDIRECT SPECIAL INCIDENTAL OR CONSEQUENTIAL DAMAGES INCLUDING DAMAGES FOR LOSS OF PROFITS LOSS OF BUSINESS LOSS OF USE OR DATA INTERRUPTION OF BUSINESS AND THE LIKE EVEN IF ASUS HAS BEEN ADVISED OF THE POSSIBILITY OF SUCH DAMAGES ARISING FROM ANY DEFECT OR ERROR IN THIS MANUAL OR PRODUCT SPECIFICATI...

Страница 3: ...ck Internet Setup QIS with Auto detection 18 2 3 Connecting to your wireless network 21 3 Configuring the General Settings of ROG Gaming Center 3 1 Logging into the Web GUI 22 3 2 Dash Board 23 3 3 Aiprotection Pro 27 3 3 1 Configuring Aiprotection Pro 28 3 3 2 Blocking Malicious Sites 30 3 3 3 Two Way IPS 31 3 3 4 Infected Device Prevention and Blocking 32 3 3 5 Setting up Parental Control 33 3 4...

Страница 4: ...e Advanced Settings 4 1 Using the Network Map 52 4 1 1 Setting up the wireless security settings 53 4 1 2 Managing your network clients 54 4 1 3 Monitoring your USB device 55 4 1 4 ASUS AiMesh 57 4 2 Wireless 63 4 2 1 General 63 4 2 2 WPS 65 4 2 3 Bridge 67 4 2 4 Wireless MAC Filter 69 4 2 5 RADIUS Setting 70 4 2 6 Professional 71 4 3 Creating a Guest Network 74 4 4 LAN 76 4 4 1 LAN IP 76 4 4 2 DH...

Страница 5: ...3 4 6 1 Using AiDisk 94 4 6 2 Using Servers Center 96 4 6 3 3G 4G 101 4 7 Using AiCloud 2 0 102 4 7 1 Cloud Disk 103 4 7 2 Smart Access 105 4 7 3 AiCloud Sync 106 4 8 IPv6 107 4 9 Firewall 108 4 9 1 General 108 4 9 2 URL Filter 108 4 9 3 Keyword filter 109 4 9 4 Network Services Filter 110 4 10 Administration 111 4 10 1 Operation Mode 111 4 10 2 System 112 4 10 3 Firmware Upgrade 113 4 10 4 Restor...

Страница 6: ...estoration 120 5 3 Setting up your printer server 121 5 3 1 ASUS EZ Printer Sharing 121 5 3 2 Using LPR to Share Printer 125 5 4 Download Master 130 5 4 1 Configuring Bit Torrent download settings 131 5 4 2 NZB settings 132 6 Troubleshooting 6 1 Basic Troubleshooting 133 6 2 Frequently Asked Questions FAQs 135 Appendices Notices 144 ASUS Contact information 154 ...

Страница 7: ...tion 1 2 Package contents NOTES If any of the items are damaged or missing contact ASUS for technical inquiries and support Refer to the ASUS Support Hotline list at the back of this user manual Keep the original packaging material in case you need future warranty services such as repair or replacement GT AC2900 Wireless Router 3 wireless antennas AC adapter Network cable RJ 45 Dual purpose stand ...

Страница 8: ... 1 Place the dual purpose stand behind the router and then align the protrusion to the hollow To Stand Place the dual purpose stand under the router align the protrusion to the hollow and then tighten the screw ...

Страница 9: ...9 2 Push the stand upwards until hearing a slightly click sound 3 Tighten the screw ...

Страница 10: ...g the router on the wall with hooks and screws Note Ensure that each hook can reliably hold at least 2 kg and is secured by screws to prevent the router from dropping down Hooks are not included in the package ...

Страница 11: ...ady ROG Boost Key Press this button to change the Aura lighting effects or turn on off Game Boost DFS channels and GeForce Now QoS Reset button This button resets or restores the system to its factory default settings Wi Fi On Off button Press this button to turn on off the Wi Fi connection WPS button This button launches the WPS Wizard LED On Off button Press this button to turn on off the Aura l...

Страница 12: ...50 90 Storage 20 90 Power button Press this button to power on or off the system Power DC IN port Insert the bundled AC adapter into this port and connect your router to a power source USB 2 0 port Insert USB 2 0 compatible devices such as USB hard disks or USB flash drives into this port USB 3 0 port Insert USB 3 0 devices such as USB hard disks or USB flash drives into this port WAN Internet por...

Страница 13: ...om metal obstructions and away from direct sunlight Keep the device away from 802 11g or 20MHz only Wi Fi devices 2 4GHz computer peripherals Bluetooth devices cordless phones transformers heavy duty motors fluorescent lights microwave ovens refrigerators and other industrial equipment to prevent signal interference or loss Always update to the latest firmware Visit the ASUS website at http www as...

Страница 14: ...r to your computer to connect to the network With its dual band technology your wireless router supports 2 4GHz and 5GHz wireless signals simultaneously This allows you to do Internet related activities such as Internet surfing or reading writing e mail messages using the 2 4GHz band while simultaneously streaming high definition audio video files such as movies or music using the 5GHz band Some I...

Страница 15: ...rom your existing modem setup If your modem has a backup battery remove it as well Reboot your cable modem and computer recommended A Wired connection NOTE You can use either a straight through cable or a crossover cable for wired connection To set up your wireless router via wired connection 1 Plug your router into a power outlet and power it on Connect the network cable from your computer to a L...

Страница 16: ... Wireless connection To set up your wireless router via wireless connection 1 Plug your router into a power outlet and power it on 2 Connect to the network name SSID shown on the product label on the back side of the router For better network security change to a unique SSID and assign a password Modem Wall Power Outlet LINE LAN RESET PWR Power 1 WAN 3 2 GT AC2900 Laptop Tablet Smart phone ...

Страница 17: ...ed access NOTES For details on connecting to a wireless network refer to the WLAN adapter s user manual To set up the security settings for your network refer to the section Setting up the wireless security settings in Chapter 3 of this user manual ASUS router Default SSID ASUS_XX XX refers to the last two digits of the MAC address You can find it on the label at the bottom of your ROG router ...

Страница 18: ...et it to its factory default settings To use QIS with auto detection 1 Launch a web browser You will be redirected to the ASUS Setup Wizard Quick Internet Setup If not key in http router asus com manually 2 The wireless router automatically detects if your ISP connection type is Dynamic IP PPPoE PPTP and L2TP Key in the necessary information for your ISP connection type IMPORTANT Obtain the necess...

Страница 19: ...default settings If QIS failed to detect your Internet connection type click Skip to manual setting and manually configure your connection settings 4 Choose preferred function of the Boost key Aura Shuffle Allows you to change your Aura lighting effects by pressing the Boost Key DFS channel on off Utilizes additional 5GHz channels providing greater bandwidth with less interference GeForce NOW on o...

Страница 20: ...n username and password is different from the 2 4GHz 5GHz network name SSID and security key The wireless router s login username and password allows you to log into your wireless router s Web GUI to configure your wireless router s settings The 2 4GHz 5GHz network name SSID and security key allows Wi Fi devices to log in and connect to your 2 4GHz 5GHz network ...

Страница 21: ...reless network that you want to connect to then click Connect 3 You may need to key in the network security key for a secured wireless network then click OK 4 Wait while your computer establishes connection to the wireless network successfully The connection status is displayed and the network icon displays the connected status NOTES Refer to the next chapters for more details on configuring your ...

Страница 22: ...zing gaming features NOTE The features may vary with different firmware versions To log into the web GUI 1 On your web browser manually key in the wireless router s default IP address http router asus com 2 On the login page key in the default user name admin and the password that you have set in 2 2 Quick Internet Setup QIS with Auto dection 3 You can now use the Web GUI to configure various sett...

Страница 23: ...or most online games network ping that is less than 99 ms is considered good quality If network ping is less than 150 ms the quality is acceptable Generally if network ping is more than 150 ms it is hard to play game smoothly Ping deviation is also highly related with online game experiences With higher ping deviation it is much easier causing possible toggle when playing online game There is no b...

Страница 24: ...24 Game Radar Game Radar from Dashboard could give you a quick look about ping time for specific game server ...

Страница 25: ...nt Trigger light mode the system will detect the following events and trigger the LED to show different lighting effects as notifications Game Boost When turn on Game Boost the LED shows Flash in Red To know more about Game Boost see 3 4 Game Acceleration Traffic Meter Rainbow LED shows your real time traffic and it changes the color combination according to your Internet speed ...

Страница 26: ...t control the lighting effect when selecting this function Boost Key ROG Rapture gaming router supports Boost Key button on the physical product and allows users to define the functions of Boost Key from Dashboard Aura Shuffle Allows you to change your Aura lighting effect by pressing the Boost Key DFS channel on off Utilizes additional 5GHz channels providing greater bandwidth with less interfere...

Страница 27: ...ion Pro Aiprotection Pro provides real time monitoring that detects malware spyware and unwanted access It also filters unwanted websites and apps and allows you to schedule Internet access time for a connected device ...

Страница 28: ... network from unwanted access To Configure Aiprotection Pro 1 From the navigation panel go to General Aiprotection Pro 2 From the Aiprotection Pro main page click Network Protection 3 From the Network Protection tab click Scan The search results are displayed on the Router Security Assessment page ...

Страница 29: ...ge manually configure the items marked as No Weak or Very Weak To do this a Click an item to go to the item s setting page b From the item s security settings page configure and make the necessary changes and click Apply when done c Go back to the Router Security Assessment page and click Close to exit the page 5 Click OK on the confirmation message ...

Страница 30: ... an always up to date protection NOTE This function is automatically enabled if you run the Router Weakness Scan To enable Malicious Sites Blocking 1 From the navigation panel go to General Aiprotection Pro 2 From the Aiprotection Pro main page click Network Protection 3 From the Malicious Sites Blocking pane click ON ...

Страница 31: ...er configuration NOTE This function is automatically enabled if you run the Router Weakness Scan To enableTwo Way IPS 1 From the navigation panel go to General Aiprotection Pro 2 From the Aiprotection Pro main page click Network Protection 3 From the Two Way IPS pane click ON ...

Страница 32: ...ness Scan To enable infected device prevention and blocking 1 From the navigation panel go to General Aiprotection Pro 2 From the Aiprotection Pro main page click Network Protection 3 From the Infected Device Prevention and Blocking pane click ON To configure Alert Preference 1 From the Infected Device Prevention and Blocking pane click Alert Preference 2 Select or key in the e mail provider e mai...

Страница 33: ...ol allows you to control the Internet access time or set the time limit for a client s network usage To enable Parental Control 1 From the navigation panel go to General Aiprotection Pro 2 From the Aiprotection Pro main page click Parental Controls tab ...

Страница 34: ...to the Parental Controls tab 3 From the Web Apps Filters pane click ON 4 When the End Users License Agreement EULA message prompt appears click I agree to continue 5 From the Client List column select or key in the client s name from the dropdown list box 6 From the Content Category column select the filters from the four main categories Adult Instant Message and Communication P2P and FileTransfer...

Страница 35: ... Parental Controls Time Scheduling 2 From the EnableTime Scheduling pane click ON 3 From the Client Name column select or key in the client s name from the dropdown list box NOTE You may also key in the client s MAC address in the Client MAC Address column Ensure that the client name does not contain special characters or spaces as these may cause the router to function abnormally 4 Click to add t...

Страница 36: ...36 3 4 Game Acceleration ...

Страница 37: ... in Game firstV which can work with ASUS ROG gaming routers Game Packet Prioritization This feature allows you to enable Game Boost with one click When Game Boost is enabled ROG Rapture gaming router puts the gaming packet as the top priority to provide you with the best gaming experience Game Server Acceleration The wtfast powered Gamers Private Network GPNTM reduces your average game latency and...

Страница 38: ...b 2 From the Enable QoS pane click ON 3 Fill in the upload and download bandwidth fields NOTE Get the bandwidth information from your ISP You can also go to http speedtest net to check and get your bandwidth 4 Select the QoS Type Adaptive Traditional or Bandwidth limiter for your configuration NOTE Refer to the QoS tab for the definition of the QoS Type 5 Click Apply ...

Страница 39: ...evices defined by Nvidia To enable GeForce NOW Qos 1 Go to Game Acceleration QoS tick the Enable QoS button and then choose the QoS type GeForce NOW 2 Enable Geforce NOW QoS UPnP control Select Yes GeForce NOW QoS mode will be enabled automatically when Geforce NOW enabled devices are detected by the router 3 Set the desired upload download bandwidth Get the bandwidth information from ISP or use o...

Страница 40: ...nection with virtually all MMO games To update the firmware 1 Launch the web browser and key in http router asus com enter the router s default login name and password admin admin to enter ASUSWRT GUI 2 Go to Administration Firmware Upgrade and click Check and follow the onscreen instructions to upgrade the firmware You can also download the latest firmware from http support asus com ServiceHome a...

Страница 41: ...st account 4 From the wtfast Rules list create the profile for the device that you want to use wtfast GPN on 5 Select a GPN server according to your location or select Auto and Apply settings 6 Enable GPN profile BEFORE you launch the game NOTE Free account supports one device if you would like to upgrade to multiple devices click Upgrade to make subscription ...

Страница 42: ...ngs in your environment such as NAT and port blocks Open NAT helps ensure that ROG Rapture gaming router is not blocking the game connection To use Open NAT 1 From the navigation panel go to General Open NAT and turn on Enable port forwarding 2 Choose a game from the game list which will be updated from time to time ...

Страница 43: ...ld 5 Click OK and then click Apply Notes If you want to set up port forwarding rules for FTP server or other services please go to WAN Virtual server Port Forwarding see section 4 5 4 If the game you want to play does not include in the game profile click and then select Manual to create a rule ...

Страница 44: ... connection quality of servers for specific games To use Game Radar 1 From the navigation panel go to General Game Radar and select a game from the game list 2 Check the Ping Status of each server 3 For a smooth online gaming experience select a game server with low ping status ...

Страница 45: ...s and packet data for troubleshooting NOTE Enabling WiFi Radar may result to a drop wireless performance Only enable Wi Fi Radar when needed To use WiFi Radar 1 Go to Settings and configure all the WiFi Radar parameters 1 From the navigation panel go to General WiFi Radar and set the schedule for data recording ...

Страница 46: ...46 2 Click Start Data Collection 3 Click Submit after you set all the parameters 3 7 1 WiFi Site Survey WiFi Site Survey allows you to search for wireless networks in your environment ...

Страница 47: ...ess Channel Statistics This feature shows channel usage of all bands and channel distribution statistics in your environment 3 7 3 AdvancedTroubleshooting This feature shows WiFi glitch statistics in your environment ...

Страница 48: ...ver To set up access to aVPN server 1 From the navigation panel go to General VPN 2 On the Enable PPTPVPN Server field select ON 3 On the VPN Details dropdown list select Advanced Settings to configure the advanced VPN settings such as broadcast support authentication MPPE Encryption and Client IP address range 4 On the Network Place Samba Support field select Yes 5 Enter the user name and passwor...

Страница 49: ...teracts DDoS attacks to prevent your PC game or your stream from disconnecting with game servers Building a VPN connection also can simply change your IP address to the region where the game server is located to improve your ping time to game servers To start please follow the steps below 1 Click the button beside Server List to add a new VPN tunnel 2 Activate the VPN connection you created in Ser...

Страница 50: ...50 ...

Страница 51: ...Internet connection It s also a great way to monitor the users Internet usage or activities To configure theTraffic analyzer 1 From the navigation panel go to General Traffic Analyzer 2 From the Traffic Analyzer main page turn on traffic analyzer statistic 3 Select the date whose chart you want to display 4 On the Display for field select Router or Apps to display the traffic information 5 On the ...

Страница 52: ...52 4 Configuring the Advanced Settings 4 1 Using the Network Map Network Map allows you to configure your network s security settings manage your network clients and monitor your USB device ...

Страница 53: ...igure the wireless security settings such as SSID security level and encryption settings NOTE You can set up different wireless security settings for 2 4GHz and 5GHz bands 2 4GHz security settings 5GHz security settings 3 On the Wireless name SSID field key in a unique name for your wireless network 4 From the Authentication Method dropdown list select the authentication method for your wireless n...

Страница 54: ... Click Apply when done 4 1 2 Managing your network clients To manage your network clients 1 From the navigation panel go to Advanced Settings Network Map tab 2 On the Network Map screen select the Clients icon to display your network client s information 3 Click View List below the Clients icon to display all the clients 4 To block a client s access to your network select the client and click the ...

Страница 55: ...e that the USB storage device is formatted and partitioned properly Refer to the Plug n Share Disk Support List at http event asus com networks disksupport The USB ports support two USB drives or one printer and one USB drive at the same time IMPORTANT You first need to create a share account and its permission access rights to allow other network clients to access the USB device via an FTP site t...

Страница 56: ...er to the section 4 6 2 Using Servers Center in this user manual The wireless router works with most USB HDDs Flash disks up to 4TB size and supports read write access for FAT16 FAT32 NTFS and HFS Safely removing the USB disk IMPORTANT Incorrect removal of the USB disk may cause data corruption To safely remove the USB disk 1 From the navigation panel go to Advanced Settings Network Map 2 In the u...

Страница 57: ...ou have multiple AiMesh routers we recommend using the router with the highest specifications as your AiMesh router and the others as AiMesh nodes AiMesh router AiMesh node 4 1 4 2AiMesh Setup steps Prepare Place your AiMesh router and node within 1 3 meters of each other during the setup process AiMesh node Factory default status Keep power on and standby for AiMesh system settings within 1 3 met...

Страница 58: ...o your PC and modem and then log in into the web GUI AiMesh router Modem AiMesh node Logout Reboot AiMeshRouter 2 Go to Network Map page click AiMesh icon and then Search for your extending AiMesh node NOTE If you cannot find the AiMesh icon here click on firmware version and update the firmware ...

Страница 59: ...search for your AiMesh node When the AiMesh node shows on this page click it to add it into the AiMesh system NOTE If you cannot find any AiMesh node please go to TROUBLE SHOOTING 4 A message is displayed when synchronization is completed 5 Congratulations You will find the pages below show up when an AiMesh node has been successfully added to the AiMesh network ...

Страница 60: ...ed fireware at https www asus com AiMesh ii Power on your AiMesh node and connect it to your PC via a network cable iii Launch a web GUI You will be redirected to the ASUS Setup Wizard If not navigate to http router asus com iv Go to Administration Firmware Upgrade Click on Choose File and upload the AiMesh supported firmware v After firmware uploaded please go to Network Map page to confirm wheth...

Страница 61: ...Yes You can choose to set the AiMesh router as router mode or access point mode Please go to web GUI http router asus com and go to the page Administration Operation Mode Q2 Could I setup wired connection between AiMesh routers Ethernet backhaul A Yes AiMesh system supports both wireless and wired connection between AiMesh router and node to maximize throughput and stability AiMesh analyzes the wi...

Страница 62: ...outer and node via Wi Fi first 2 Place the node in the ideal locations for best coverage Run an Ethernet cable from the LAN port of the AiMesh router to the WAN port of AiMesh node 3 AiMesh system will auto select the best path for data transmission whether wired or wireless ...

Страница 63: ...igation panel go to Advanced Settings Wireless General tab 2 Select 2 4GHz or 5GHz as the frequency band for your wireless network 3 If you want to use the Smart Connect function move the slider to ON in the Enable Smart Connect field This function automatically connect the clients in your network to the appropriate band 2 4GHz or 5GHz for optimal speed ...

Страница 64: ...s mode options to determine the types of wireless devices that can connect to your wireless router Auto Select Auto to allow 802 11ac 802 11n 802 11g and 802 11b devices to connect to the wireless router N only Select N only to maximize wireless N performance This setting prevents 802 11g and 802 11b devices from connecting to the wireless router Legacy Select Legacy to allow 802 11b g n devices t...

Страница 65: ...the navigation panel go to Advanced Settings Wireless WPS tab 2 In the EnableWPS field move the slider to ON 3 WPS uses 2 4GHz by default If you want to change the frequency to 5GHz turn OFF the WPS function click Switch Frequency in the Current Frequency field and turn WPS ON again NOTE WPS supports authentication using Open System WPA Personal and WPA2 Personal WPS does not support a wireless ne...

Страница 66: ...ogo NOTE Check your wireless device or its user manual for the location of the WPS button c The wireless router will scan for any available WPS devices If the wireless router does not find any WPS devices it will switch to standby mode 6 To set up WPS using the Client s PIN code follow these steps a Locate the WPS PIN code on your wireless device s user manual or on the device itself b Key in the ...

Страница 67: ...r wireless devices or stations to access your ASUS wireless router It can also be considered as a wireless repeater where your ASUS wireless router communicates with another access point and other wireless devices To set up the wireless bridge 1 From the navigation panel go to Advanced Settings Wireless WDS tab 2 Select the frequency band for the wireless bridge ...

Страница 68: ...In the Connect to APs in list field click Yes if you want to connect to an Access Point listed in the Remote AP List 5 By default the operating control channel for the wireless bridge is set to Auto to allow the router to automatically select the channel with the least amount of interference You can modify the Control Channel from Advanced Settings Wireless General tab NOTE Channel availability va...

Страница 69: ...Settings Wireless Wireless MAC Filter tab 2 Tick Yes in the Enable Mac Filter field 3 In the MAC Filter Mode dropdown list select either Accept or Reject Select Accept to allow devices in the MAC filter list to access to the wireless network Select Reject to prevent devices in the MAC filter list to access to the wireless network 4 On the MAC filter list click the Add button and key in the MAC add...

Страница 70: ...authentication mode is set to WPA Enterprise or WPA2 Enterprise NOTE Please refer to section 4 2 1 General for configuring your wireless router s Authentication Mode 2 From the navigation panel go to Advanced Settings Wireless RADIUS Setting 3 Select the frequency band 4 In the Server IP Address field key in your RADIUS server s IP Address 5 In the Server Port field key in the server port 6 In the...

Страница 71: ...ate to Enable Radio weekdays You can specify which days of the week wireless networking is enabled Time of Day to Enable Radio You can specify a time range when wireless networking is enabled during the week Date to Enable Radio weekend You can specify which days of the weekend wireless networking is enabled 4 2 6 Professional The Professional screen provides advanced configuration options NOTE We...

Страница 72: ...devices and optimizes wireless multicast traffic Multicast rate Mbps Select the multicast transmission rate or click Disable to switch off simultaneous single transmission PreambleType Preamble Type defines the length of time that the router spent for CRC Cyclic Redundancy Check CRC is a method of detecting errors during data transmission Select Short for a busy wireless network with high network ...

Страница 73: ...in an AMPDU and avoid packets get lost or corrupted during transmission in error prone wireless channels Optimize ack suppression Optimize the max number of ack to suppress in a raw Turbo QAM Enable this function allows to support 256 QAM MCS 8 9 on the 2 4GHz band to achieve better range and throughput on that frequency Airtime Fairness With airtime fairness the speed of the network is not determ...

Страница 74: ...2 4GHz and three 5GHz To create a guest network 1 From the navigation panel go to Advanced Settings Guest Network 2 On the Guest Network screen select 2 4GHz or 5GHz frequency band for the guest network that you want to create 3 Click Enable 4 To change a guest s settings click the guest settings you want to modify Click Remove to delete the guest s settings 5 Assign a wireless name for your tempo...

Страница 75: ... Authentication Method 7 If you select a WPA authentication method select a WPA Encryption 8 Specify the Access time or choose Limitless 9 Select Disable or Enable on the Access Intranet item 10 When done click Apply ...

Страница 76: ...P settings of your wireless router NOTE Any changes to the LAN IP address will be reflected on your DHCP settings To modify the LAN IP settings 1 From the navigation panel go to Advanced Settings LAN LAN IP tab 2 Modify the IP address and Subnet Mask 3 When done click Apply ...

Страница 77: ...on your network To configure the DHCP server 1 From the navigation panel go to Advanced Settings LAN DHCP Server tab 2 In the Enable the DHCP Server field tick Yes 3 In the Domain Name text box enter a domain name for the wireless router 4 In the IP Pool Starting Address field key in the starting IP address 5 In the IP Pool Ending Address field key in the ending IP address ...

Страница 78: ... specifying an IP address range An IP Pool Starting Address should not be greater than the IP Pool Ending Address 7 In the DNS and Server Settings section key in your DNS Server and WINS Server IP address if needed 8 Your wireless router can also manually assign IP addresses to devices on the network On the Enable Manual Assignment field choose Yes to assign an IP address to specific MAC addresses...

Страница 79: ...ault route settings unless you have advanced knowledge of routing tables To configure the LAN Routing table 1 From the navigation panel go to Advanced Settings LAN Route tab 2 On the Enable static routes field choose Yes 3 On the Static Route List enter the network information of other access points or nodes Click the Add or Delete button to add or remove a device on the list 4 Click Apply ...

Страница 80: ...pports connection to IPTV services through an ISP or a LAN The IPTV tab provides the configuration settings needed to set up IPTV VoIP multicasting and UDP for your service Contact your ISP for specific information regarding your service ...

Страница 81: ... 1 From the navigation panel go to Advanced Settings WAN Internet Connection tab 2 Configure the following settings below When done click Apply WAN ConnectionType Choose your Internet Service Provider type The choices are Automatic IP PPPoE PPTP L2TP or static IP Consult your ISP if the router is unable to obtain a valid IP address or if you are unsure the WAN connection type ...

Страница 82: ...nsfer Using UPnP a new network device is discovered automatically Once connected to the network devices can be remotely configured to support P2P applications interactive gaming video conferencing and web or proxy servers Unlike Port forwarding which involves manually configuring port settings UPnP automatically configures the router to accept incoming connections and direct requests to a specific...

Страница 83: ...ce that attempt to connect To avoid connection issues due to an unregistered MAC address you can Contact your ISP and update the MAC address associated with your ISP service Clone or change the MAC address of the ASUS wireless router to match the MAC address of the previous networking device recognized by the ISP DHCP query frequency Changes the DHCP Discovery interval settings to avoid overloadin...

Страница 84: ...he dual WAN feature to any of these two modes Failover Mode Select this mode to use the secondary WAN as the backup network access Load Balance Mode Select this mode to optimize bandwidth minimize response time and prevent data overload for both primary and secondary WAN connections ...

Страница 85: ...scenarios More than one local client needs port forwarding for the same application at a different time An application requires specific incoming ports that are different from the outgoing ports To set up PortTrigger 1 From the navigation panel go to Advanced Settings WAN PortTrigger tab 2 On the Enable PortTrigger field tick Yes 3 On the Well Known Applications field select the popular games and ...

Страница 86: ...range 66660 7000 The IRC server responds by verifying the username and creating a new connection to the client PC using an incoming port If Port Trigger is disabled the router drops the connection because it is unable to determine which PC is requesting for IRC access When Port Trigger is enabled the router assigns an incoming port to receive the inbound data This incoming port closes once a speci...

Страница 87: ...network to access specific services provided by a PC in your network To set up Port Forwarding 1 From the navigation panel go to Advanced Settings WAN Virtual Server Port Forwarding tab 2 On the Enable Port Forwarding field tick Yes 3 On the Famous Server List field select the type of service you want to access 4 On the Famous Game List field select the popular game that you want to access This it...

Страница 88: ...ned a port number and a specific task For example port 80 is used for HTTP A specific port can only be used by one application or service at a time Hence two PCs attempting to access data through the same port at the same time would fail For example you cannot set up Port Forwarding for port 100 for two PCs at the same time Local IP Key in the client s LAN IP address NOTE Use a static IP address f...

Страница 89: ...d port forwarding Port triggering will work even without setting up a specific LAN IP address Unlike port forwarding which requires a static LAN IP address port triggering allows dynamic port forwarding using the router Predetermined port ranges are configured to accept incoming connections for a limited period of time Port triggering allows multiple computers to run applications that would normal...

Страница 90: ...n or you want to host a domain web or e mail server CAUTION Opening all the ports on a client to the Internet makes the network vulnerable to outside attacks Please be aware of the security risks involved in using DMZ To set up DMZ 1 From the navigation panel go to Advanced Settings WAN DMZ tab 2 Configure the setting below When done click Apply IP address of Exposed Station Key in the client s LA...

Страница 91: ... and Host Name Choose ASUS DDNS or other DDNS If you want to use ASUS DDNS fill in the Host Name in the format of xxx asuscomm com xxx is your host name If you want to use a different DDNS service click FREE TRIAL and register online first Fill in the User Name or E mail Address and Password or DDNS Key fields Enable wildcard Enable wildcard if your DDNS service requires one NOTES DDNS service wil...

Страница 92: ... connection to pass through the router to the network clients PPTP Passthrough L2TP Passthrough IPsec Passthrough and RTSP Passthrough are enabled by default To enable disable the NAT Passthrough settings go to the Advanced Settings WAN NAT Passthrough tab When done click Apply ...

Страница 93: ...T To use the server functions you need to insert a USB storage device such as a USB hard disk or USB flash drive in the USB 2 0 port on the rear panel of your wireless router Ensure that the USB storage device is formatted and partitioned properly Refer to the ASUS website at http event asus com 2009 networks disksupport for the file system support table ...

Страница 94: ... AiDisk allows you to share files stored on a connected USB device through the Internet AiDisk also assists you with setting up ASUS DDNS and an FTP server To use AiDisk 1 From the navigation panel go to Advanced Settings USB application then click the AiDisk icon 2 From the Welcome to AiDisk wizard screen click Go ...

Страница 95: ...nd key in your domain name When done click Next You can also select Skip ASUS DDNS settings and then click Next to skip the DDNS setting 5 Click Finish to complete the setting 6 To access the FTP site that you created launch a web browser or a third party FTP client utility and key in the ftp link ftp domain name asuscomm com you have previously created ...

Страница 96: ...evices to access multimedia files from the USB disk connected to your wireless router NOTE Before using the DLNA Media Server function connect your device to the router s network To launch the Media Server setting page go to Advanced Settings USB application Media Services and Servers Media Servers tab Refer to the following for the descriptions of the fields Enable iTunes Server Select ON OFF to ...

Страница 97: ...sing Network Place Samba Share service Network Place Samba Share allows you to set up the accounts and permissions for the Samba service To use Samba share 1 From the navigation panel go to Advanced Settings USB application Media Services and Servers Network Place Samba Share Cloud Disk tab NOTE Network Place Samba Share is enabled by default ...

Страница 98: ... b Enter the folder name and click Add The folder that you created will be added to the folder list 2 Follow the steps below to add delete or modify an account To create a new account a Click to add new account b In the Account and Password fields key in the name and password of your network client Retype the password to confirm Click Add to add the account to the list ...

Страница 99: ... to share a specific file folder 4 Click Apply to apply the changes Using the FTP Share service FTP share enables an FTP server to share files from USB disk to other devices via your local area network or via the Internet IMPORTANT Ensure that you safely remove the USB disk Incorrect removal of the USB disk may cause data corruption To safely remove the USB disk refer to the section Safely removin...

Страница 100: ...s for a specific folder W Select to assign write only access for a specific folder R Select to assign read only access for a specific folder No Select this option if you do not want to share a specific folder 3 If you prefer you can set the Allow anonymous login field to ON 4 In the Maximum number of concurrent connections field key in the number of devices that can simultaneously connect to the F...

Страница 101: ... ISP Select your Internet Service Provider ISP from the dropdown list APN Access Point Name service optional Contact your 3G 4G service provider for detailed information Dial Number and PIN code The 3G 4G provider s access number and PIN code for connection NOTE PIN code may vary from different providers Username Password The username and password will be provided by the 3G 4G network carrier USB ...

Страница 102: ...lows you to save sync share and access your files To use AiCloud 2 0 1 From Google Play Store or Apple Store download and install the ASUS AiCloud app to your smart device 2 Connect your smart device to your network Follow the instructions to complete the AiCloud setup process ...

Страница 103: ...d disk 1 Insert a USB storage device into the wireless router 2 Turn on Cloud Disk 3 Go to https router asus com and enter the router login account and password For better user experience we recommend that you use Google Chrome or Firefox ...

Страница 104: ...Cloud Disk files on devices connected to the network NOTE When accessing the devices that are connected to the network you need to enter the device s user name and password manually which will not be saved by AiCloud for security reason ...

Страница 105: ...ork via your router s domain name NOTES You can create a domain name for your router with ASUS DDNS For more details refer to section 4 5 6 DDNS By default AiCloud provides a secure HTTPS connection Key in https yourASUSDDNSname asuscomm com for a very secure Cloud Disk and Smart Access usage ...

Страница 106: ...iCloud Sync 1 Launch AiCloud click AiCloud Sync Go 2 Select ON to enable AiCloud Sync 3 Click Add new account 4 Enter your ASUS WebStorage account password and select the directory that you want to sync with WebStorage 5 Click Apply ...

Страница 107: ... if your Internet service supports IPv6 To set up IPv6 1 From the navigation panel go to Advanced Settings IPv6 2 Select your ConnectionType The configuration options vary depending on your selected connection type 3 Enter your IPv6 LAN and DNS settings 4 Click Apply NOTE Please refer to your ISP regarding specific IPv6 information for your Internet service ...

Страница 108: ...etween the LAN and WAN connection On the Logged packets type select Dropped Accepted or Both 5 Click Apply 4 9 2 URL Filter You can specify keywords or web addresses to prevent access to specific URLs NOTE The URL Filter is based on a DNS query If a network client has already accessed a website such as http www abcxxx com then the website will not be blocked a DNS cache in the system stores previo...

Страница 109: ...r phrase and click the Add button 4 Click Apply NOTES The Keyword Filter is based on a DNS query If a network client has already accessed a website such as http www abcxxx com then the website will not be blocked a DNS cache in the system stores previously visited websites To resolve this issue clear the DNS cache before setting up the Keyword Filter Web pages compressed using HTTP compression can...

Страница 110: ...go to Advanced Settings Firewall Network Service Filter tab 2 On the Enable Network Services Filter field select Yes 3 Select the Filter table type Black List blocks the specified network services White List limits access to only the specified network services 4 Specify the day and time when the filters will be active 5 To specify a Network Service to filter enter the Source IP Destination IP Port...

Страница 111: ...le devices on its own local network Access Point mode In this mode the router creates a new wireless network on an exising network Media Bridge This setup requires two wireless routers The second router serves as a media bridge where multiple devices such as Smart TVs and gaming consoles can be connected via ethernet Repeater mode In Repeater mode GT AC2900 wirelessly connects to an existing wirel...

Страница 112: ...time zone for your network NTP Server The wireless router can access a NTP Network time Protocol server in order to synchronize the time EnableTelnet Click Yes to enable Telnet services on the network Click No to disable Telnet Authentication Method You can select HTTP HTTPS or both protocols to secure router access EnableWeb Access fromWAN Select Yes to allow devices outside the network to access...

Страница 113: ...wly To recover or restore the system refer to section 5 2 Firmware Restoration 4 10 4Restore Save Upload Setting To restore save upload wireless router settings 1 From the navigation panel go to Advanced Settings Administration Restore Save Upload Setting tab 2 Select the tasks that you want to do To restore to the default factory settings click Restore and click OK in the confirmation message To ...

Страница 114: ...TE System log resets when the router is rebooted or powered off To view your system log 1 From the navigation panel go to Advanced Settings System Log 2 You can view your network activities in any of these tabs General Log DHCP Leases Wireless Log Port Forwarding Routing Table ...

Страница 115: ...g two ways Via the Wireless screen 1 On your web browser manually key in the wireless router s default IP address http router asus com 2 On the login page key in the default user name admin and password admin and click OK The QIS page launches automatically 3 From the navigation panel go to Advanced Settings Wireless General tab 4 Move the slider to ON in the Enable Smart Connect field This functi...

Страница 116: ... change the trigger conditions according to your networking surroundings To change the settings go to the Smart Connect Rule tab on the Network Tools screen Smart Connect Rule controls are divided into four sections Steering Trigger Condition STA Selection Policy Interface Select and Qualify Procedures Bounce Detect ...

Страница 117: ...ignal level of any associated client meets this criteria steering will be triggered PHY Rate Less PHY Rate Greater These controls determine STA link rates that trigger band steering VHT This controls determines how 802 11ac and non ac clients are handled ALL default means any type of client can trigger steering AC only means a client must support 802 11ac to trigger steering Not allowed means only...

Страница 118: ...ction policy criteria for the radio will be steered to the first target if that radio s Bandwidth Utilization is less than the set value Otherwise the client will be sent to the secondTarget Band radio Bounce Detect This set of controls determines how often a client can be steered This is intended to prevent clients from constantly moving around It does not however prevent clients from disconnecti...

Страница 119: ...t http dlcdnet asus com pub ASUS LiveUpdate Release Wireless Printer zip The utilities are not supported on MAC OS 5 1 Device Discovery Device Discovery is an ASUS WLAN utility that detects an ASUS wireless router device and allows you to configure the wireless networking settings To launch the Device Discovery utility From your computer s desktop click Start All Programs ASUS Utility ASUSWireless...

Страница 120: ...outer before using the Firmware Restoration utility NOTE This feature is not supported on MAC OS To launch the rescue mode and use the Firmware Restoration utility 1 Unplug the wireless router from the power source 2 Hold the Reset button at the rear panel and simultaneously replug the wireless router into the power source Release the Reset button when the Power LED at the front panel flashes slow...

Страница 121: ...ad NOTE This is not a firmware upgrade utility and cannot be used on a working ASUS Wireless Router Normal firmware upgrades must be done through the web interface Refer to Chapter 4 Configuring the Advanced Settings for more details 5 3 Setting up your printer server 5 3 1 ASUS EZ Printer Sharing ASUS EZ Printing Sharing utility allows you to connect a USB printer to your wireless router s USB po...

Страница 122: ...ced Settings USB Application Network Printer Server 2 Click Download Now to download the network printer utility NOTE Network printer utility is supported on Windows 7 8 8 1 10 To install the utility on Mac OS select Use LPR protocol for sharing printer 3 Unzip the downloaded file and click the Printer icon to run the network printer setup program ...

Страница 123: ...instructions to set up your hardware then click Next 5 Wait a few minutes for the initial setup to finish Click Next 6 Click Finish to complete the installation 7 Follow the Windows OS instructions to install the printer driver ...

Страница 124: ...124 8 After the printer s driver installation is complete network clients can now use the printer ...

Страница 125: ... Windows and MAC operating system using LPR LPD Line Printer Remote Line Printer Daemon Sharing your LPR printer To share your LPR printer 1 From the Windows desktop click Start Devices and Printers Add a printer to run the Add PrinterWizard 2 Select Add a local printer and then click Next ...

Страница 126: ...126 3 Select Create a new port then set Type of Port to Standard TCP IP Port Click New Port 4 In the Hostname or IP address field key in the IP address of the wireless router then click Next ...

Страница 127: ...127 5 Select Custom then click Settings 6 Set Protocol to LPR In the Queue Name field key in LPRServer then click OK to continue ...

Страница 128: ...t to finish setting up the standard TCP IP port 8 Install the printer driver from the vendor model list If your printer is not in the list click Have Disk to manually install the printer drivers from a CD ROM or file ...

Страница 129: ...129 9 Click Next to accept the default name for the printer 10 Click Finish to complete the installation ...

Страница 130: ...d Master to download and install the utility automatically NOTE If you have more than one USB drive select the USB device you want to download the files to 2 After the download process is finished click the Download Master icon to start using the utility 3 Click Add to add a download task 4 Select a download type such as BitTorrent HTTP or FTP Provide a torrent file or a URL to begin downloading N...

Страница 131: ...k BitTorrent to launch the BitTorrent Setting page 2 Select a specific port for your download task 3 To prevent network congestion you can limit the maximum upload and download speeds under Speed Limits 4 You can limit the maximum number of allowed peers and enable or disable file encryption during downloads 5 4 1 Configuring BitTorrent download settings ...

Страница 132: ...132 5 4 2 NZB settings You can set up a USENET server to download NZB files After entering USENET settings Apply ...

Страница 133: ... 1 Launch the Web GUI Go to Advanced Settings Administration Firmware Upgrade tab Click Check to verify if the latest firmware is available 2 If the latest firmware is available visit the ASUS global website at https www asus com Networking ROG Rapture GT AC2900 HelpDesk_BIOS to download the latest firmware 3 From the Firmware Upgrade page click Browse to locate the firmware file 4 Click Upload to...

Страница 134: ...your computer to the router wirelessly ensure that the SSID wireless network name encryption mehtod and password are correct Check if your network settings are correct Each client on the network should have a valid IP address ASUS recommends that you use the wireless router s DHCP server to assign IP addresses to computers on your network Some cable modem service providers require you to use the M...

Страница 135: ...information Delete the cookies and files in your web browser For Internet Explorer 8 follow these steps 1 Launch Internet Explorer 8 then click Tools Internet Options 2 In the General tab under Browsing history click Delete select Temporary Internet Files and Cookies then click Delete NOTES The commands for deleting cookies and files vary with web browsers Disable proxy server settings cancel the ...

Страница 136: ...er to the wireless client Try to adjust antennas of the router to the best direction as described in section 1 5 Positioning your router DHCP server has been disabled 1 Launch the web GUI Go to Advanced Settings Network Map Clients and search for the device that you want to connect to the router 2 If you cannot find the device in the Network Map go to Advanced Settings LAN DHCP Server Basic Config...

Страница 137: ...rol Channel If you are using a wireless LAN adapter check if the wireless channel in use conforms to the channels available in your country area If not adjust the channel channel bandwidth and wireless mode If you still cannot connect to the router wirelessly you can reset your router to factory default settings In the router GUI click Administration Restore Save Upload Setting and click Restore ...

Страница 138: ...e the device using the Delete button or adjust the Time Management Settings If there is still no Internet access try to reboot your computer and verify the network s IP address and gateway address Check the status indicators on the ADSL modem and the wireless router If the WAN LED on the wireless router is not ON check if all cables are plugged properly You forgot the SSID network name or network ...

Страница 139: ...admin Enable DHCP Yes if WAN cable is plugged in IP address http router asus com or 192 168 1 1 Domain Name Blank Subnet Mask 255 255 255 0 DNS Server 1 192 168 1 1 DNS Server 2 Blank SSID 2 4GHz ASUS SSID 5GHz ASUS_5G Firmware upgrade failed Launch the rescue mode and run the Firmware Restoration utility Refer to section 5 2 Firmware Restoration on how to use the Firmware Restoration utility ...

Страница 140: ...launch the browser 2 Click Tools Internet options Connections tab LAN settings Before configuring your wireless router do the steps described in this section for your host computer and network clients 3 From the Local Area Network LAN Settings screen untick Use a proxy server for your LAN 4 Click OK when done ...

Страница 141: ...en done NOTE Refer to your browser s help feature for details on disabling the proxy server B Set theTCP IP settings to automatically obtain an IP address Windows 7 1 Click Start Control Panel Network and Internet Network and Sharing Center Manage network connections 2 Select Internet Protocol Version 4 TCP IPv4 or Internet ProtocolVersion 6 TCP IPv6 then click Properties ...

Страница 142: ...atically 4 Click OK when done MAC OS 1 Click the Apple icon located on the top left of your screen 2 Click System Preferences Network Configure 3 From the TCP IP tab select Using DHCP in the Configure IPv4 dropdown list 4 Cllick Apply Now when done NOTE Refer to your operating system s help and support feature for details on configuring your computer s TCP IP settings ...

Страница 143: ...indows 7 1 Click Start Internet Explorer to launch the browser 2 Click Tools Internet options Connections tab 3 Tick Never dial a connection 4 Click OK when done NOTE Refer to your browser s help feature for details on disabling the dial up connection ...

Страница 144: ... device pursuant to part 15 of the FCC Rules These limits are designed to provide reasonable protection against harmful interference in a residential installation This equipment generates uses and can radiate radio frequency energy and if not installed and used in accordance with the instructions may cause harmful interference to radio communications However there is no guarantee that interference...

Страница 145: ...op objects on top and do not shove any foreign objects into the product DO NOT expose to or use near liquids rain or moisture DO NOT use the modem during electrical storms DO NOT cover the vents on the product to prevent the system from getting overheated DO NOT use damaged power cords accessories or other peripherals If the Adapter is broken do not try to fix it by yourself Contact a qualified se...

Страница 146: ...e 2 This device must accept any interference including interference that may cause undesired operation of the device Cet appareil contient des émetteurs récepteurs exempts de licence qui sont conformes au x RSS s exemptés de licence d Innovation Sciences et Développement économique Canada L opération est soumise aux deux conditions suivantes 1 Cet appareil ne doit pas provoquer d interférences 2 C...

Страница 147: ...1000 SBLB801 Dipole Reverse SMA Plug 2 3 7 3 PSA RFDPA161000 SBLB801 Dipole Reverse SMA Plug 2 3 8 4 PSA RFDPA161000 SBLB801 Dipole Reverse SMA Plug 2 3 Dynamic Frequency Selection DFS for devices operating in the bands 5250 5350 MHz 5470 5600 MHz and 5650 5725 MHz Sélection dynamique de fréquences DFS pour les dispositifs fonctionnant dans les bandes 5250 5350 MHz 5470 5600 MHz et 5650 5725 MHz T...

Страница 148: ...sé avec un minimum de 31 cm de distance entre la source de rayonnement et votre corps VCCI Japan Compliance Statement この装置は 情報処理装置等電波障害自主規制協議会 VCCI の基準 に基づくクラス B 情報技術装置です この装置は 家庭環境で使用すること を目的としていますが ラジオやテレビジョン受信機に近接して使用され ると 受信障害を引き起こすことがあります 取扱説明書に従って正しい取り扱をして下さい 5 3GHz 帯 W53 5 250 5 350MHz は屋内利用に限定されています KC KoreaWarning Statement B급 기기 가정용 방송통신기자재 이 기기는 가정용 B급 으로 전자파적합등록을 한 기기로서 주로 가정에서 사용하는 것을...

Страница 149: ...在溫度為 0 C 32 F 至 40 C 104 F 之間的環境中使用本產品 請依照產品上的電源功率貼紙說明使用正確的電源變壓器 如果使用錯誤規格 的電源變壓器有可能會造成內部零件的損毀 請勿將產品放置於不平坦或不穩定的表面 若產品的機殼毀損 請聯絡維修服 務人員 請勿在產品上放置其他物品 請勿將任何物品塞入產品內 以避免引起元件短 路或電路損毀 請保持機器在乾燥的環境下使用 雨水 溼氣 液體等含有礦物質將會腐蝕電 子線路 請勿在雷電天氣下使用數據機 請勿堵塞產品的通風孔 以避免因散熱不良而導致系統過熱 請勿使用破損的電源線 附件或其他周邊產品 如果電源已毀損 請不要嘗試自行修復 請將其交給專業技術服務人員或經銷 商來處理 為了防止電擊風險 在搬動主機之前 請先將電源線插頭暫時從電源插座上拔 除 NCC 警語 經型式認證合格之低功率射頻電機 非經許可 公司 商號或使用者均不得擅自變 更頻率...

Страница 150: ...某一均質材料中的含量超出 GB T 26572 規定的限量要 求 然該部件仍符合歐盟指令 2011 65 EU 的規范 備註 此產品所標示之環保使用期限 係指在一般正常使用狀況下 产品中有害物质的名称及含量 安全說明 請在溫度為 0 C 32 F 至 40 C 104 F 之間的環境中使用本產品 請依照產品上的電源功率貼紙說明使用正確的電源適配器 如果試用錯誤規格 的電源適配器可能會造成內部零件的損壞 請勿將產品放置於不平坦或不穩定的表面 若產品的外殼損壞 請聯繫 維修服務人員 請勿在產品上放置其他物品 請勿將任何物品塞入產品內 以避免引起組件短 路或電路損壞 請保持机器在干燥的環境下使用 雨水 濕氣 液体等含有礦物質會腐蝕電子 線路 請勿在雷電天气下使用調製解調器 請勿堵塞產品的通風孔 以避免因散熱不良而導致系統過熱 請勿使用破損的電源線 附件或其他周邊產品 如果電源已損壞 請不要嘗試自...

Страница 151: ...ns de bonnes conditions de réception pour minimiser le niveau de rayonnement Ce n est pas toujours le cas dans certaines zones ou situations notamment dans les parkings souterrains dans les ascenseurs en train ou en voiture ou tout simplement dans un secteur mal couvert par le réseau d Tenez cet appareil à distance des femmes enceintes et du bas ventre des adolescents Условия эксплуатации Температ...

Страница 152: ... את לפתוח אין חיצוני מטען ע י מופעל המוצר באם הקרובה השירות למעבדת לפנות יש כלשהי בעיה של במקרה מנוזלים והמטען המוצר את להרחיק יש מיידית לנתקו יש כוח ספק במטען או ו במוצר שמקורם רעשים מוזר ריח של במקרה שירות למעבדת ולפנות החשמל מרשת ולא חיצוני לשימוש לא בלבד המבנה בתוך לשימוש מיועד כוח ספק והמטען המוצר לחה בסביבה לשימוש החשמל כבל את ולעקם לשבור לחתוך אין על יתר להתחמם לו להניח או החשמל כבל על חפצי...

Страница 153: ...thorised distributors in Turkey BOGAZICI BILGISAYARTICARETVE SANAYI A S Tel FAX No 90 212 331 10 00 90 212 332 28 90 Address ESENTEPE MAH BUYUKDERE CAD ERCAN HAN B BLOK NO 121 SISLI ISTANBUL 34394 CIZGI Elektronik San Tic Ltd Sti Tel FAX No 90 212 356 70 70 90 212 356 70 69 Address GURSEL MAH AKMAN SK 47B 1 KAGITHANE ISTANBUL KOYUNCU ELEKTRONiK BiLGi iSLEM SiST SAN VE DISTIC A S Tel No 90 216 5288...

Страница 154: ...rt ASUS COMPUTER GmbH Germany and Austria Address Harkort Str 21 23 D 40880 Ratingen Germany Support Fax 49 2102 959931 Website asus com de Online contact eu rma asus com sales Technical Support Telephone Component 49 2102 5789555 Telephone Germany System Notebook Eee LCD 49 2102 5789557 Telephone Austria System Notebook Eee LCD 43 820 240513 Support Fax 49 2102 959911 Online support https www asu...

Страница 155: ...conformity is available at https www asus com Networking ROG Rapture GT AC2900 HelpDesk_Declaration Declaration of Conformity for Ecodesign directive 2009 125 EC Testing for eco design requirements according to EC No 1275 2008 and EU No 801 2013 has been conducted When the device is in Networked Standby Mode its I O and network interface are in sleep mode and may not work properly To wake up the d...

Страница 156: ...адрес https www asus com Networking ROG Rapture GT AC2900 HelpDesk_Declaration Декларация за съответствие за Директива за екодизайна 2009 125 ЕО Проведени са тестове за съвместимост с изискванията за екодизайн съгласно ЕО No 1275 2008 и ЕС No 801 2013 Когато устройството е в Networked Standby Mode Режим на готовност на мрежа I O и мрежовият интерфейс са в спящ режим и може да не работят както тряб...

Страница 157: ...dnosti dostupan je na https www asus com Networking ROG Rapture GT AC2900 HelpDesk_Declaration Izjava o sukladnosti za direktivu o ekodizajnu 2009 125 EZ Provedeno je testiranje zahtjeva na ekodizajn u skladu s EC No 1275 2008 i EU No 801 2013 Kada je uređaj u umreženom načinu mirovanja njegovi ulazi izlazi i mrežno sučelje su također u načinu mirovanja i možda neće ispravno raditi Za pokretanje u...

Страница 158: ...e k dispozici na adrese https www asus com Networking ROG Rapture GT AC2900 HelpDesk_Declaration Prohlášení o shodě se směrnicí o ekodesignu 2009 125 ES Bylo provedeno testování požadavků na ekodesign podle směrnic ES č 1275 2008 a EU č 801 2013 Když se toto zařízení nachází v pohotovostním síťovém režimu jeho vstupy výstupy a síťové rozhraní jsou v režimu spánku a nemusí fungovat správně Zařízení...

Страница 159: ...ssil https www asus com Networking ROG Rapture GT AC2900 HelpDesk_Declaration Vastavuse kinnitus ökodisaini direktiivile 2009 125 EÜ Ökodisaini erinõuetele vastavust testiti kooskõlas määruste EÜ nr 1275 2008 ja EÜ nr 801 2013 nõuetega Kui seade on võrku ühendatud ooterežiimis on selle I O ja võrguliides unerežiimis ning seetõttu on võimalik et seade ei toimi nõuetekohaselt Seadme äratamiseks vaju...

Страница 160: ...900 HelpDesk_Declaration Megfelelőségi nyilatkozat a környezettudatos tervezésről szóló 2009 125 EK irányelvhez A környezettudatos tervezés követelményeit illetően tesztelést végeztünk az EK 1275 2008 és EU 801 2013 előírásai szerint Ha a készülék hálózati készenléti üzemmódra van állítva akkor az I O és a hálózati csatoló alvó üzemmódba kerül és elképzelhető hogy nem működik megfelelően A készülé...

Страница 161: ...https www asus com Networking ROG Rapture GT AC2900 HelpDesk_Declaration Atbilstības paziņojums ekodizaina Direktīvai Nr 2009 125 EK Veikta ekodizaina prasību pārbaude saskaņā ar Komisijas Regulu EK Nr 1275 2008 un Komisijas Regulu ES Nr 801 2013 Ja ierīce ir tīkla gaidstāves režīmā tās I O ievade izvade un tīkla interfeiss ir miega režīmā un var nedarboties pareizi Lai aktivizētu ierīci nospiedie...

Страница 162: ...te https www asus com Networking ROG Rapture GT AC2900 HelpDesk_Declaration Ekologinio projektavimo direktyvos 2009 125 EB atitikties deklaracija Atliktas ekologinio projektavimo reikalavimų pagal EB Nr 1275 2008 ir ES Nr 801 2013 atitikimo patikrinimas Kai prietaisas yra prijungtas prie tinklo ir veikia budėjimo režimu jo įjungimo išjungimo ir tinklo sąsaja veikia miego režimu ir negali tinkamai ...

Страница 163: ...est dostępny pod adresem https www asus com Networking ROG Rapture GT AC2900 HelpDesk_ Declaration Deklaracja zgodności dotycząca dyrektywy w sprawie ekoprojektu 2009 125 WE Przeprowadzono testy pod kątem wymogów dotyczących ekoprojektu zgodnie z rozporządzeniem WE Nr 1275 2008 i UE Nr 801 2013 Gdy urządzenie jest w sieciowym trybie czuwania jego porty We Wy oraz interfejs sieciowy również znajduj...

Страница 164: ...e conformitate UE completă este disponibilă la adresa https www asus com Networking ROG Rapture GT AC2900 HelpDesk_Declaration Declarația de conformitate pentru Directiva privind proiectarea ecologică 2009 125 CE Testarea pentru cerințele de proiectare ecologică în conformitate cu CE nr 1275 2008 și UE nr 801 2013 a fost efectuată Când dispozitivul se află în modul de standby în rețea I E și inter...

Страница 165: ...snosti je dostupan na adresi https www asus com Networking ROG Rapture GT AC2900 HelpDesk_Declaration Deklaracija o saglasnosti za Ekodizajn direktivu 2009 125 EC Testiranje za eko dizajn zahteve u skladu sa EC Br 1275 2008 i EU Br 801 2013 je obavljeno Kada je ovaj uređaj u režimu za stanje pripravnosti mreže njegov I O i mrežni interfejs su u režimu za spavanje i možda neće raditi ispravno Da pr...

Страница 166: ...osti je na voljo na spletnem mestu https www asus com Networking ROG Rapture GT AC2900 HelpDesk_Declaration Izjava o skladnosti za Direktivo o okoljsko primerni zasnovi 2009 125 ES Testiranje glede zahtev za okoljsko primerno zasnovo v skladu z ES št 1275 2008 in EU št 801 2013 je bilo izvedeno Če je naprava v omrežnem načinu pripravljenosti sta vhodno izhodni in omrežni vmesnik v načinu spanja in...

Страница 167: ... Celý text vyhlásenia o zhode ES nájdete na adrese https www asus com Networking ROG Rapture GT AC2900 HelpDesk_ Declaration Vyhlásenie o zhode podľa smernice o ekodizajne č 2009 125 ES Bolo vykonané testovanie na splnenie požiadaviek na ekodizajn podľa smernice ES č 1275 2008 a EÚ č 801 2013 Ak je zariadenie v pohotovostnom režime v rámci siete jeho vstupné výstupné a sieťové rozhranie sú v režim...

Страница 168: ...inin tam metni https www asus com Networking ROG Rapture GT AC2900 HelpDesk_Declaration adresinde bulunabilir 2009 125 EC Çevreye DuyarlıTasarım yönergesi için Uygunluk Bildirimi EC No 1275 2008 ve EU No 801 2013 uyarınca çevreye duyarlı tasarım gereksinimlerine yönelik test işlemi gerçekleştirilmiştir Aygıt Ağa Bağlı Bekleme Modundayken G Ç ve ağ arabirimi uyku modundadır ve uygun biçimde çalışma...

Страница 169: ...overensstemmelseserklæringen kan findes på https www asus com Networking ROG Rapture GT AC2900 HelpDesk_Declaration Overensstemmelseserklæring for miljøvenligt design i direktiv 2009 125 EC Vedrørende testkrav af øko design i henhold til EC nr 1275 2008 og EU nr 801 2013 er blevet gennemført Når enheden er på netværk standby er dens I O og netværksgrænseflade i dvale og vil muligvis ikke virke ord...

Страница 170: ...t EU conformiteitsverklaring is beschikbaar op https www asus com Networking ROG Rapture GT AC2900 HelpDesk_Declaration Conformiteitsverklaring voor Ecodesign Richtlijn 2009 125 EG Testen van vereisten van ecodesign overeenkomstig EG nr 1275 2008 en EU nr 801 2013 zijn uitgevoerd Wanneer het apparaat in de modus Stand by in netwerk staat staan de I O en netwerkinterface in de slaapstand en werken ...

Страница 171: ...échargée à partir du site internet suivant https www asus com Networking ROG Rapture GT AC2900 HelpDesk_Declaration Déclaration de conformité Directive sur l écoconception 2009 125 CE Test de la conformité aux exigences d écoconception selon CE 1275 2008 et UE 801 2013 Lorsque l appareil est en mode Networked Standby son panneau d E S et son interface réseau sont en mode veille et peuvent ne pas f...

Страница 172: ...uusvakuutuksen teksti on nähtävissä osoitteessa https www asus com Networking ROG Rapture GT AC2900 HelpDesk_ Declaration Ekologisen suunnittelun direktiivin 2009 125 EY vaatimustenmukaisuusvakuutus Testaus EY N o 1275 2008 n ja EU N o 801 2013 n mukaisista ekologisista suunnitteluvaatimuksista on suoritettu Kun laite on verkossa valmiustilassa sen I O ja verkkoliittymä ovat lepotilassa eivätkä ne...

Страница 173: ... relevanten Bestimmungen der Richtlinie 2014 53 EU übereinstimmt Der gesamte Text der EU Konformitätserklärung ist verfügbar unter https www asus com Networking ROG Rapture GT AC2900 HelpDesk_Declaration Konformitätserklärung für Ökodesign Richtlinie 2009 125 EC Die Überprüfung der Ökodesign Anforderungen nach EC Nr 1275 2008 und EU Nr 801 2013 wurde durchgeführt Wenn sich das Gerät im Netzwerkber...

Страница 174: ...ίναι διαθέσιμο στη διεύθυνση https www asus com Networking ROG Rapture GT AC2900 HelpDesk_Declaration Δήλωση συμμόρφωσης για την οδηγία Ecodesign Οικολογικός σχεδιασμός 2009 125 ΕΚ Έχει διενεργηθεί δοκιμή για τις απαιτήσεις οικολογικού σχεδιασμού σύμφωνα με τους κανονισμούς ΕΚ αριθ 1275 2008 και ΕΕ αριθ 801 2013 Όταν η συσκευή βρίσκεται σε λειτουργία Αναμονή δικτύου η διασύνδεση I O και δικτύου βρ...

Страница 175: ...ità UE è disponibile all indirizzo https www asus com Networking ROG Rapture GT AC2900 HelpDesk_Declaration Dichiarazione di conformità con la direttiva Ecodesign 2009 125 EC I test per i requisiti eco design EC N 1275 2008 e EU N 801 2013 sono stati eseguiti Quando il dispositivo si trova nella modalità Standby di rete le sue interfacce di rete e I O sono in sospensione e potrebbero non funzionar...

Страница 176: ...ndig tekst for EU samsvarserklæringen finnes på https www asus com Networking ROG Rapture GT AC2900 HelpDesk_Declaration Samsvarserklæring for direktiv om miljøvennlig design 2009 125 EF Testing for miljøutformingskrav i henhold til EF nr 1275 2008 og EU nr 801 2013 er utført Når enheten er i nettverksventemodus er I O og nettverksgrensesnittet i hvilemodus og fungerer kanskje ikke som det skal Tr...

Страница 177: ...l da declaração de conformidade da UE está disponível em https www asus com Networking ROG Rapture GT AC2900 HelpDesk_ Declaration Declaração de conformidade para a Diretiva Conceção Ecológica 2009 125 CE Foram realizados testes de requisitos de conceção ecológica de acordo com o Nº 1275 2008 CE e Nº 801 2013 UE Quando o dispositivo se encontra no modo de espera em rede a interface de E S e de red...

Страница 178: ...3 UE En https www asus com Networking ROG Rapture GT AC2900 HelpDesk_Declaration está disponible el texto completo de la declaración de conformidad para la UE Declaración de conformidad para la directiva de ecodiseño 2009 125 CE Se han realizado pruebas para cumplir los requisitos de ecodiseño conforme a las directivas CE nº 1275 2008 y UE nº 801 2013 Cuando el dispositivo está en modo de espera y...

Страница 179: ...lse finns på https www asus com Networking ROG Rapture GT AC2900 HelpDesk_Declaration Försäkran om överensstämmelse för Ecodesign direktivet 2009 125 EC Test för ekodesingkrav i enlighet med EC nr 1275 2008 och EU nr 801 2013 har utförts När enheten är i standby läge för nätverk är gränssnitten för I O och nätverk försatta i viloläge och fungerar kanske inte ordentligt För att väcka enheten tryck ...

Отзывы: