background image

ASUS PCH-DL motherboard

4-13

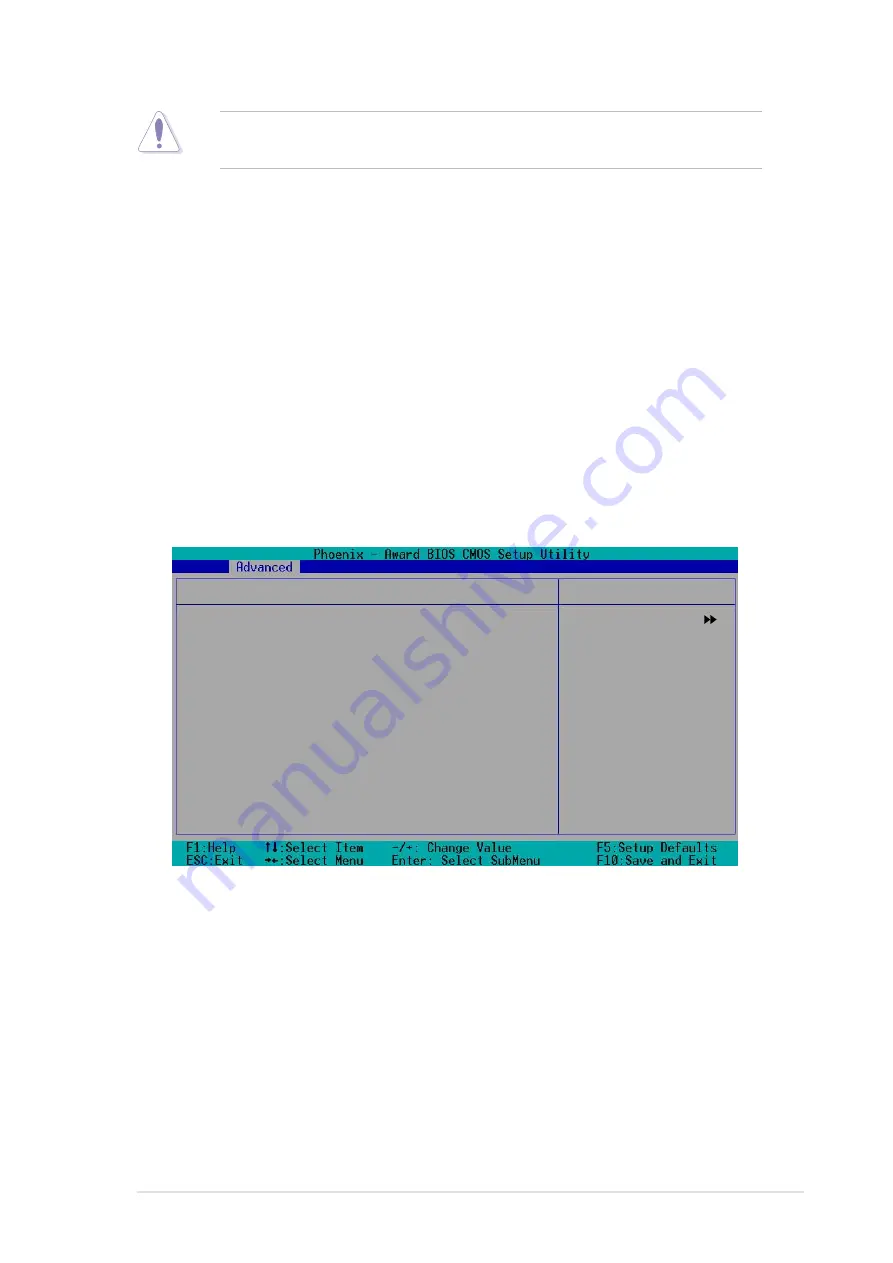
4.4.2 CPU Configuration

This menu shows the CPU configuration settings. Select an item then
press Enter to display a pop-up menu with the configuration options.

CPU L1 & L2 Cache

[Enabled]

Hyper-Threading Technology

[Enabled]

CPU Configuration

Item Specific Help 

Disable/Enable CPU L1/
L2 cache.

Select Menu

Chipset Vcore Voltage [+1.6V]

Allows adjustment of the chipset Vcore voltage. Configuration options:
[+1.5V] [+1.6V] [+1.7V] [+1.8V]

DRAM Vcore Voltage [+2.6V]

Allows adjustment of the DRAM Vcore voltage. Configuration options:
[+2.8V] [+2.7V] [+2.6V]

CPU L1 & L2 Cache  [Enabled]

Allows you to enable or disable the CPU L1 and L2 cache. Configuration
options: [Disabled] [Enabled]

Hyper-Threading Technolody  [Enabled]

Allows you to enable or disable the CPU Hyper-Threading Technology
feature. Set this item to [Enabled] if you are using an operating system that
is optimized for Hyper-Threading Technology, such as Windows XP or
Linux 2.4. Otherwise, set this item to [Disabled]. Configuration options:
[Disabled] [Enabled]

Setting to very high Vcore voltages may cause the system to become
unstable!

Содержание PCH-DL

Страница 1: ...Motherboard PCH DL User Guide ...

Страница 2: ...A PARTICULAR PURPOSE IN NO EVENT SHALL ASUS ITS DIRECTORS OFFICERS EMPLOYEES OR AGENTS BE LIABLE FOR ANY INDIRECT SPECIAL INCIDENTAL OR CONSEQUENTIAL DAMAGES INCLUDING DAMAGES FOR LOSS OF PROFITS LOSS OF BUSINESS LOSS OF USE OR DATA INTERRUPTION OF BUSINESS AND THE LIKE EVEN IF ASUS HAS BEEN ADVISED OF THE POSSIBILITY OF SUCH DAMAGES ARISING FROM ANY DEFECT OR ERROR IN THIS MANUAL OR PRODUCT SPECI...

Страница 3: ... Installing the CPU 2 5 2 3 3 Installing the CPU heatsink and fan 2 7 2 4 System memory 2 12 2 4 1 Overview 2 12 2 4 2 Memory configurations 2 12 2 4 3 Installing a DIMM 2 14 2 4 4 Removing a DIMM 2 14 2 5 Expansion slots 2 15 2 5 1 Installing an expansion card 2 15 2 5 2 Configuring an expansion card 2 15 2 5 3 PCI slots 2 17 2 5 4 AGP Pro slot 2 17 2 6 Jumpers 2 18 2 7 Connectors 2 21 2 7 1 Rear...

Страница 4: ...ondary IDE Slave 4 10 4 3 5 Third IDE Master 4 11 4 3 6 Fourth IDE Master 4 11 4 4 Advanced menu 4 12 4 4 1 Advanced BIOS Features 4 12 4 4 2 CPU Configuration 4 13 4 4 3 Memory Configuration 4 14 4 4 4 Chipset 4 15 4 4 5 Onboard Device 4 18 4 4 6 Speech Configuration 4 22 4 4 7 PCIPnP 4 23 4 4 8 USB Configuration 4 25 4 5 Power menu 4 26 4 5 1 APM Configuration 4 27 4 5 2 Hardware Monitor 4 30 4 ...

Страница 5: ...use harmful interference to radio or television reception which can be determined by turning the equipment off and on the user is encouraged to try to correct the interference by one or more of the following measures Reorient or relocate the receiving antenna Increase the separation between the equipment and receiver Connect the equipment to an outlet on a circuit different from that to which the ...

Страница 6: ...your area If you are not sure about the voltage of the electrical outlet you are using contact your local power company If the power supply is broken do not try to fix it by yourself Contact a qualified service technician or your retailer Operation safety Before installing the motherboard and adding devices on it carefully read all the manuals that came with the package Before using the product ma...

Страница 7: ...e installation This chapter lists the hardware setup procedures that you have to perform when installing system components It includes description of the switches jumpers and connectors on the motherboard Chapter 3 Powering up This chapter describes the power up sequence and gives information on the BIOS beep codes Chapter 4 BIOS setup This chapter tells how to change system settings through the B...

Страница 8: ...ardware and software products Refer to the ASUS contact information 2 Optional Documentation Your product package may include optional documentation such as warranty flyers that may have been added by your dealer These documents are not part of the standard package WARNING Information to prevent injury to yourself when trying to complete a task CAUTION Information to prevent damage to the componen...

Страница 9: ...CC or non ECC DDR DIMMs 1 x AGP Pro 8X 2 x 3 3V 64 bit 66MHz PCI X 3 x 5V 32 bit 33MHz PCI Supported by south bridge 6300ESB ICH 2 x UltraDMA100 connectors 2 x Serial ATA connectors supports RAID 0 RAID 1 configurations under Windows XP Supported by Promise PDC20378 controller 1 x UltraDMA 133 connector 2 x Serial ATA connectors RAID0 RAID1 RAID0 1 Multi RAID configurations Intel 82547GI Gigabit L...

Страница 10: ...ion connector 1 x IEEE 1394 connector GAME MIDI connector S PDIF Out connector CD AUX Modem connectors Front panel audio connector 4Mb Flash ROM Phoenix Award BIOS PnP DMI2 0 WfM2 0 SM BIOS2 3 PCI 2 2 PCI X 1 0a USB 2 0 WfM 2 0 DMI 2 0 WOL WOR by PME chassis intrusion SSI type power supply with 24 pin and 8 pin power plugs Extended ATX form factor 12in x 10 5in 30 5cm x 26 7cm Device drivers Manag...

Страница 11: ...Chapter 1 This chapter describes the features of the motherboard It includes brief explanations of the special attributes of the motherboard and the new technology it supports Product introduction ...

Страница 12: ...ASUS PCH DL motherboard Chapter summary 1 1 Welcome 1 1 1 2 Package contents 1 1 1 3 Special features 1 2 ...

Страница 13: ...ution graphics via an AGP Pro 8X slot Serial ATA support IEEE 1394 USB 2 0 and 6 channel audio features the PCH DL Deluxe is your perfect vehicle to get ahead in the world of power computing Before you start installing the motherboard and hardware devices on it check the items in your package with the list below 1 2 Package contents Check your PCH DL package for the following items If any of the a...

Страница 14: ...nology through the SATA interfaces and the Intel 6300ESB ICH and Promise PDC20378 controllers onboard The SATA specification allows for thinner more flexible cables with lower pin count reduced voltage requirement and up to 150MB s data transfer rate Multi RAID solution The motherboard has the Promise PDC20378 controller to support multi RAID solution using Serial ATA 150 hard disks The RAID0 stri...

Страница 15: ...amcorders VCRs printers TVs and digital cameras 6 channel audio feature The SoundMAX class ADI AD1980 AC 97 audio CODEC supports 6 channel 5 1 surround sound output stereo microphone input variable Sample Rate Conversion SRC professional quality 103 dB out put with 94 dB SNR and analog enumeration capability The SoundMAX 4 XL software features the AudioESP Audio Enumeration and Sensing Process tha...

Страница 16: ...ppy disk C P R CPU Parameter Recall The C P R feature of the motherboard BIOS allows automatic re setting to the BIOS default settings in case the system hangs due to overclocking When the system hangs due to overclocking C P R eliminates the need to open the system chassis and clear the RTC data Simply shut down and reboot the system and BIOS automatically restores the CPU default setting for eac...

Страница 17: ... Hardware information This chapter describes the hardware setup procedures that you have to perform when installing system components It includes details on the switches jumpers and connectors on the motherboard ...

Страница 18: ...DL motherboard Chapter summary 2 1 Before you proceed 2 1 2 2 Motherboard installation 2 2 2 3 Central Processing Unit CPU 2 5 2 4 System memory 2 12 2 5 Expansion slots 2 15 2 6 Jumpers 2 18 2 7 Connectors 2 21 ...

Страница 19: ...etached from the power supply Failure to do so may cause severe damage to the motherboard peripherals and or components When lit the green LED SB_PWR1 indicates that the system is ON in sleep mode or in soft off mode a reminder that you should shut down the system and unplug the power cable before removing or plugging in any motherboard component This warning LED LED1 lights up if you installed tw...

Страница 20: ...rboard make sure that you place it into the chassis in the correct orientation The edge with external ports goes to the rear part of the chassis as indicated in the image below 2 2 2 Screw holes Place ten 10 screws into the holes indicated by circles to secure the motherboard to the chassis Make sure to unplug the power cord before installing or removing the motherboard Failure to do so may cause ...

Страница 21: ...2 0 T USB1 B USB2 Top RJ 45 T USB4 B USB3 Bottom 1394 Top Below Mic In Center Line Out Top Line In PS 2KBMS T Mouse B Keyboard COM1 PARALLEL PORT COM2 CR2032 3V Lithium Cell CMOS Power PRI_IDE1 CON12V KBPWR1 CPU_FAN2 CPU_FAN1 USBPW1 USBPW2 FP_AUDIO1 SYS_FAN1 MODEM1 Audio Codec SATA1 AGP_WARN1 PROMISE PDC20378 RAID Controller TI TSB43AB22A SPDIF_OUT CD1 AUX1 SATA2 SATA_RAID1 SATA_RAID2 J1 CHASSIS1 ...

Страница 22: ... 22 6 Line Out port light green 2 22 7 Microphone port pink 2 22 8 USB 2 0 ports 3 and 4 2 22 9 USB 2 0 ports 1 and 2 2 22 10 Serial ports 2 22 11 PS 2 keyboard port 2 22 Internal connectors 1 Floppy disk drive connector 34 1 pin FLOPPY1 2 23 2 Serial ATA connectors 7 pin SATA1 SATA2 2 23 3 IDE connectors 40 1 pin PRI_IDE blue SEC_IDE black 2 24 4 SMBus connector 6 1 pin SMB1 2 24 5 RAID ATA 133 1...

Страница 23: ... 4 pin CD1 AUX1 MODEM1 2 30 14 Front panel audio connector 10 1 pin FP_AUDIO1 2 31 15 Hard disk activity LED 2 pin IDE_LED1 2 31 16 System panel connector 20 pin PANEL 2 32 System Power LED 3 pin PLED 2 32 Message LED 2 pin MLED 2 32 System warning speaker 4 pin SPKR 2 32 Hard disk activity 2 pin HD_LED 2 32 Power switch Soft off switch 2 pin PWR_SW 2 32 Reset switch 2 pin RESET 2 32 ...

Страница 24: ...on Processor in the 604 pin package with 1MB 512KB L2 cache 2 3 2 Installing the CPU Note in the above illustration that the CPU has a gold triangular mark on one corner This mark indicates the processor Pin 1 that should match a specific corner of the CPU socket If installing only one CPU use CPU socket 1 to ensure system stability Socket for CPU1 Socket for CPU2 PCH DL PCH DL Socket 604 Prestoni...

Страница 25: ...ert the CPU into the socket until it fits in place Make sure that the socket lever is pushed back all the way otherwise the CPU does not fit in completely The CPU fits only in one correct orientation DO NOT force the CPU into the socket to prevent bending the pins and damaging the CPU 4 Carefully push down the socket lever to secure the CPU The lever clicks on the side tab to indicate that it is l...

Страница 26: ...h as a table place the thermal plate underneath a CPU socket matching the standoffs on the plate with the four holes around the CPU socket The figure below shows the corresponding matches of the motherboard holes and standoffs 1 Perform the installation steps 1 to 3 in this section before installing you motherboard into the chassis 2 Make sure that you have applied the thermal grease to the top of...

Страница 27: ...oard and the standoffs on the thermal plate 3 Secure the retention mechanism with the thermal plate using four screws 4 Position the heatsink on top of the CPU having its angled side with cut corners facing the memory sockets Make sure that the heatsink base fits completely on the retention mechanism Heatsink angled side Heatsink retention mechanism ...

Страница 28: ... positioned on the narrow side of the hole This ensures that the side holes fit on the side tabs c Press one end of the clip to snap its hole on the right side tab Retention clip d Press the other end of the clip to snap its hole on the left side tab This secures one side of the heatsink 6 Follow step 5 to install the other retention clip and completely secure the heatsink 5c 5a 5b Center tab posi...

Страница 29: ... the air tunnel snap on its sides 9 Position the fan and air tunnel assembly over the heatsink such that the two curved corners match the angled side of the heatsink 10 Align and insert the side rails of the air tunnel into the grooves on the retention mechanism NOTE You may need to slightly press out the side of the retention mechanism to properly insert the air tunnel Curved corners Side rail Gr...

Страница 30: ... retention mechanism 12 Connect the fan cable to the connector CPU_FAN1 on the motherboard Fan cable Fan connector Rail stopper Side rail Protruding tabs 13 To install a second CPU and heatsink follow the same procedure as in the first CPU installation Make sure to connect to the correct fan connector Otherwise you will get a warning message during POST For the second CPU make sure to connect the ...

Страница 31: ...e any of the recommended configurations in Table 1 2 In dual channel configurations install only identical the same type and size DDR DIMM pairs for each channel 3 Always install DIMMs with the same CAS latency For optimum compatibility it is recommended that you obtain memory modules from the same vendor 4 Make sure that the memory frequency matches the CPU FSB Front Side Bus Refer to Table 2 5 D...

Страница 32: ...Memory frequency CPU FSB synchronization Obtain DDR DIMMs only from ASUS qualified vendors for better system performance Visit the ASUS website www asus com for the latest QVL Sockets Mode DDR1 DDR2 DDR3 DDR4 blue black blue black Single channel 1 Populated 2 Populated 3 Populated 4 Populated Dual channel 1 Populated Populated 2 Populated Populated 3 Populated Populated Populated Populated CPU FSB...

Страница 33: ... socket 2 4 4 Removing a DIMM Follow these steps to remove a DIMM 3 Firmly insert the DIMM into the socket until the retaining clips snap back in place and the DIMM is properly seated Locked Retaining Clip 1 Simultaneously press the retaining clips outward to unlock the DIMM 2 Remove the DIMM from the socket Unlocked Retaining Clip DDR DIMM notch A DDR DIMM is keyed with a notch so that it fits in...

Страница 34: ...racket opposite the slot that you intend to use Keep the screw for later use 4 Align the card connector with the slot and press firmly until the card is completely seated on the slot 5 Secure the card to the chassis with the screw you removed earlier 6 Replace the system cover Make sure to unplug the power cord before adding or removing expansion cards Failure to do so may cause you physical injur...

Страница 35: ...5 IRQ Holder for PCI Steering 11 6 IRQ Holder for PCI Steering 12 7 PS 2 Compatible Mouse Port 13 8 Numeric Data Processor 14 9 Primary IDE Channel 15 10 Secondary IDE Channel These IRQs are usually available for ISA or PCI devices INTA INTB INTC INTD PCI slot 1 IRQ_F IRQ_G IRQ_H IRQ_E PCI slot 2 IRQ_G IRQ_H IRQ_E IRQ_F PCI slot 3 IRQ_H IRQ_E IRQ_F IRQ_G PCI X slot 1 PI_IRQ0 PI_IRQ1 PI_IRQ2 PI_IRQ...

Страница 36: ... and PCI X slot 1 may interfere with the SATA connectors 2 5 4 AGP Pro slot This motherboard has an Accelerated Graphics Port AGP Pro slot that supports AGP 8X 0 8V cards and AGP 4X 1 5V cards When you buy an AGP card make sure that you ask for one with 0 8V or 1 5V specification Note the notches on the card golden fingers to ensure that they fit the AGP slot on your motherboard Install only 0 8V ...

Страница 37: ...s feature requires an ATX power supply that can supply at least 1A on the 5VSB lead and a corresponding setting in the BIOS Refer to Chapter 4 for information PCH DL PCH DL Keyboard Power Setting KBPWR1 Default 5V 5VSB 1 2 2 3 PCH DL PCH DL CPU External Frequency Selection J1 CPU select frequency 2 1 100MHz 4 3 4 3 6 5 Default 2 CPU external frequency selection 3 pin J1 This jumper allows you to s...

Страница 38: ...in USBPW1 USBPW2 Set these jumpers to 5V to wake up the computer from S1 sleep mode CPU stopped DRAM refreshed system running in low power mode using the connected USB devices Set to 5VSB to wake up from S3 and S4 sleep modes no power to CPU DRAM in slow refresh power supply in reduced power mode 1 The USB device wake up feature requires a power supply that can provide 500mA on the 5VSB lead for e...

Страница 39: ...fault to pins 2 3 Keep the cap on pins 2 3 for about 5 10 seconds then move the cap back to pins 1 2 4 Re install the battery 5 Plug the power cord and turn ON the computer 6 Hold down the Del key during the boot process and enter BIOS setup to re enter data Except when clearing the RTC RAM never remove the cap on CLRTC jumper default position Removing the cap will cause system boot failure PCH DL...

Страница 40: ...nel mode the function of this port becomes Bass Center 6 Line Out port This Line Out light green port connects a headphone or a speaker In 6 channel mode the function of this port becomes Front Speaker Out 7 Microphone port This Mic pink port connects a microphone In 6 channel mode the function of this port becomes Rear Speaker Out 8 USB 2 0 ports 3 and 4 These 4 pin Universal Serial Bus USB ports...

Страница 41: ... FLOPPY1 2 Serial ATA connectors 7 pin SATA1 SATA2 These next generation connectors support the thin Serial ATA cables for Serial ATA hard disks The current Serial ATA interface allows up to 150 MB s data transfer rate faster than the standard parallel ATA with 133 MB s Ultra ATA 133 If you installed Serial ATA hard disks you may create a RAID 0 RAID 1 configuration using the RAID feature of the I...

Страница 42: ...e label or documentation when setting the device as master or slave Pin 20 on each IDE connector is removed to match the covered hole on the UltraDMA cable connector This prevents incorrect orientation when you connect the cables 4 SMBus connector 6 1 pin SMB1 This connector allows you to connect SMBus System Management Bus devices Devices communicate with an SMBus host and or other SMBus devices ...

Страница 43: ...hard disks on the Serial ATA RAID connectors to create a multi RAID configuration PCH DL PCH DL RAID Connector NOTE Orient the red markings usually zigzag on the IDE ribbon cable to PIN 1 PRI_RAID1 PIN 1 1 If you wish to create a RAID set using UltraATA hard disks make sure that you have connected the UltraATA cable and installed UltraATA 133 hard disks 2 The Promise PDC20378 RAID controller does ...

Страница 44: ...u have connected the SATA cable and installed Serial ATA devices You cannot enter the SATARaid utility and SATA BIOS setup during POST if there are no connected Serial ATA devices 2 The Promise PDC20378 RAID controller does not support ATAPI devices such as CD ROMs DVD ROMs etc 3 For RAID 0 and RAID 1 configurations use both Parallel ATA and Serial ATA devices for better performance PCH DL PCH DL ...

Страница 45: ... 1 Do not forget to connect the 8 pin 12V power plug Otherwise the system does not boot up 2 Make sure that your power supply can provide 8A on the 12V lead and at least 1A on the 5 volt standby lead 5VSB The minimum recommended wattage is 300W The system may become unstable or may not boot up if the power is inadequate PCH DL PCH DL ATX Power Connectors For Power Supply with 20 pin Power Connecto...

Страница 46: ...event By default the pins labeled Chassis Signal and Ground are shorted with a jumper cap If you wish to use the chassis intrusion detection feature remove the jumper cap from the pins PCH DL PCH DL Chassis Intrusion Connector CHASSIS1 Default 5VSB_MB Chassis Signal GND PCH DL PCH DL IEEE 1394 Connector IEEE1394_1 1 TPA0 GND TPB0 12V GND TPA0 GND TPB0 12V 9 IEEE 1394 connector 10 1 pin IEEE1394_1 ...

Страница 47: ...A 26 64W max at 12V Connect the fan cables to the fan connectors on the motherboard making sure that the black wire of each cable matches the ground pin of the connector Do not forget to connect the fan cables to the fan connectors Lack of sufficient air flow within the system may damage the motherboard components These are not jumpers DO NOT place jumper caps on the fan connectors PCH DL PCH DL 1...

Страница 48: ...V 13 Internal audio connectors 4 pin CD1 AUX1 MODEM1 These connectors allow you to receive stereo audio input from sound sources such as a CD ROM TV tuner or MPEG card The MODEM connector allows the onboard audio to interface with a voice modem card with a similar connector It also allows the sharing of mono_in such as a phone and a mono_out such as a speaker between the audio and a voice modem ca...

Страница 49: ...ce for the Intel front panel audio cable that allow convenient connection and control of audio devices By default the pins labeled LINE OUT_R BLINE_OUT_R and the pins LINE OUT_L BLINE_OUT_L are shorted with jumper caps Remove the caps only when you are connecting the front panel audio cable PCH DL PCH DL Intel Panel Connector FP_AUDIO1 BLINE_OUT_L MIC2 Line out_R Line out_L BLINE_OUT_R NC MICPWR 5...

Страница 50: ... device connected to the any of IDE connectors cause the IDE LED to light up Power switch Soft off switch 2 pin PWR_SW This lead connects a switch that controls the system power Pressing the power switch turns the system between ON and SLEEP or ON and SOFT OFF depending on the BIOS or OS settings Pressing the power switch while in the ON mode for more than 4 seconds turns the system OFF Reset swit...

Страница 51: ...Chapter 3 Powering up This chapter describes the power up sequence and gives information on the BIOS beep codes ...

Страница 52: ...ASUS PCH DL motherboard Chapter summary 3 1 Starting up for the first time 3 1 3 2 Powering off the computer 3 2 ...

Страница 53: ...n standards or if it has a power standby feature the monitor LED may light up or switch between orange and green after the system LED turns on The system then runs the power on tests While the tests are running the BIOS beeps see BIOS beep codes table below or additional messages appear on the screen If you do not see anything within 30 seconds from the time you turned on the power the system may ...

Страница 54: ... any POST message Action No CPU installed Install an Intel Xeon Processor into the CPU socket System failed CPU test Check the CPU if properly installed Call ASUS technical support for assistance See the ASUS contact information System failed memory test Install 184 pin unbuffered PC3200 2700 2100 DIMMs into the DIMM sockets Check if the DIMMs on the DIMM sockets are properly installed Make sure t...

Страница 55: ...have connected an IDE hard disk drive to the one of the IDE connectors on the motherboard See section 2 7 Connectors CPU temperature too high Check CPU fan if working properly CPU fan failed Check the CPU fan and make sure it turns on after you applied power to the system Make sure that your CPU fan supports the fan speed detection function CPU voltage out of range Check your power supply and make...

Страница 56: ...If you are using Windows XP or Windows Server 2003 1 Click the Start button then select Turn Off Computer 2 Click the Turn Off button to shut down the computer 3 The power supply should turn off after Windows shuts down 3 3 2 Using the dual function power switch While the system is ON pressing the power switch for less than 4 seconds puts the system to sleep mode or to soft off mode depending on t...

Страница 57: ...Chapter 4 BIOS setup This chapter tells how to change system settings through the BIOS Setup menus Detailed descriptions of the BIOS parameters are also provided ...

Страница 58: ...US PCH DL motherboard Chapter summary 4 1 Managing and updating your BIOS 4 1 4 2 BIOS Setup program 4 3 4 3 Main menu 4 6 4 4 Advanced menu 4 12 4 5 Power menu 4 26 4 6 Boot menu 4 32 4 7 Exit menu 4 37 ...

Страница 59: ... floppy disk DOS environment Insert a 1 44 MB floppy disk into the drive At the DOS prompt type format a s then press the Enter key Windows XP environment a Insert a new 1 44 MB floppy disk in the floppy disk drive b From the Windows desktop click Start My Computer c In the My Computer window click the 3 1 2 Floppy icon d From the Menu bar click File Format e Select Create an MS DOS Startup Disk i...

Страница 60: ...oppy disk 2 Insert the disk that contains the new BIOS file into the floppy drive 5 AWDFLASH checks the new BIOS file from the floppy disk 6 After verification AWDFLASH flashes the new BIOS file Do not shut down the computer during the flash process 7 After the new BIOS file is copied the computer returns to POST Save only the updated BIOS file in the floppy disk to avoid loading the wrong BIOS fi...

Страница 61: ...n the CMOS RAM of the Flash ROM The Flash ROM on the motherboard stores the Setup utility When you start up the computer the system provides you with the opportunity to run this program Press Delete during the Power On Self Test POST to enter the Setup utility otherwise POST continues with its test routines If you wish to enter Setup after POST restart the system by pressing Ctrl Alt Delete or by ...

Страница 62: ...emory 26114K Select Menu 4 2 2 Menu bar The menu bar on top of the screen has the following main items Main For changing the basic system configuration settings Advanced For changing the advanced system settings Power For changing the power configuration settings Boot For changing the system boot configuration settings Exit For selecting the exit options and loading default settings To select the ...

Страница 63: ...he right side of a menu screen when there are items that do not fit on the screen Press Up Down arrow keys or PageUp PageDown keys to display the other items on the screen 4 2 7 Pop up window Select an item in the menu then press Enter to display a pop up window with the configuration options for that item The navigation keys differ from one screen to another 4 2 3 Navigation keys At the bottom of...

Страница 64: ...r are Month 1 to 12 Day 1 to 31 Year 1999 to 2099 Use the Tab key to move between the month day and year fields Legacy Diskette A 1 44M 3 5 in Sets the type of floppy drive installed Configuration options None 360K 5 25 in 1 2M 5 25 in 720K 3 5 in 1 44M 3 5 in 2 88M 3 5 in Floppy 3 Mode Support Disabled This is required to support older Japanese floppy drives The Floppy 3 Mode feature allows readi...

Страница 65: ...nter the message Detecting Hard Drive appears as the BIOS attempts to detect the presence of a IDE drive Primary IDE Master Auto Select Auto to automatically detect an IDE drive If automatic detection is successful the setup BIOS automatically fills in the correct values for the remaining fields on this sub menu If automatic detection fails this may be because the IDE drive is too old or too new I...

Страница 66: ...n manually enter the drive values Configuration options CHS LBA Large Auto PIO Mode Auto Sets the PIO mode for the IDE drive The settings Mode 0 to 4 allow successive increase in performance Configuration options Auto Mode 0 Mode 1 Mode 2 Mode 3 Mode 4 UDMA Mode Auto When this item is set to Auto the UDMA capability allows improved transfer speeds and data integrity for supported IDE drives Config...

Страница 67: ...fer to the drive documentation or the drive label for this information To enter a value you may also highlight the item then press Enter to display a pop up menu Type in the value from the drive documentation then press Enter Capacity xxxxx MB Displays the auto detected hard disk capacity The value is not user configurable Cylinder Shows the number of the hard disk cylinders Head Shows the number ...

Страница 68: ... new IDE drives This is necessary so that you can write or read data from the hard disk Make sure to set the partition of the Primary IDE hard disk drive to Active Precomp Displays the precompressed volumes on the hard disk if any on the motherboard Landing Zone Displays the drive s maximum usable capacity as calculated by the BIOS based on the drive information you entered Sector Shows the number...

Страница 69: ... as Fourth IDE Master refer to section 4 3 1 Primary IDE Master and section 4 3 5 Third IDE Master for the menu item descriptions 4 3 5 Third IDE Master When configuring a drive as Third IDE Master refer to section 4 3 1 Primary IDE Master for the menu item descriptions which are not discussed in this section Third IDE Master Auto Detection Press Enter Extended IDE Drive Auto Access Mode Auto Capa...

Страница 70: ... Features This menu shows the chipset and DRAM Vcore voltage settings Select an item then press Enter to display a pop up menu with the configuration options Advanced BIOS Features CPU Configuration Memory Configuration Chipset Onboard Device Speech Configuration PCIPnP USB Configuration Item Specific Help Virus Protection Boot Sequence Select Menu Chipset Vcore Voltage 1 6V DRAM Vcore Voltage 2 6...

Страница 71: ... 7V 1 8V DRAM Vcore Voltage 2 6V Allows adjustment of the DRAM Vcore voltage Configuration options 2 8V 2 7V 2 6V CPU L1 L2 Cache Enabled Allows you to enable or disable the CPU L1 and L2 cache Configuration options Disabled Enabled Hyper Threading Technolody Enabled Allows you to enable or disable the CPU Hyper Threading Technology feature Set this item to Enabled if you are using an operating sy...

Страница 72: ...led Memory Configuration Item Specific Help Set DRAM Frequency Select Menu DRAM Frequency Auto This item sets the DRAM operating frequency Configuration options DDR266 DDR333 Auto Memory Timing Selectable By SPD The DRAM clock are set according to the DRAM SPD Serial Presence Detect Select By SPD for automatic DRAM clock detection Select Manual to allow setting the succeeding memory items to optim...

Страница 73: ... then press Enter to display a sub menu with additional items or show a pop up menu with the configuration options AGP Bridge Configuration Frequency Voltage Control System BIOS Cacheable Enabled Video BIOS Cacheable Disabled Init Display First AGP Slot Auto Detect PCI Clk Enabled Spread Spectrum 0 50 Chipset Item Specific Help Press Enter to set Select Menu System BIOS Cacheable Enabled Allows yo...

Страница 74: ... data Configuration options 4 8 16 32 64 128 256 Init Display First AGP Slot Allows you to select the graphics controller to use as primary boot device Configuration options PCI VGA Card AGP Slot Auto Detect PCI Clk Enabled Allows you to select the maximum PCI bus speed to be porgrammed Configuration options Enabled Disabled Spread Spectrum 0 50 Allows you to select the clock generator spread spre...

Страница 75: ...within the specified range then press Enter Configuration options Min 133 Max 165 CPU Clock Ratio 20 X Sets the ratio between the CPU core clock and the Front Side Bus FSB frequency Key in a value within the specified range then press Enter Configuration options Min 12 Max 23 The minimum and maximum configuration values depend on the installed CPU Take caution when overclocking the CPU Overclockin...

Страница 76: ...rd AC97 audio Select Menu Onboard AC97 Audio Auto Allows you to enable or disable the onboard AC97 audio controller Configuration options Auto Disabled CSA LAN Giga LAN Enabled Allows you enable or disable the onboard Gigabit LAN controller Configuration options Disabled Enabled Onboard LAN Boot ROM Disabled Allows you to enable or disable the boot ROM of the onboard LAN controller Configuration o...

Страница 77: ...em is set to Enabled Configuration options IDE RAID SuperIO Device Serial Port 1 3F8 IRQ4 Serial Port 2 2F8 IRQ3 Allow you to select the serial port base addresses Configuration options Disabled 3F8 IRQ4 2F8 IRQ3 3E8 IRQ4 2E8 IRQ3 Auto Onboard Parallel Port 378 IRQ7 Allows you to select the parellel port base address Configuration options Disabled 378 IRQ7 278 IRG5 3BC IRQ7 Parallel Port Mode SPP ...

Страница 78: ...item becomes configurable only if the Parallel Port Mode is set to ECP or ECP EPP Configuration options 1 3 Game Port Address 201 Allows you to select the game port address Configuration options Disabled 201 209 Midi Port Address 330 Allows you to select the MIDI port address Configuration options Disabled 330 300 290 Midi Port IRQ 10 Allows you to select the MIDI port IRQ Configuration options 5 ...

Страница 79: ...aximum of six IDE devices on each channel Use ths option when you installed a native operating system like Windows 2000 XP d Setting to SATA Only allows you to install IDE devices on the Serial ATA channels only e Setting to Disabled disables the onboard SATA controller The RAID feature is also disabled SATA Mode IDE When set to RAID this item allows configuration of the installed IDE devices into...

Страница 80: ...abled Speech Configuration Item Specific Help Enable Disable Speech IC Controller Select Menu Speech IC Controller Enabled Allows you enable or disable the Speech IC controller Configuration options Disabled Enabled Report IDE Error Disabled Allows you enable or disable the IDE error reporting function Configuration options Disabled Enabled Report System Booting Disabled Allows you enable or disab...

Страница 81: ...Extended System Configuration Data ESCD when you exit the Setup The ESCD includes information on non PnP devices Set this item to Enabled if you installed an expansion card that conflicts with other devices and cause system boot failure Configuration options Disabled Enabled Resources Controlled By Auto ESCD When set to Auto ESCD allows BIOS to automatically configure of all boot and Plug and Play...

Страница 82: ...pecific Help Legacy ISA for devices compliant with the original PC AT bus specification PCI ISA PnP for devices compliant with the Plug and Play standard whether designed for PCI or ISa bus architecture Select Menu IRQ xx assigned to PCI device The IRQ Resources sub menu is activated when the Resources Controlled by parameter is set to Manual Select PCI Device to assign an IRQ address to a Plug an...

Страница 83: ...troller Select Menu USB Controller Enabled Allows you enable or disable the USB controller Configuration options Disabled Enabled USB 2 0 Support Enabled Allows you to enable or disable the EHCI controller Setting this item to Enabled allows the built in high speed USB support in the BIOS to turn on automatically when you install high speed USB devices Configuration options Disabled Enabled USB Le...

Страница 84: ...pend Type S1 S3 APM Configuration Hardware Configuration Item Specific Help Enable Disable ACPI support for Operating System Select Menu ACPI APIC Support Enabled Allows you to enable or disable the ACPI feature on the operating system Configuration options Disabled Enabled ACPI Suspend Type S1 S3 Allows you to select the ACPI state that you wish to use for system suspend Configuration options S1 ...

Страница 85: ... By Alarm Disabled Date of Month Alarm 0 Time hh mm ss Alarm 0 0 0 APM Configuration Item Specific Help This field allows you to set the automatic power saving features Select Menu Power Management User Define Allows you to set the automatic power saving features Configuration options User Define Min Saving Max Saving HDD Power Down Disabled Shuts down any IDE hard disk drives in the system after ...

Страница 86: ...nes when to activate the video off feature for monitor power management Configuration options Yes No MODEM Use IRQ 3 Allows you to select the IRQ assignment for the modem Configuration options NA 3 4 5 7 9 10 11 Soft Off by PWR BTTN Instant Off When set to Instant Off the system goes to soft off when you press the power button for less than 4 seconds When set to Delay 4 Sec press the power button ...

Страница 87: ... Hot Key Resume by Alarm Disabled Allows you to enable or disable RTC to generate a wake event When this item is enabled you can set the date and time of alarm using the two following items Configuration options Disabled Enabled Date of Month Alarm 0 To set the date of alarm highlight this item and press Enter to display a pop up menu Key in a value within the specified range then press Enter Conf...

Страница 88: ...RPM System Temperature1 35o C 93o F System Temperature2 20o C 68o F M B Temperature 44o C 111o F CPU1 Temperature 45o C 113o F CPU2 Temperature N A Chassis Fan1 Speed 0 RPM CPU Fan1 Speed 5152 RPM CPU Fan2 Speed 0 RPM Shutdown Temperature Disabled Hardware Monitor Item Specific Help Press Enter to view Select Menu Shutdown Temperature Disabled Allows system shutdown when the temperature goes over ...

Страница 89: ...stment according to the system temperature Configuration options Disabled 45o C 113o F 50o C 122o F 55o C 131o F 60o C 140o F 65o C 149o F Chassis Q Fan Tole Value 5 Allows you to set the smart chassis fan speed detection range Configuration options Min 1 Max 5 CPU Q Fan Temperature 40o C 104o F Allows automatic CPU fan speed adjustment according to the system temperature Configuration options Dis...

Страница 90: ...ity Hard Disk Boot Priority Removable Device Priority Boot Settings Configuration Security Item Specific Help Select Menu 1st Boot Device Removable 2nd Boot Device CDROM 3rd Boot Device Hard Disk Boot Device Priority Item Specific Help Select your Boot Device Priority Select Menu 1st Boot Device Removable 2nd Boot Device CDROM 3rd Boot Device Hard Disk These items allow you to select your boot dev...

Страница 91: ...em Specific Help Use up or down arrow to select a device then press to move it up or to move it down the list Press ESC to exit this menu Select Menu 1 Floppy Disks Removable Device Priority Item Specific Help Use up or down arrow to select a device then press to move it up or to move it down the list Press ESC to exit this menu Select Menu ...

Страница 92: ...nabled Quick Power On Self Test Enabled This field speeds up the Power On Self Test POST routine by skipping retesting a second third and fourth time Configuration options Disabled Enabled Halt On All Errors Sets the system to halt on errors according to the system functions specified in each option Configuration options All Errors No Errors All But Keyboard All But Diskette All But Disk Key Case ...

Страница 93: ...s Typematic Rate Chars Sec and Typematic Delay become configurable only when the item Typematic Setting is enabled Typematic Rate Chars Sec 6 Allows you to select the rate at which character repeats when you hold a key Configuration options 6 8 10 12 15 20 24 30 Typematic Delay Msec 250 Allows you to set the delay before key strokes begin to repeat Configuration options 250 500 750 1000 4 6 5 Secu...

Страница 94: ...nu A note about passwords The Supervisor password is required to enter the BIOS Setup program preventing unauthorized access The User password is required to boot the system preventing unauthorized use Forgot the password If you forget your password you can clear it by erasing the CMOS Real Time Clock RTC RAM The RAM data containing the password information is powered by the onboard button cell ba...

Страница 95: ...nd return to the menu Exit Discard Changes Select this option then press Enter if you wish to exit the Setup utility without saving your changes When a confirmation window appears type Y to exit and discard your changes or N to cancel and return to the menu Load Setup Defaults Select this option then press Enter or simply press F5 to load the optimized values for each of the Setup menu items When ...

Страница 96: ...4 38 Chapter 4 BIOS Setup ...

Страница 97: ...Appendix Reference information This appendix includes additional information that you may refer to when confiiguring the motherboard ...

Страница 98: ...ASUS PCH DL motherboard Appnedix summary A 1 Block diagram A 1 ...

Страница 99: ... KB MS Game Port HW monitor 4 USB1 1 2 0 Ports HubLink Bus 266MB s Intel Xeon CPU Intel Xeon CPU Intel 82875P North Bridge Intel 6300ESB South Bridge Winbond 83627THF Super I O 4Mb BIOS FWH Intel 82547GI Gb Ethernet Audio Codec ADI AD1980 Promise PDC20378 AC97 USB USB USB USB PCI X BUS 66MHz 533 MB s FSB 2 IDE Ports Ultra ATA 66 100 2 Serial ATA Ports 1 IDE Port Ultra ATA 66 100 2 Serial ATA Ports...

Страница 100: ...A 2 Appendix Reference information ...

Отзывы: