Chapter 2: BIOS information
2-15
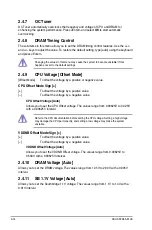
2.4.12 1.1Vsb Voltage [Auto]
Allows you to set the 1.1Vsb voltage. The values range from 1.1000V to 1.4000V with a 0.1V
interval.
2.4.13 APU1.2V Voltage [Auto]
Allows you to set the APU (Accelerated Processor Unit) 1.2V voltage. The values range from
1.2000V to 1.8000V with a 0.01V interval.
2.4.14 VDDA Voltage [Auto]
Allows you to set the VDDA voltage. The values range from 2.5000V to 2.8000V with a 0.1V
interval.
•
The values of the
CPU Offset Voltage
,
VDDNB Offset Voltage
,
DRAM Voltage
,
SB 1.1V Voltage
,
1.1Vsb Voltage
,
APU1.2V Voltage
, and
VDDA Voltage
items are
labeled in different color, indicating the risk levels of high voltage settings.
•
The system may need better cooling system to work stably under high voltage
settings.
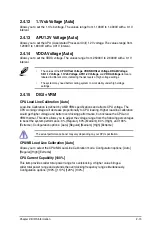
2.4.15 DIGI + VRM
CPU Load Line Calibration [Auto]
Load-line Calibration is defined by AMD VRM specifications and affects CPU voltage. The
CPU working voltage will decrease proportionally to CPU loading. Higher load-line calibration
would get higher voltage and better overclocking performance, but increase the CPU and
VRM thermal. This item allows you to adjust the voltage range from the following percentages
to boost the system performance: 0% (Regular), 60% (Medium), 80% (High), and 100%
(Extreme). Configuration options: [Auto] [Regular] [Medium] [High] [Extreme]
The actual performance boost may vary depending on your CPU specifiation.
CPU/NB Load Line Calibration [Auto]
Allows you to select the CPU/NB Load-Line Calibration mode. Configuration options: [Auto]
[Regular] [High] [Extreme]
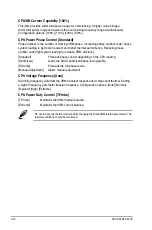
CPU Current Capability [100%]
This item provides wider total power range for overclocking. A higher value brings a
wider total power range and extends the overclocking frequency range simultaneously.
Configuration options: [100%] [110%] [120%] [130%]
Содержание F2A55-M LE
Страница 1: ...Motherboard F2A55 M LE ...
Страница 20: ...1 4 1 APU installation 1 4 3 2 Chapter 1 Product introduction 1 8 ...
Страница 22: ...To uninstall the APU heatsink and fan assembly 5 3 1 4 2 Chapter 1 Product introduction 1 10 ...
Страница 29: ...1 5 3 Installing a DIMM 1 2 3 To remove a DIMM B A A ASUS F2A55 M LE 1 17 ...
Страница 74: ...2 32 ASUS F2A55 M LE ...

