ROG STRIX Z370-H GAMING
3-13
Chapter 3
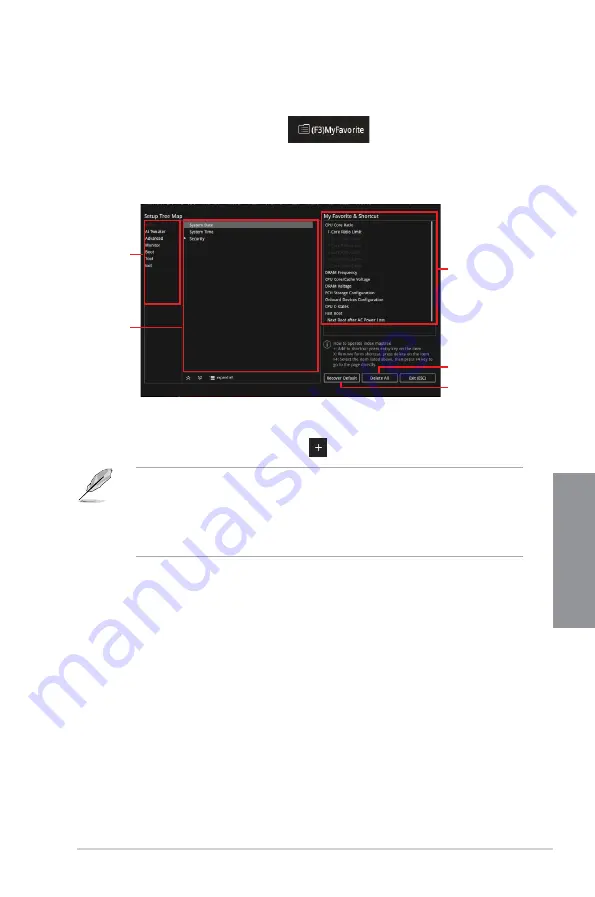
Adding items to My Favorites
To add BIOS items:
1.
Press <F3> on your keyboard or click
from the BIOS screen to open
Setup Tree Map screen.
2.
On the Setup Tree Map screen, select the BIOS items that you want to save in My
Favorites screen.
3.
Select an item from main menu panel, then click the submenu that you want to save as
favorite from the submenu panel and click
or press <Enter> on your keyboard.
You cannot add the following items to My Favorite items:
•
Items with submenu options
•
User-managed items such as language and boot order
•
Configuration items such as Memory SPD Information, system time and date.
4.
Click
Exit (ESC)
or press <Esc> key to close Setup Tree Map screen.
5.
Go to My Favorites menu to view the saved BIOS items.
Main menu panel
Submenu panel
Selected shortcut
items
Delete all favorite
items
Recover to default
favorite items
Содержание 90MB0VJ0-M0EAY0
Страница 1: ...Motherboard ROG STRIX Z370 H GAMING ...
Страница 34: ...1 20 Chapter 1 Product Introduction Chapter 1 ...
Страница 38: ...2 4 Chapter 2 Basic Installation Chapter 2 To uninstall the CPU heatsink and fan assembly ...
Страница 41: ...ROG STRIX Z370 H GAMING 2 7 Chapter 2 To remove a DIMM 2 1 4 DIMM installation ...
Страница 42: ...2 8 Chapter 2 Basic Installation Chapter 2 2 1 5 ATX power connection Ensure to connect the 8 pin power plug ...
Страница 43: ...ROG STRIX Z370 H GAMING 2 9 Chapter 2 2 1 6 SATA device connection OR ...
Страница 46: ...2 12 Chapter 2 Basic Installation Chapter 2 To install HYPER M 2 x4 card The SSD card is purchased separately ...
Страница 47: ...ROG STRIX Z370 H GAMING 2 13 Chapter 2 2 1 9 M 2 installation ...
Страница 54: ...2 20 Chapter 2 Basic Installation Chapter 2 ...
Страница 84: ...3 30 Chapter 3 BIOS Setup Chapter 3 ...


