


ROG STRIX Z370-H GAMING
1-11
Chapter 1
1.1.7
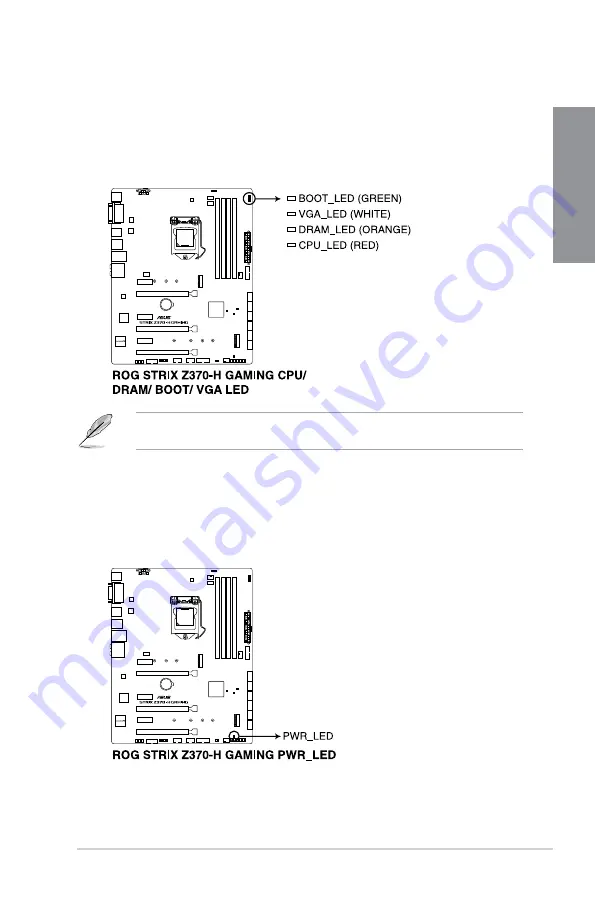
Onboard LEDs
1.
Q LEDs (BOOT, VGA, DRAM, CPU)
Q LEDs check key components (CPU, DRAM, VGA card, and booting devices) in
sequence during motherboard booting process. If an error is found, the corresponding
LED remains lit until the problem is solved. This user-friendly design provides an
intuitive way to locate the root problem within seconds.
2.
Standby Power LED
The motherboard comes with a standby power LED. The LED lights up to indicate that
the system is ON, in sleep mode, or in soft-off mode. This is a reminder that you should
shut down the system and unplug the power cable before removing or plugging in any
motherboard component. The illustration below shows the location of the onboard LED.
The Q LEDs provide the most probable cause of an error code as a starting point for
troubleshooting. The actual cause may vary from case to case.
Содержание 90MB0VJ0-M0EAY0
Страница 1: ...Motherboard ROG STRIX Z370 H GAMING ...
Страница 34: ...1 20 Chapter 1 Product Introduction Chapter 1 ...
Страница 38: ...2 4 Chapter 2 Basic Installation Chapter 2 To uninstall the CPU heatsink and fan assembly ...
Страница 41: ...ROG STRIX Z370 H GAMING 2 7 Chapter 2 To remove a DIMM 2 1 4 DIMM installation ...
Страница 42: ...2 8 Chapter 2 Basic Installation Chapter 2 2 1 5 ATX power connection Ensure to connect the 8 pin power plug ...
Страница 43: ...ROG STRIX Z370 H GAMING 2 9 Chapter 2 2 1 6 SATA device connection OR ...
Страница 46: ...2 12 Chapter 2 Basic Installation Chapter 2 To install HYPER M 2 x4 card The SSD card is purchased separately ...
Страница 47: ...ROG STRIX Z370 H GAMING 2 13 Chapter 2 2 1 9 M 2 installation ...
Страница 54: ...2 20 Chapter 2 Basic Installation Chapter 2 ...
Страница 84: ...3 30 Chapter 3 BIOS Setup Chapter 3 ...


