background image

object. The very same object will be in the field of view of the telescope and now you 
can  proceed  to  its  observation.  In  the  process  of  guidance  from  the  object  to  the 
object,  the  accuracy  of  the  guidance  may  be  lost.    The  reason  for  this  may  be  the 
errors of the polar axis, errors in the  mechanics of the telescope, etc. Therefore, it is 
recommended to periodically tie the telescope on a visible star, as described above. 


6.


CONTROL  STAND-ALONE 


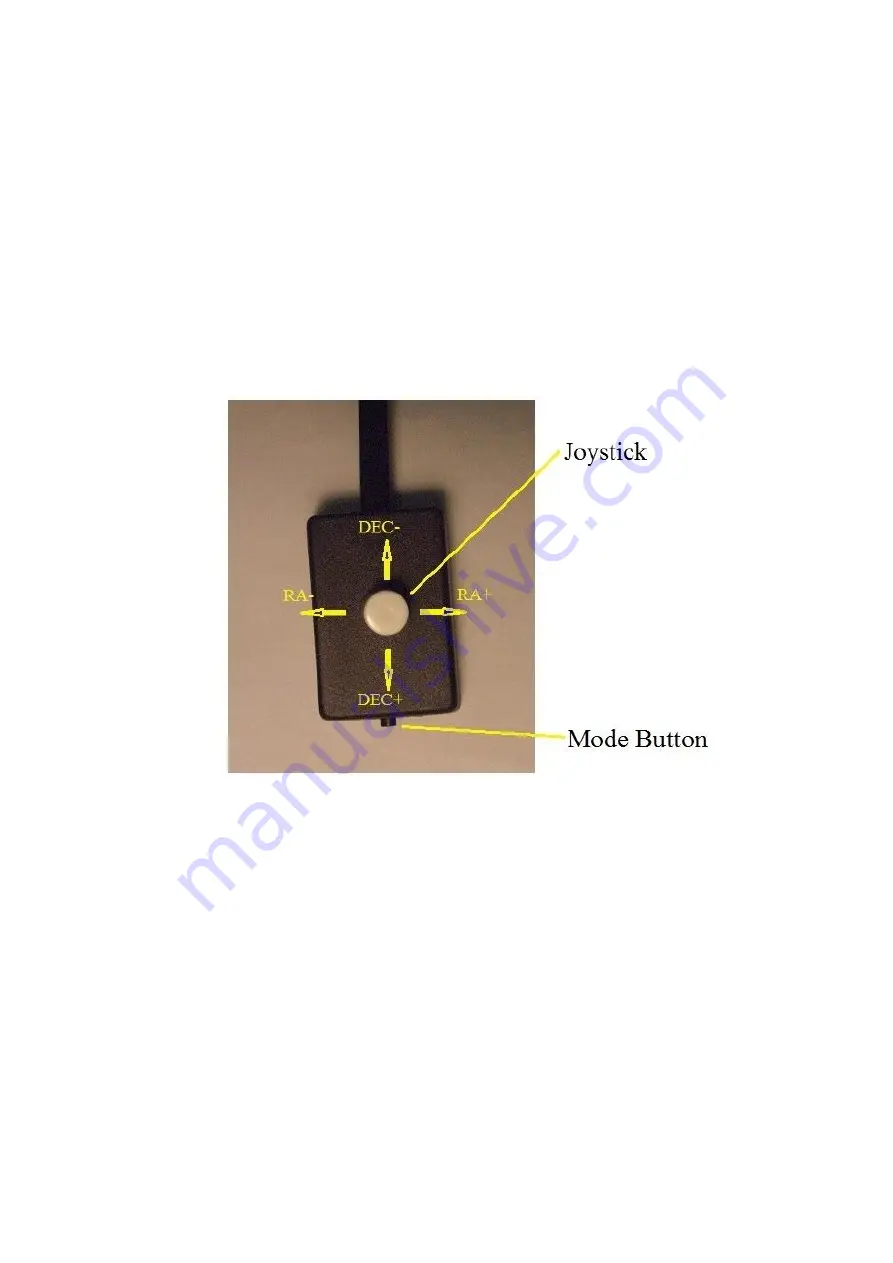
(OPERATION joystick) 


Figure 8 


6.1. Follow steps 3.1, 3.2. 
6.2 Connect the control unit to the mount with the joystick of the manual control. 
6.3 After switching on the power,  beeps will sound, that indicates that the CS is ready 
for operation and  will begin tracking with a stellar speed. 
6.4 The switching speed of the mount is made using the joystick positions 
    Ra + and Ra- while holding down the Set button. Each speed selection 
    Is confirmed by a short sound signal according to the following scheme: 1 beep -stop, 
2 - siderial, 3 - lunar, 4 - solar speed. 
6.5 Switching speed correction of the mount is made with using the joystick positions 
Dec + and Dec- while holding down the Set button. Every choice speed is confirmed by 
a long sound signal according to the following scheme: 1 beep - x20, 2- x65, 3- x200, 4- 
x500. 

Содержание EQStar+

Страница 1: ...EQStar Equatorial mount control system User guide AstroGadget 2018...

Страница 2: ...planetarium at MD as a control of the telescope should be chosen or Celestron or SynScan as well as a mount German equatorial mount The following programs for MD works with CS include SkySafary Orion...

Страница 3: ...Fig 1 CS in the PC control mode Fig 2 CS in the MD control mode...

Страница 4: ...Fig 3 CS in astrophotography mode Fig 4 CS in offline mode...

Страница 5: ...l mount control unit Joystick for a stand alone mount control DB9 USB cable for connection of EQStar to PC Set of cables for the motors connection Wi Fi adapter for mount control from the mobile devic...

Страница 6: ...3 GETTING STARTED ON THE EXAMPLE MOUNT EQ5 3 1 PC control Install as shown in Fig 6 the drive motors of the axes on the mount Fig 6...

Страница 7: ...6 x http www ascom standards org 3 5 Install EQMOD Ascom driver located on the CD software 3 6 Connect the DB9 USB cable to your computer s USB port 3 7 After turning on the power you will hear a bee...

Страница 8: ...e planetarium CS After successful connections must be made to align to the telescope according to the instructions on the application EQMOD http eq mod sourceforge net tutindex html The telescope is n...

Страница 9: ...nnect the joystick to the EQStar Press and hold the MODE button for 5 seconds until a long beep sounds EQStar has now switched to stand alone mode guided via the ST 4 port By default the guiding speed...

Страница 10: ...is on the original CD If necessary data on the time and place of observation can be adjusted and saved in the CS If the data on time and the place of observation will not correspond to the actual one...

Страница 11: ...e WEB interface as shown in the figure 7a Fig 7a In the planetarium program on the mobile device for example in SkySafari select the connection method by WiFi and write down the ip address and port in...

Страница 12: ...If the star in the crosshairs of the planetarium finder corresponds to a star in the center of the telescope s eyepiece click Align on the control panel of the program Now the telescope knows the obje...

Страница 13: ...l unit to the mount with the joystick of the manual control 6 3 After switching on the power beeps will sound that indicates that the CS is ready for operation and will begin tracking with a stellar s...

Страница 14: ...ug The center pin of the power connector is positive Compatible type of stepper motor not included in the KIT bipolar Current of the winding of the stepper motor adjustable 0 8 A max RA and DEC reduct...

Отзывы: