


Inst.419 Astral Pool Connect LITE+ Instructions V08-20
15
4.9 Internet Gateway Troubleshooting
To confirm that the Internet Gateway is able to connect to the ConnectMyPool servers, follow these steps.
1.
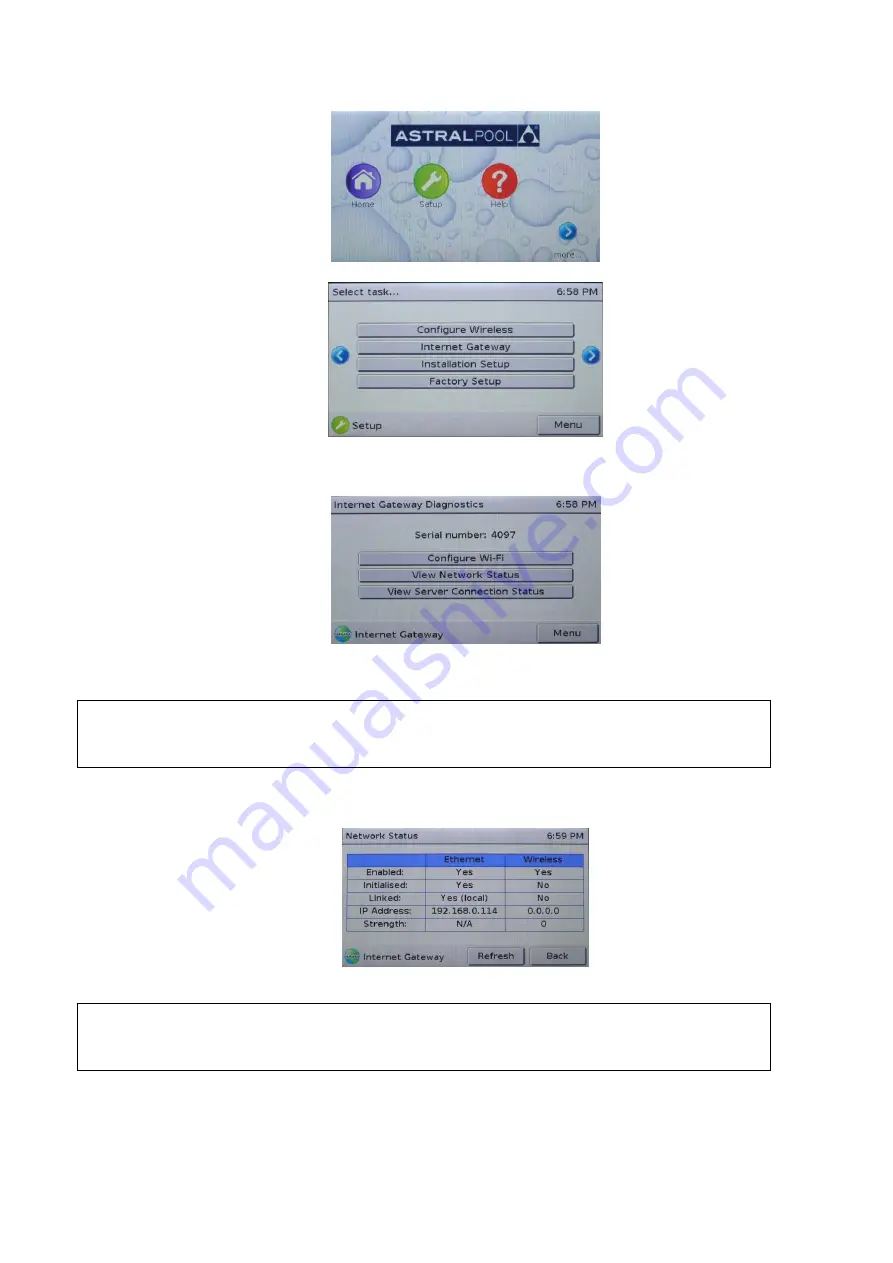
On the Touchscreen, go to ‘Setup’.
2.
Use the arrows to scroll pages, and then press on the ‘Internet Gateway’ button.
3.
You are now shown the main Internet Gateway Diagnostics page. This page shows you the serial number of the ‘Internet
Gateway’, as well as allowing you to perform further configuration or diagnostics.
If the serial number is shown as ‘???’, then the Touchscreen cannot communicate with the Internet Gateway.
Check that the Internet Gateway is plugged in to the pool system, using normal flat-cable RJ12 connection, and
that the plugs of the RJ12 cable have the correct orientation.
4.
Press the ‘View Network Status’ button. This page shows you the status of the two network connections of which the
Internet Gateway can make use. The information can be refreshed with the ‘Refresh’ button.
The Internet Gateway can use either wired (Ethernet) or wireless (Wi-Fi) connection. The status of each is shown in the
table.
If the table is filled with ‘?’, then the Touchscreen cannot communicate with the Internet Gateway. Check that
the Internet Gateway is plugged in to the pool system, using normal flat-cable RJ12 connection, and that the
plugs of the RJ12 cable have the correct orientation.
In most cases, the Internet Gateway will only be using one of the two connection methods. To confirm that the Internet
Gateway has a proper network connection, the following is required for either the Ethernet or Wireless connection:
The ‘Linked’ field for the appropriate connection method must be ‘Yes’; and,
The IP address must NOT be ‘0.0.0.0’.


