

5
BLSS Trim
Installation Instructions
ML2000 Series
FM351 08/19
Copyright © 2019, ASSA ABLOY Access and Egress Hardware Group, Inc. All rights reserved. Reproduction in whole or
in part without the express written permission of ASSA ABLOY Access and Egress Hardware Group, Inc. is prohibited.
For installation assistance contact Corbin Russwin
1-800-543-3658 • [email protected]
4
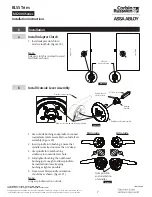
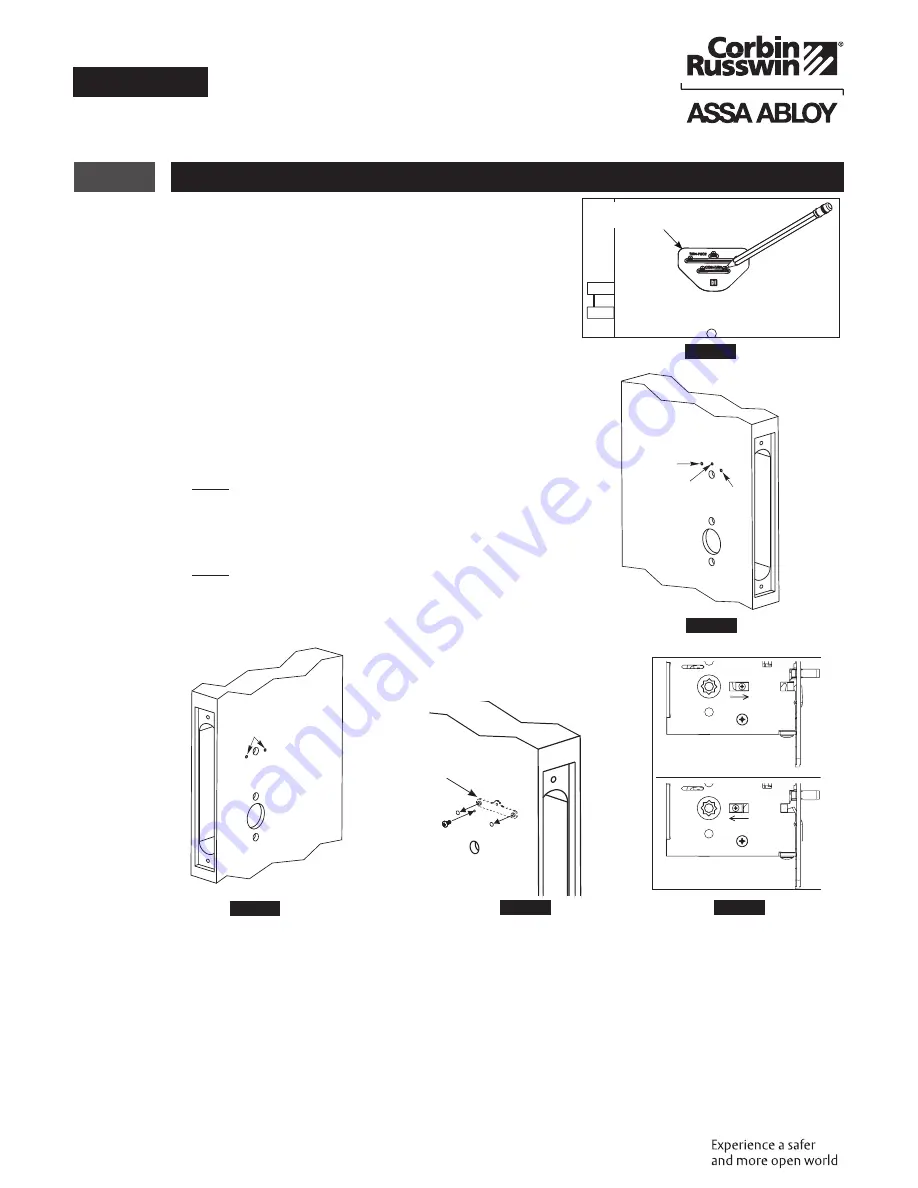
Door Preparation
Important:
Be sure to hand the lockbody before installing.
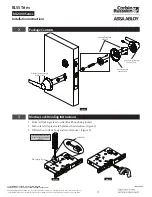
1. Insert mortise lock into door and fully
tighten 1" lock mounting combination
screws. (Figure 7)
2.
Turn-piece functions only:
Insert turn-piece door marker spindle
into lockbody on inside of door.
Note:
Use square side of door marker spindle.
(Figure 8)
3.
Turn-piece functions only:
Slide turn-piece door marker over spindle.
4.
Turn-piece functions only:
Mark three holes for turn-piece. (Figure 9)
5.
Coin-turn functions only:
Insert turn-piece marker spindle into lockbody
on outside of door.
Note:
Use square side of door marker spindle.
(Figure 8)
Figure 7
Blade Side
Figure 8
Turn-Piece Door
Marker Template
Inside of Door
Figure 9
4
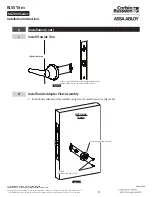
Door Preparation (cont .)
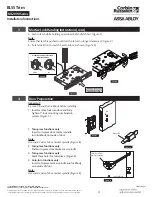
6.
Coin-turn functions only:
Slide turn-piece door marker template over spindle.
7.
Coin-turn functions only:
Mark two holes for coin-turn. (Figure 10)
8. Remove lockbody from door.
9.
Turn-piece functions only:
Drill one middle hole (.290") and two outer holes (3/8")
halfway through door. (Figure 11)
10.
Coin-turn functions only:
Drill two holes (1/8") halfway through door. (Figure 12)
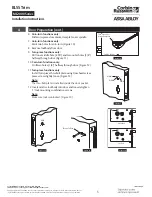
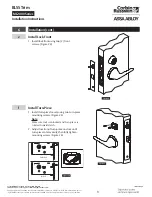
11.
Turn-piece functions only:
Install turn-piece thru-bolt plate using truss head screw.
Leave screw slightly loose. (Figure 13)
Note:
The thru-bolt plate is installed inside the door pocket.
12. Insert mortise lockbody into door and loosely tighten
1" lock mounting combination screws.
Note:
Make sure lock is unlocked. (Figure 14)
Turn-Piece Door
Marker Template
Outside of Door
Figure 10
Ø.290"
Ø3/8"
Ø3/8"
Figure 11
Ø1/8"
Figure 12
Thru-bolt Plate
Figure 13
Figure 14
Unlocked
Locked


