41
H510M/ac
Deutsch
1
+5V
DUMMY
SIGNAL
GND
DUMMY
SPEAKER
DUMMY
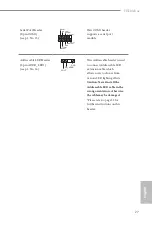
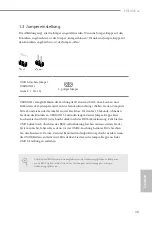
Gehäuseeingriffs- und
Lautsprecher-Stiftleiste
(7-polig, SPK_CI1)
(siehe S. 1, Nr. 17)
Bitte verbinden Sie
Gehäuseeingriffsvorrichtung und
den Gehäuselautsprecher mit
dieser Stiftleiste.
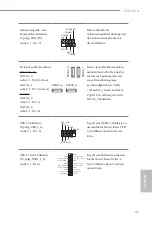
Serial-ATA-III-Anschlüsse
Winkel rechts:
(SATA3_0:
siehe S. 1, Nr. 8) (obere)
(SATA3_1:
siehe S. 1, Nr. 7) (untere)
Vertikal:
(SATA3_2:
siehe S. 1, Nr. 11)
(SATA3_3:
siehe S. 1, Nr. 10)
Diese vier SATA-III-Anschlüsse
unterstützen SATA-Datenkabel
für interne Speichergeräte mit
einer Datenübertragungs-
geschwindigkeit bis 6,0 Gb/s.
* Wenn M2_1 durch ein SATA-
Typ-M.2-Gerät belegt ist, wird
SATA3_0 deaktiviert.
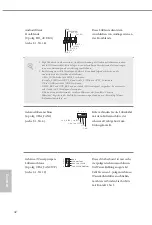
USB 2.0-Stiftleiste
(9-polig, USB_5_6)
(siehe S. 1, Nr. 14)
Es gibt eine USB-2.0-Stiftleiste an
diesem Motherboard. Diese USB
2.0-Stiftleiste unterstützt zwei
Ports.
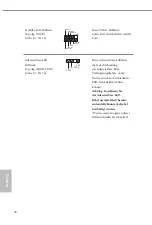
USB 3.2 Gen1-Stiftleiste
(19-polig, USB3_3_4)
(siehe S. 1, Nr. 6)
Es gibt eine Stiftleiste an diesem
Motherboard. Diese USB-3.2-
Gen1-Stiftleiste kann zwei Ports
unterstützen.
SA
TA3_1
SA
TA3_0
SATA3_3
SATA3_2
DUMMY
GND
GND
P+
P-
USB_PWR
P+
P-
USB_PWR
1
1
In
Dummy
IntA_PB_D-
GND
IntA_
GND
IntA_PB_SSTX-
IntA_
IntA_PB_SSRX-
Vbus
Vbus
Vbus
IntA_PA_SSRX-
IntA_
GND
IntA_PA_SSTX-
IntA_
GND
IntA_PA_D-
In
Содержание H510M/ac
Страница 11: ...English 7 H510M ac Step 4 Fasten the screw nuts to secure the connec tors ...
Страница 20: ...English 16 4 5 3 ...
Страница 22: ...English 18 2 2 Installing the CPU Fan and Heatsink 1 2 C P U _ F A N ...
Страница 24: ...English 20 1 2 3 ...

