background image

2 3

2.

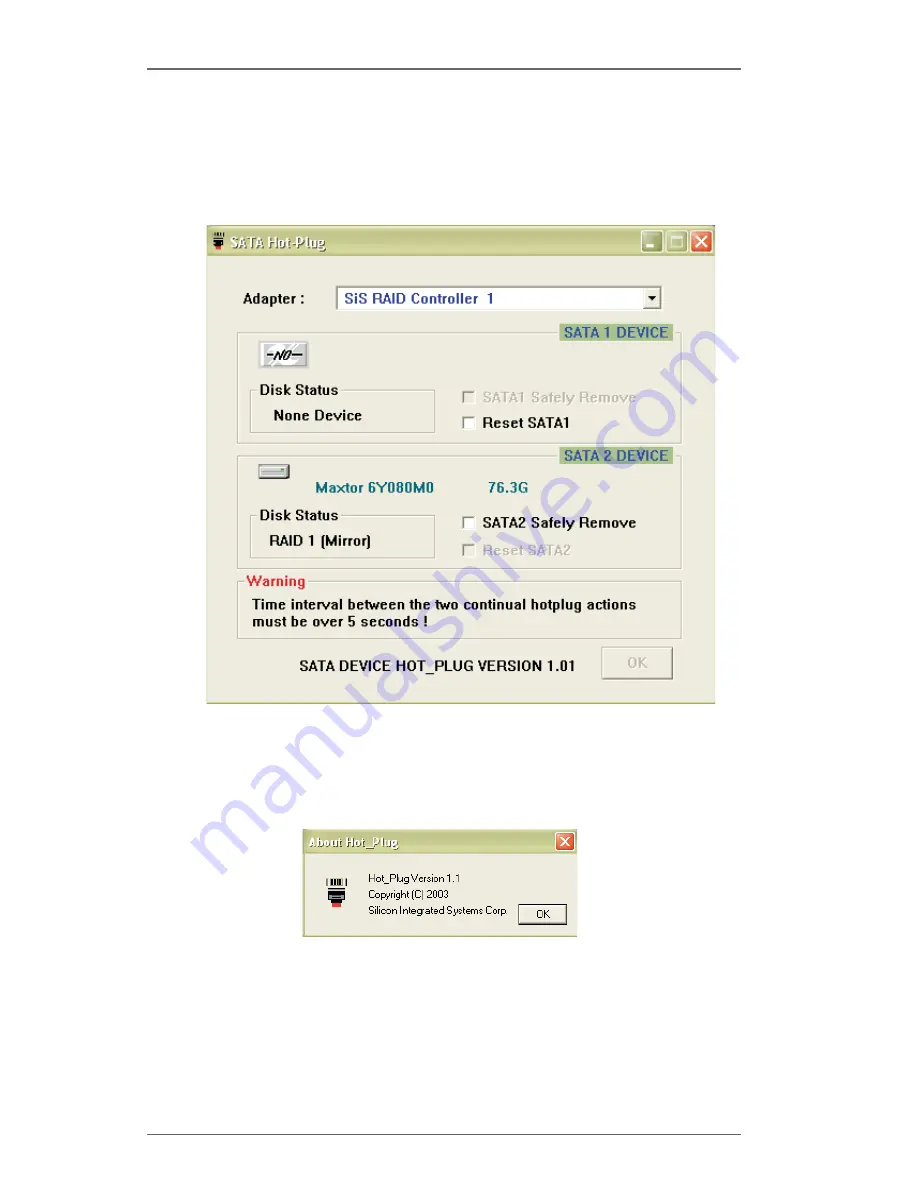
Next, you can click the “SATA Status” and the SiS Hot-Plug Utility window

opens as below. You can click the drop-down box “Adapter” to select

the controller you want to use.  The default value is the information on

first controller “SiS RAID controller 1”.

3.

You also can click “About” to get some copyright information and the hot-

plug version (ex. Hot_Plug Version 1.1). See below:

Содержание 939S56-M

Страница 1: ...menu and choose Programs From the Programs menu choose SiS RAID Utility and click on SiSRaid NOTE If your working OS is installed in the SATA hard disk s and you want to re configure the RAID type we...

Страница 2: ...some device information on different controllers You can click the drop down box Adapter to se lect the controller you want to use The default value is the information of the first device on SiS RAID...

Страница 3: ...e Click the drop down box Raid Type This box enables the user to select array type There are three array types that the user can select JBOD RAID 0 and RAID 1 User can select any one array type to cre...

Страница 4: ...Size drop down box will be enabled and user must select a block size Clicking the drop down box Block Size there are seven block size that the user can select 8k 16k 32k 64k 128k 256k and 512k User c...

Страница 5: ...to select mode type There are two mode types that the user can select PIO and DMA User can select any one mode type to create a RAID set The default selection is DMA NOTE For the Mode option you may...

Страница 6: ...or double click the marked disk to select that disk into the Selected Disks pane In the same way user can click the upward arrow icon or double click the marked disk in the Selected Disks to get back...

Страница 7: ...ration Create Raid Raid Type JBOD 2 From the drop down box Mode Type select the mode type you want or use the default value DMA 3 From the Available Disks pane select the disk and click down ward arro...

Страница 8: ...selected has the ability of booting another warning message will pop up before SiS Software RAID message You may click Yes button to continue or click No button to cancel 5 Next another message box w...

Страница 9: ...d Type RAID 0 2 From the drop down box Block Size select the block size you want 3 From the drop down box Mode Type select the mode type you want 4 From the Available Disks pane select the disk and cl...

Страница 10: ...boot device disk into all the selected disks In this option the source cannot be bootable Source is a boot Select this option will split data from source device disk into all the selected disks In th...

Страница 11: ...s button to start the operation or click No button to cancel When this operation is beginning you still can click the destroy button on the Create Stripe RaidSet dialog to stop this operation But this...

Страница 12: ...the following warning message will popup Next you can click Yes button to start the opera tion or click No button to cancel When you click Yes button to start this operation the following warning mess...

Страница 13: ...ps 1 Configuration Create Raid Raid Type RAID 1 2 From the drop down box Mode Type select the mode type you want 3 From the Available Disks pane select the disk and click down ward arrow icon or doubl...

Страница 14: ...clean mirror array without any data on it Create and Duplicate operation will reserve data on the Duplicate source disk and copy them onto the target disk OK Start the operation Cancel Cancel the oper...

Страница 15: ...opera tion or click No button to cancel When you click Yes button to start this operation the following warning message will popup Click OK button to start this duplicating action Don t restart your c...

Страница 16: ...ase RAID0 A B C D E Meaning RAID0 Raid Type A total number of disks in this Raid B C the serial number of each disk in this Raid D E a Raid is correct B D C E b Raid is error D or E will show or In th...

Страница 17: ...17 HD information...

Страница 18: ...uttons The RaidType meaning will show below 1 Connfiguration Delete Raid the following windows will appear 2 Highlight the disk array in the Current RaidType pane and then click the Information button...

Страница 19: ...k the Delete button Then a warning message will pop up Pay attention to the warning message You may click Yes to delete the selected disk array or click No to cancel 4 Next another message will pop up...

Страница 20: ...ry you can find two panes and some buttons Those meaning will be showing below 2 First you can click the button Available Raid to find whether any error RAID set existing See below Next highlight the...

Страница 21: ...Raid and Available Disk is finished you may click the Start button to start this operation And the Start button will become Pause Then you can click the Pause button to pause the thread operation And...

Страница 22: ...le without unplugging the power cable sometimes it will cause the Hot Plug function fail 5 Time interval of the two continual hot plug actions must be over 5 seconds How to use SiS964 SiS180 Hot Plug...

Страница 23: ...below You can click the drop down box Adapter to select the controller you want to use The default value is the information on first controller SiS RAID controller 1 3 You also can click About to get...

Страница 24: ...rmation will show on it 6 If you plug out a SATA device without selecting the SATAx Safely Remove the data in this SATA device may be lost The following mes sage will be popup to tell you the SATA dev...

Отзывы: