


62
1.8-2.3
1.7-2.2
1.8-2.3
1.8-2.3
13.05
Flred/Power
NO
YES
YES
YES
YES
2.0
73.9-117.1
45.6-73.8
22-35
20.4-27.6
X1.3/Power
X1.6/Power
X1.6/Power
X1.6/Power
Appendix
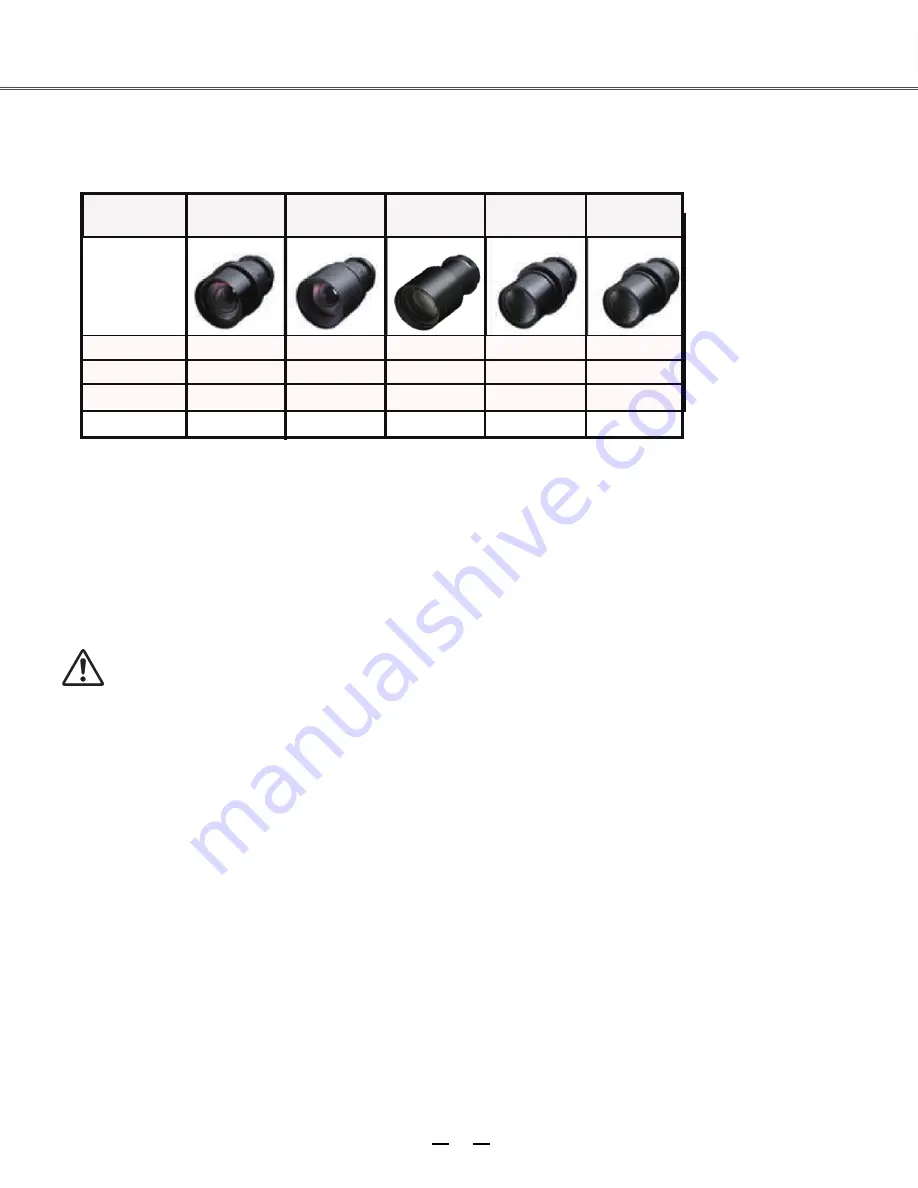
Optional parts
Wide-range
lens
tandard lens
Ultra-long
-focus lens
Appearance
Electric
Zoom/Focus
Foci(mm)
F value
Replacing lens
E1655’s lens can be replaced by those of other models, a design that allows the projector to be used for
multi-purposes.
If you want to install or replace the lens, you should contact the local distributor. Only qualified sales personnel or
repair engineers are permitted to install or replace the lens. To avoid injury, never attempt to install or replace the
lens without permission.
When you need to lift or move E1655,
do not grasp the lens for that purpose. Otherwise, the projector
may be seriously damaged.
To sales personnel and repair engineers:
For information on installation and replacement of lens, please refer to related operating instructions. Before
installing or replacing the lens, make sure the model of the lens is correct to E1655.
Short-focus
lens
lens
Telephoto
Type
Listed below are optional parts. Users should provide distributors with such information as part name and model
when they place the order.
Содержание E1655 series
Страница 1: ...Multimedia projector Model E1655 series User s Manual P N 410533500 ...
Страница 63: ......


