Aseptico ADU-25 Скачать руководство пользователя страница 4

2

1.

Place the ADU-25 Custom cart in an

upright position on a flat, stable surface.

Loosen the center column retaining knob

and extend the telescoping upper portion.

Tighten the knob at the desired height

(Fig. 1).

2.

Check to make sure the syringe, highspeed

and lowspeed handpieces are hanging in

their proper holder. Locate the foot control

on the floor (Fig. 1). 

HANDPIECE

PRESSURE

GAUGE

AA-21

HIGH VOLUME

VACUUM 

SYSTEM

(Optional)

THREE-WAY

SYRINGE

NWS-8 HDPE

WATER SUPPLY

TANK (Optional)

HIGHSPEED

HANDPIECE

CONTROL

AA-25 SALIVA

EJECTOR

SYSTEM

(Optional)

REMOVABLE

INSTRUMENT

TRAY

3.

The ADU-25 unit must be connected to a

dry, filtered, 70-100 psi air source.  Simply

extend the 1/4" grey air supply line from

the ADU-25 cart  and connect the quick-

disconnect into the compressed air source

(Fig. 2)

LOWSPEED

HANDPIECE

CONTROL

TELESCOPING

CENTER

COLUMN WITH

RETAINING

KNOB

FOOT

CONTROL

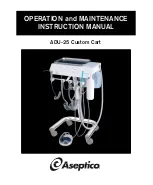
Figure 1.- ADU-25 Custom Cart with Options

SETTING UP THE SYSTEM:

Figure 2 - Air Supply Connector

CONNECT TO

70-100 PSI

AIR SOURCE

Содержание ADU-25

Страница 1: ...OPERATION and MAINTENANCE INSTRUCTION MANUAL ADU 25 Custom Cart...

Страница 2: ...7 Handpiece Controls 4 Fig 8 Foot Control 4 Fig 9 Water Tank Removal 5 Fig 10 Right Side of Chassis 6 Fig 11 AA 21 HVE Vacuum Sys Opt 6 Fig 12 AA 25 LVE Vacuum Sys Opt 7 Fig 13 AA 290CK Central Vac K...

Страница 3: ...ions provided in this manual to receive the best and longest service from your Aseptico equipment Separate manuals may be provided to cover the operation and maintenance of hand held pieces or other a...

Страница 4: ...E VACUUM SYSTEM Optional THREE WAY SYRINGE NWS 8 HDPE WATER SUPPLY TANK Optional HIGHSPEED HANDPIECE CONTROL AA 25 SALIVA EJECTOR SYSTEM Optional REMOVABLE INSTRUMENT TRAY 3 The ADU 25 unit must be co...

Страница 5: ...connect at the rear of the delivery head Fig 4a Note manual release lever on disconnect Insert metal fitting on top of bottle into quick disconnect Locking ring will snap into place Press release leve...

Страница 6: ...e locking collar surrounding the tip socket and pull the used tip straight out of the socket see Fig 6 To insert a new tip press locking collar and push tip into socket as far as it will go Release co...

Страница 7: ...ol 7 FLUSH TOGGLE Fig 10 The flush toggle located on the right side of the chassis allows you to quickly and completely flush your handpieces washing away contaminants which may have accumulated in th...

Страница 8: ...The ADU 25 is supplied with a large capacity container 9 AA 25 SALIVA EJECTOR SYSTEM Optional The AA 25 Saliva Ejector is an air powered self contained oral evacuation system It is supplied with a pla...

Страница 9: ...clean water or vacuum system cleanser through the evacuator hose and thoroughly cleaning the waste bottle CAUTION Use only NON foaming cleansers in the vaccum lines 10 AA 290CK CENTRAL VACUUM KIT Opti...

Страница 10: ...erclockwise will increase pressure 3 HANDPIECE PRESSURE ADJUSTMENT Fig 15 The amount of air pressure supplied to each handpiece may be adjusted by turning the flow control for that handpiece on the co...

Страница 11: ...onds after every patient and about 20 seconds at the beginning of each day Refer to page 4 3 GENERAL CLEANING The cart exterior is designed to make cleaning and the use of prophylactic barriers as eas...

Страница 12: ...rt or whole Aseptico shall be the sole arbiter of such action In the event of alleged defect under warranty the purchaser is to notify Aseptico s Customer Service Department promptly Customer Service...

Отзывы: