background image

IRD1516 Tuner/ASI to IP Gateway 


Solutions Provider for FTTx, RFoG and HFC www.ascentcomtec.com 

Page 9 of 31 


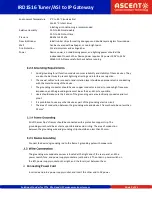
Environment Temperature 

5 °C to 40 °C (sustainable) 
0 to 45 °C (short time) 
installing air-conditioning is recommended 

Relative Humidity 

20 % to 80 % sustainable 
10 % to 90 % short time 

Pressure 

86 kPa to 105 kPa 

Door & Window 

Install rubber strips for sealing door-gaps and double-layered glass for windows. 

Wall 

Can be covered with wallpaper, or non-bright paint. 

Fire Protection 

Fire alarm system and extinguisher 

Power 

Device power, air-conditioning power, and lighting power should all be 
independent to each other. Device power requires AC power 100 V to 240 V 
50/60 Hz 2A. Please carefully check before running. 


Good grounding for all function modules ensures reliability and stability of these devices. They 
are also the best way to prevent lightning arresting and interference rejection. 


The coaxial cables’ outer conductor and isolation layer should keep proper electric conducting 
with the metal housing of the device. 


The grounding conductor should have a copper conductor in order to reduce high frequency 
impedance, and the grounding wire must be as thick and short as possible. 


Users should make sure the 2 ends of the grounding wire are electrically conducive and rust-
proof.  


It is prohibited to use any other device as part of the grounding electric circuit 


The area of conduction between the grounding wire and device’s frame should be no less than 
25 mm

2

.


All of the machine’s frames should be connected with a protective copper strip. The 
grounding wire should be as short as possible and avoid circling. The area of conduction 
between the grounding wire and grounding strip should be no less than 25 mm

2


Connect the device’s grounding rod to the frame’s grounding pole with copper wire. 


The grounding wire conductive screw is located at the right end of the rear panel, and the 
power switch, fuse, and power supply socket are just beside it. The order is: power switch on 
the left, power supply socket on the right, and the fuse is just between them. 


Connecting Power Cord 

Insert one end into a power supply socket, and insert the other end to AC power. 

Содержание IRD1516

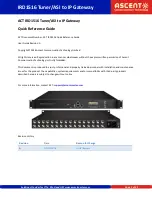
Страница 1: ...IRD1516 Tuner ASI to IP Gateway Quick Reference Guide Revision A...

Страница 2: ...n any manner whatsoever without the express written permission of Ascent Communication Technology is strictly forbidden This document is produced to assist professional and properly trained personnel...

Страница 3: ...ts 1 Product Outline 4 1 1 Outline 4 1 2 Features 4 1 3 Inner Principle 5 1 4 Specifications 6 1 5 Appearance and Description 7 2 Installation Guide 8 2 1 Acquisition Check 8 2 2 Installation Preparat...

Страница 4: ...ckages or directly convert the TS from ASI input and tuner into IP packages then output the IP packages through different IP addresses and ports BISS functionality is also embedded for tuner input to...

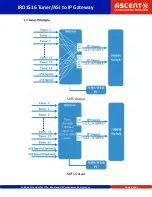
Страница 5: ...IRD1516 Tuner ASI to IP Gateway Solutions Provider for FTTx RFoG and HFC www ascentcomtec com Page 5 of 31 SPTS Output MPTS Output...

Страница 6: ...2 QPSK 1 MBd to 45 MBd 8PSK 2 MBd to 30 MBd Code Rate 1 2 3 5 2 3 3 4 4 5 5 6 8 9 9 10 Constellation QPSK 8PSK ISDB T Input Frequency 30 MHz to 1000 MHz ATSC Input Frequency 54 MHz to 858 MHz Bandwidt...

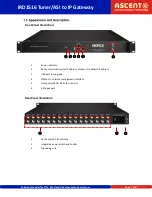
Страница 7: ...llustration 1 Power indicator 2 Reset resets webmaster IP address recover it to default IP address 3 USB port for upgrade 4 NMS port network management interface 5 Data ports GE1 GE2 IP out ports 6 AS...

Страница 8: ...stallation The main content of this chapter including Checking the possible device missing or damage during the transportation Preparing relevant environment for installation Installing gateway Connec...

Страница 9: ...ng with the metal housing of the device The grounding conductor should have a copper conductor in order to reduce high frequency impedance and the grounding wire must be as thick and short as possible...

Страница 10: ...ure that the computer s IP address is different from the IRD1516 s IP address otherwise it will cause an IP conflict The default IP of this device is 192 168 2 136 Connect the pc and the device with a...

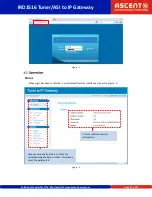
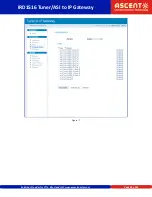
Страница 11: ...comtec com Page 11 of 31 Figure 1 Status When login has been confirmed it will display the status interface as shown in Figure 2 Figure 2 User can click any item here to enter the corresponding interf...

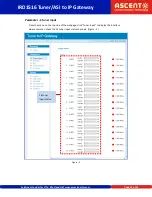
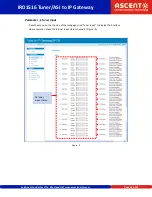
Страница 12: ...Tx RFoG and HFC www ascentcomtec com Page 12 of 31 Parameter Tuner input From the menu on the top side of the webpage click Tuner Input to display the interface where users can check the 16 tuner inpu...

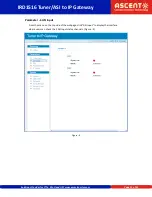
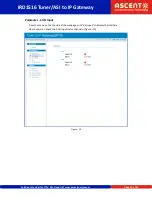
Страница 13: ...rovider for FTTx RFoG and HFC www ascentcomtec com Page 13 of 31 Parameter ASI input From the menu on the top side of the webpage click ASI Input to display the interface where users can check the 2 A...

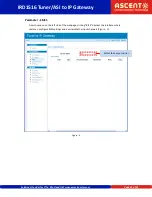
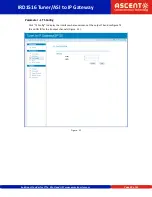
Страница 14: ...oG and HFC www ascentcomtec com Page 14 of 31 Parameter BISS From the menu on the left side of the webpage clicking BISS displays the interface where users can configure BISS settings and descramble t...

Страница 15: ...bpage clicking Program Parse displays the interface where users can parse the program from the input channels When users disable the ASI input IRD1516 can support 16 Tuner inputs with 16 MPTS IP outpu...

Страница 16: ...IRD1516 Tuner ASI to IP Gateway Solutions Provider for FTTx RFoG and HFC www ascentcomtec com Page 16 of 31 Figure 7...

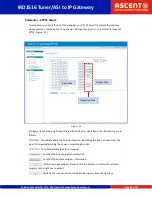
Страница 17: ...tput in IP 16 MPTS format through the GE1 and GE2 ports Click IP Stream to display the interface where users can set IP out parameters Figure 8 Figure 8 IRD1516 supports 16 tuner inputs and 2 ASI inpu...

Страница 18: ...Tx RFoG and HFC www ascentcomtec com Page 18 of 31 Parameter Tuner Input From the menu on the top side of the webpage click Tuner Input to display the interface where users can check the 8 tuner input...

Страница 19: ...ovider for FTTx RFoG and HFC www ascentcomtec com Page 19 of 31 Parameter ASI Input From the menu on the top side of the webpage click ASI Input to display the interface where users can check the 2 AS...

Страница 20: ...ns Provider for FTTx RFoG and HFC www ascentcomtec com Page 20 of 31 Parameter TS Config Click TS Config to display the interface where users can set the output TS and configure TS ID and ON ID for th...

Страница 21: ...vider for FTTx RFoG and HFC www ascentcomtec com Page 21 of 31 Parameter BISS From the menu on the left side of the webpage clicking BISS displays the interface where users can configure BISS and desc...

Страница 22: ...d Output Area with buttons in Operation Area Instructions are as follows To enable disable the CA Filter function By clicking the box users can filter the input CA to avoid disturbing the device s scr...

Страница 23: ...t programs To select all the output programs To parse programs time limitation of parsing input programs Program Modification The multiplexed program information can be modified by clicking the progra...

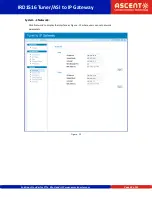
Страница 24: ...r ASI to IP Gateway Solutions Provider for FTTx RFoG and HFC www ascentcomtec com Page 24 of 31 System Network Click Network to display the interface as Figure 15 where users can set network parameter...

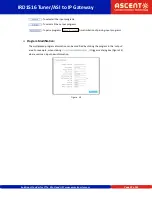
Страница 25: ...der for FTTx RFoG and HFC www ascentcomtec com Page 25 of 31 System Date Time From the menu on the left side of the webpage click Date Time to display the screen as shown in Figure 16 where users can...

Страница 26: ...FTTx RFoG and HFC www ascentcomtec com Page 26 of 31 System Password From the menu on the left side of the webpage clicking Password will display the screen as shown in Figure 17 where users can set t...

Страница 27: ...for FTTx RFoG and HFC www ascentcomtec com Page 27 of 31 System Save Restore From the menu on the left side of the webpage click Save Restore to display the screen as shown in Figure 18 where users c...

Страница 28: ...for FTTx RFoG and HFC www ascentcomtec com Page 28 of 31 System Backup Load From the menu on the left side of the webpage clicking Backup Load will display the screen as shown in Figure 19 where users...

Страница 29: ...tcomtec com Page 29 of 31 System Firmware From the menu on the left side of the webpage click Firmware to display the screen as Figure 20 where users can update firmware for the device Figure 20 Selec...

Страница 30: ...panel and other heat sink bores if necessary Check that the input AC voltage within the power supply working range and the connection is correct before switching on the device Check if the RF output...

Страница 31: ...CHINA USA Unit 1907 600 Luban Road 2710 Thomes Ave Cheyenne 200023 Shanghai CHINA WY 82001 USA Phone 86 21 60232616 Phone 1 203 816 5188 EUROPE VIETNAM Pfarrer Bensheimer Strasse 7a 15 F TTC Building...

Отзывы: